Looking for more guides from laptopmain.com? Follow us on Facebook for all the latest teardown news.
Remove all screws securing the bottom case.
Pry up and remove the bottom case.
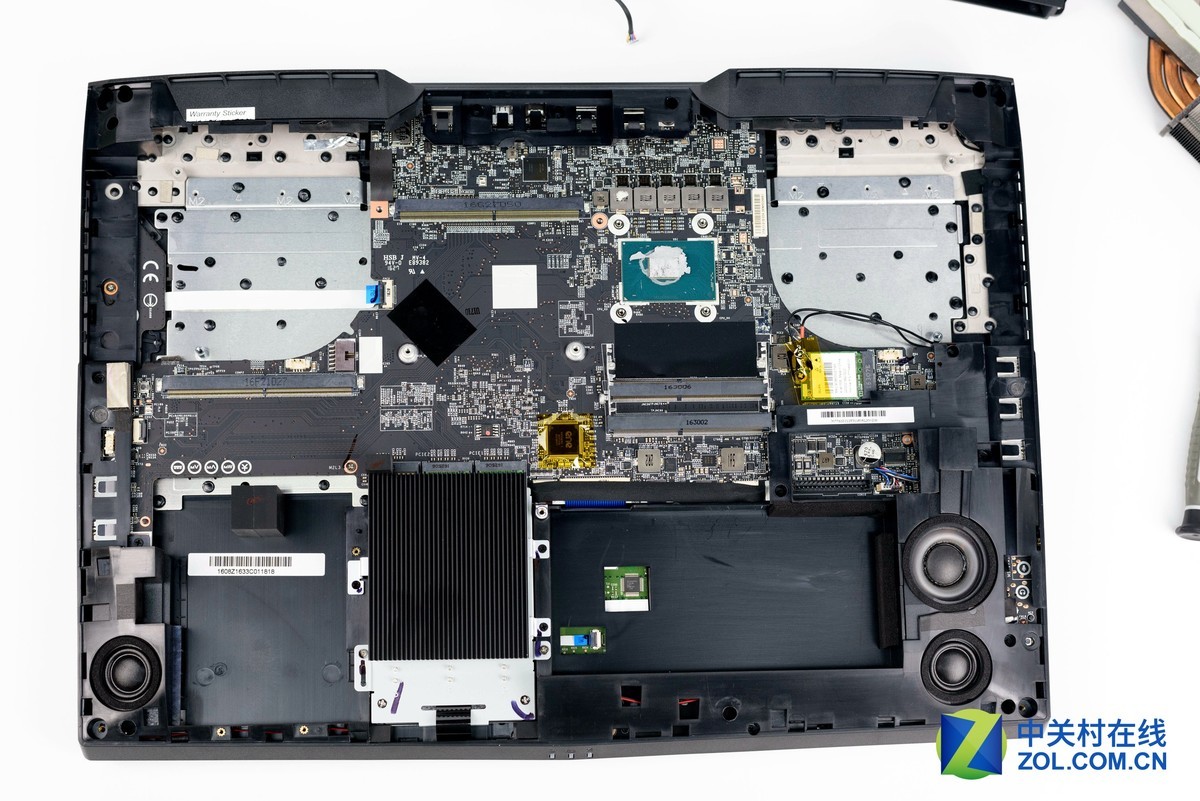
When the case was removed, you will be able to access most internal components.
Note: there is a screw is covering with fragile stickers, if you upgraded the SSD, RAM, HDD and graphics card by yourself, you will void the warranty.

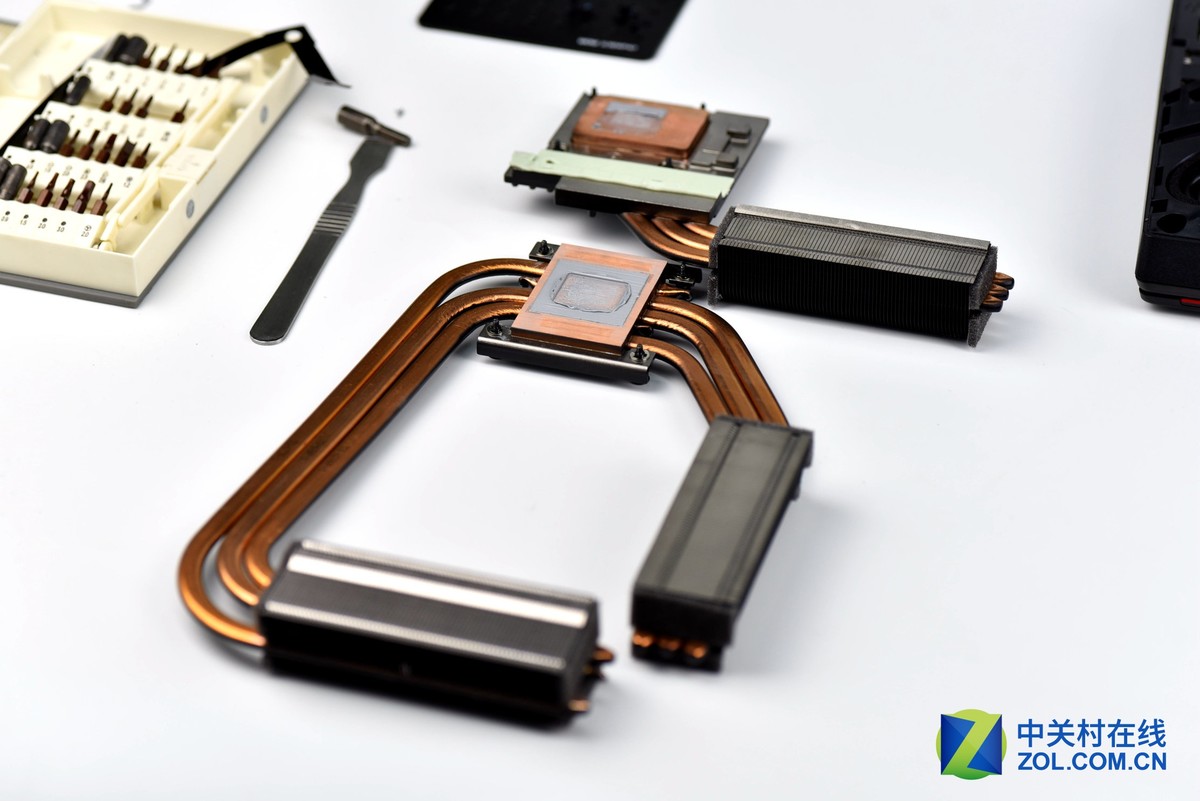
Here’s graphics card heatsink/cooling fan module.
The heat sink is very strong.
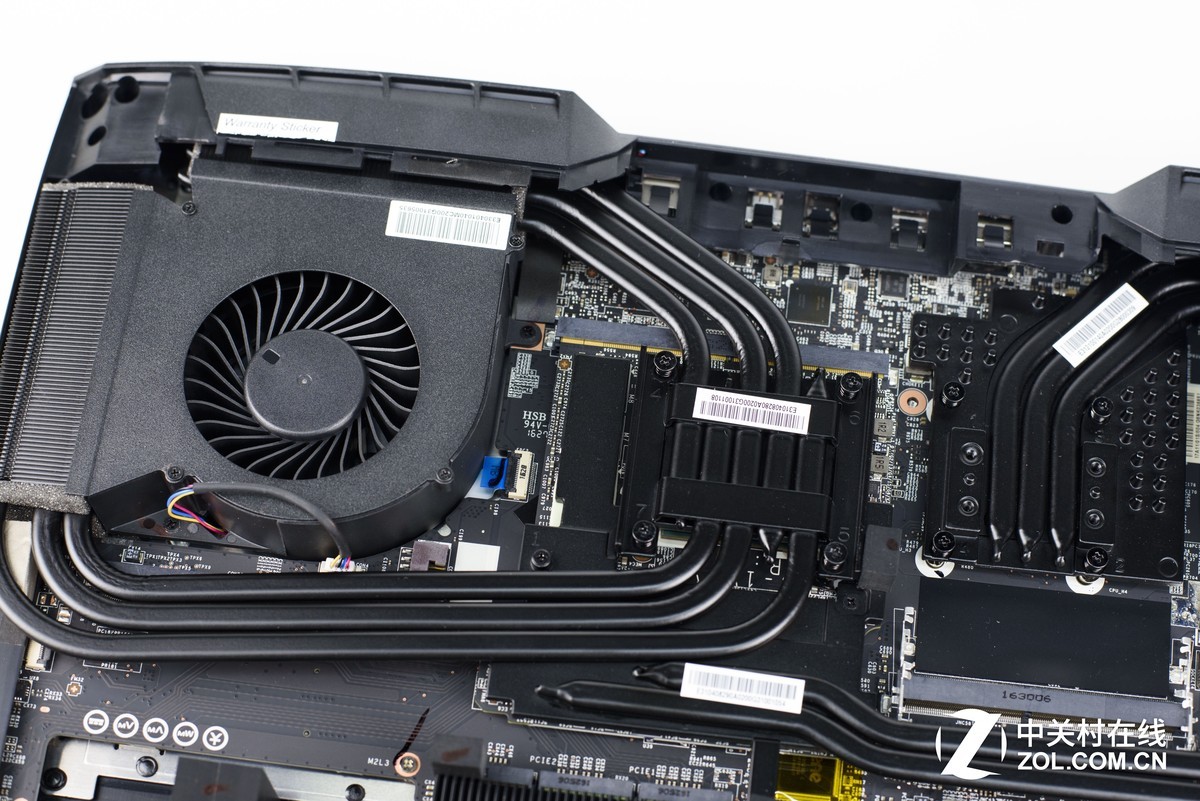
Here’s Intel processor heatsink/cooling fan module.

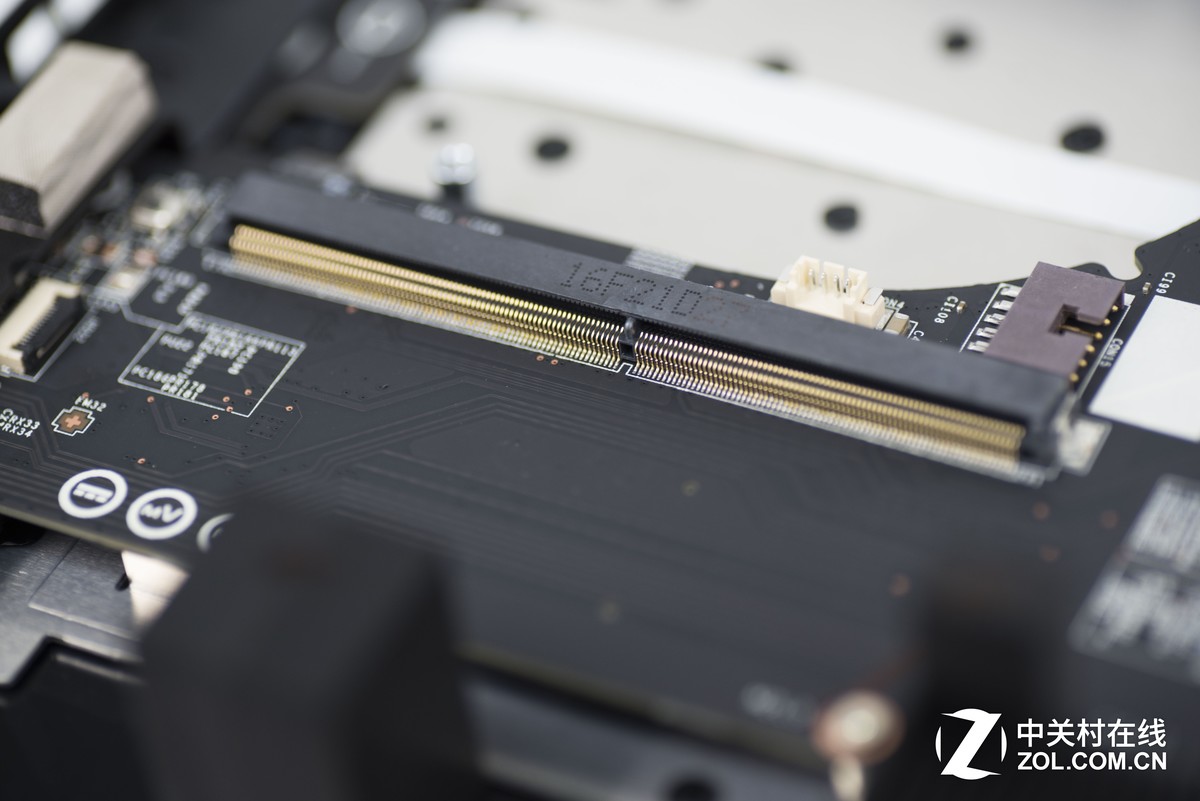
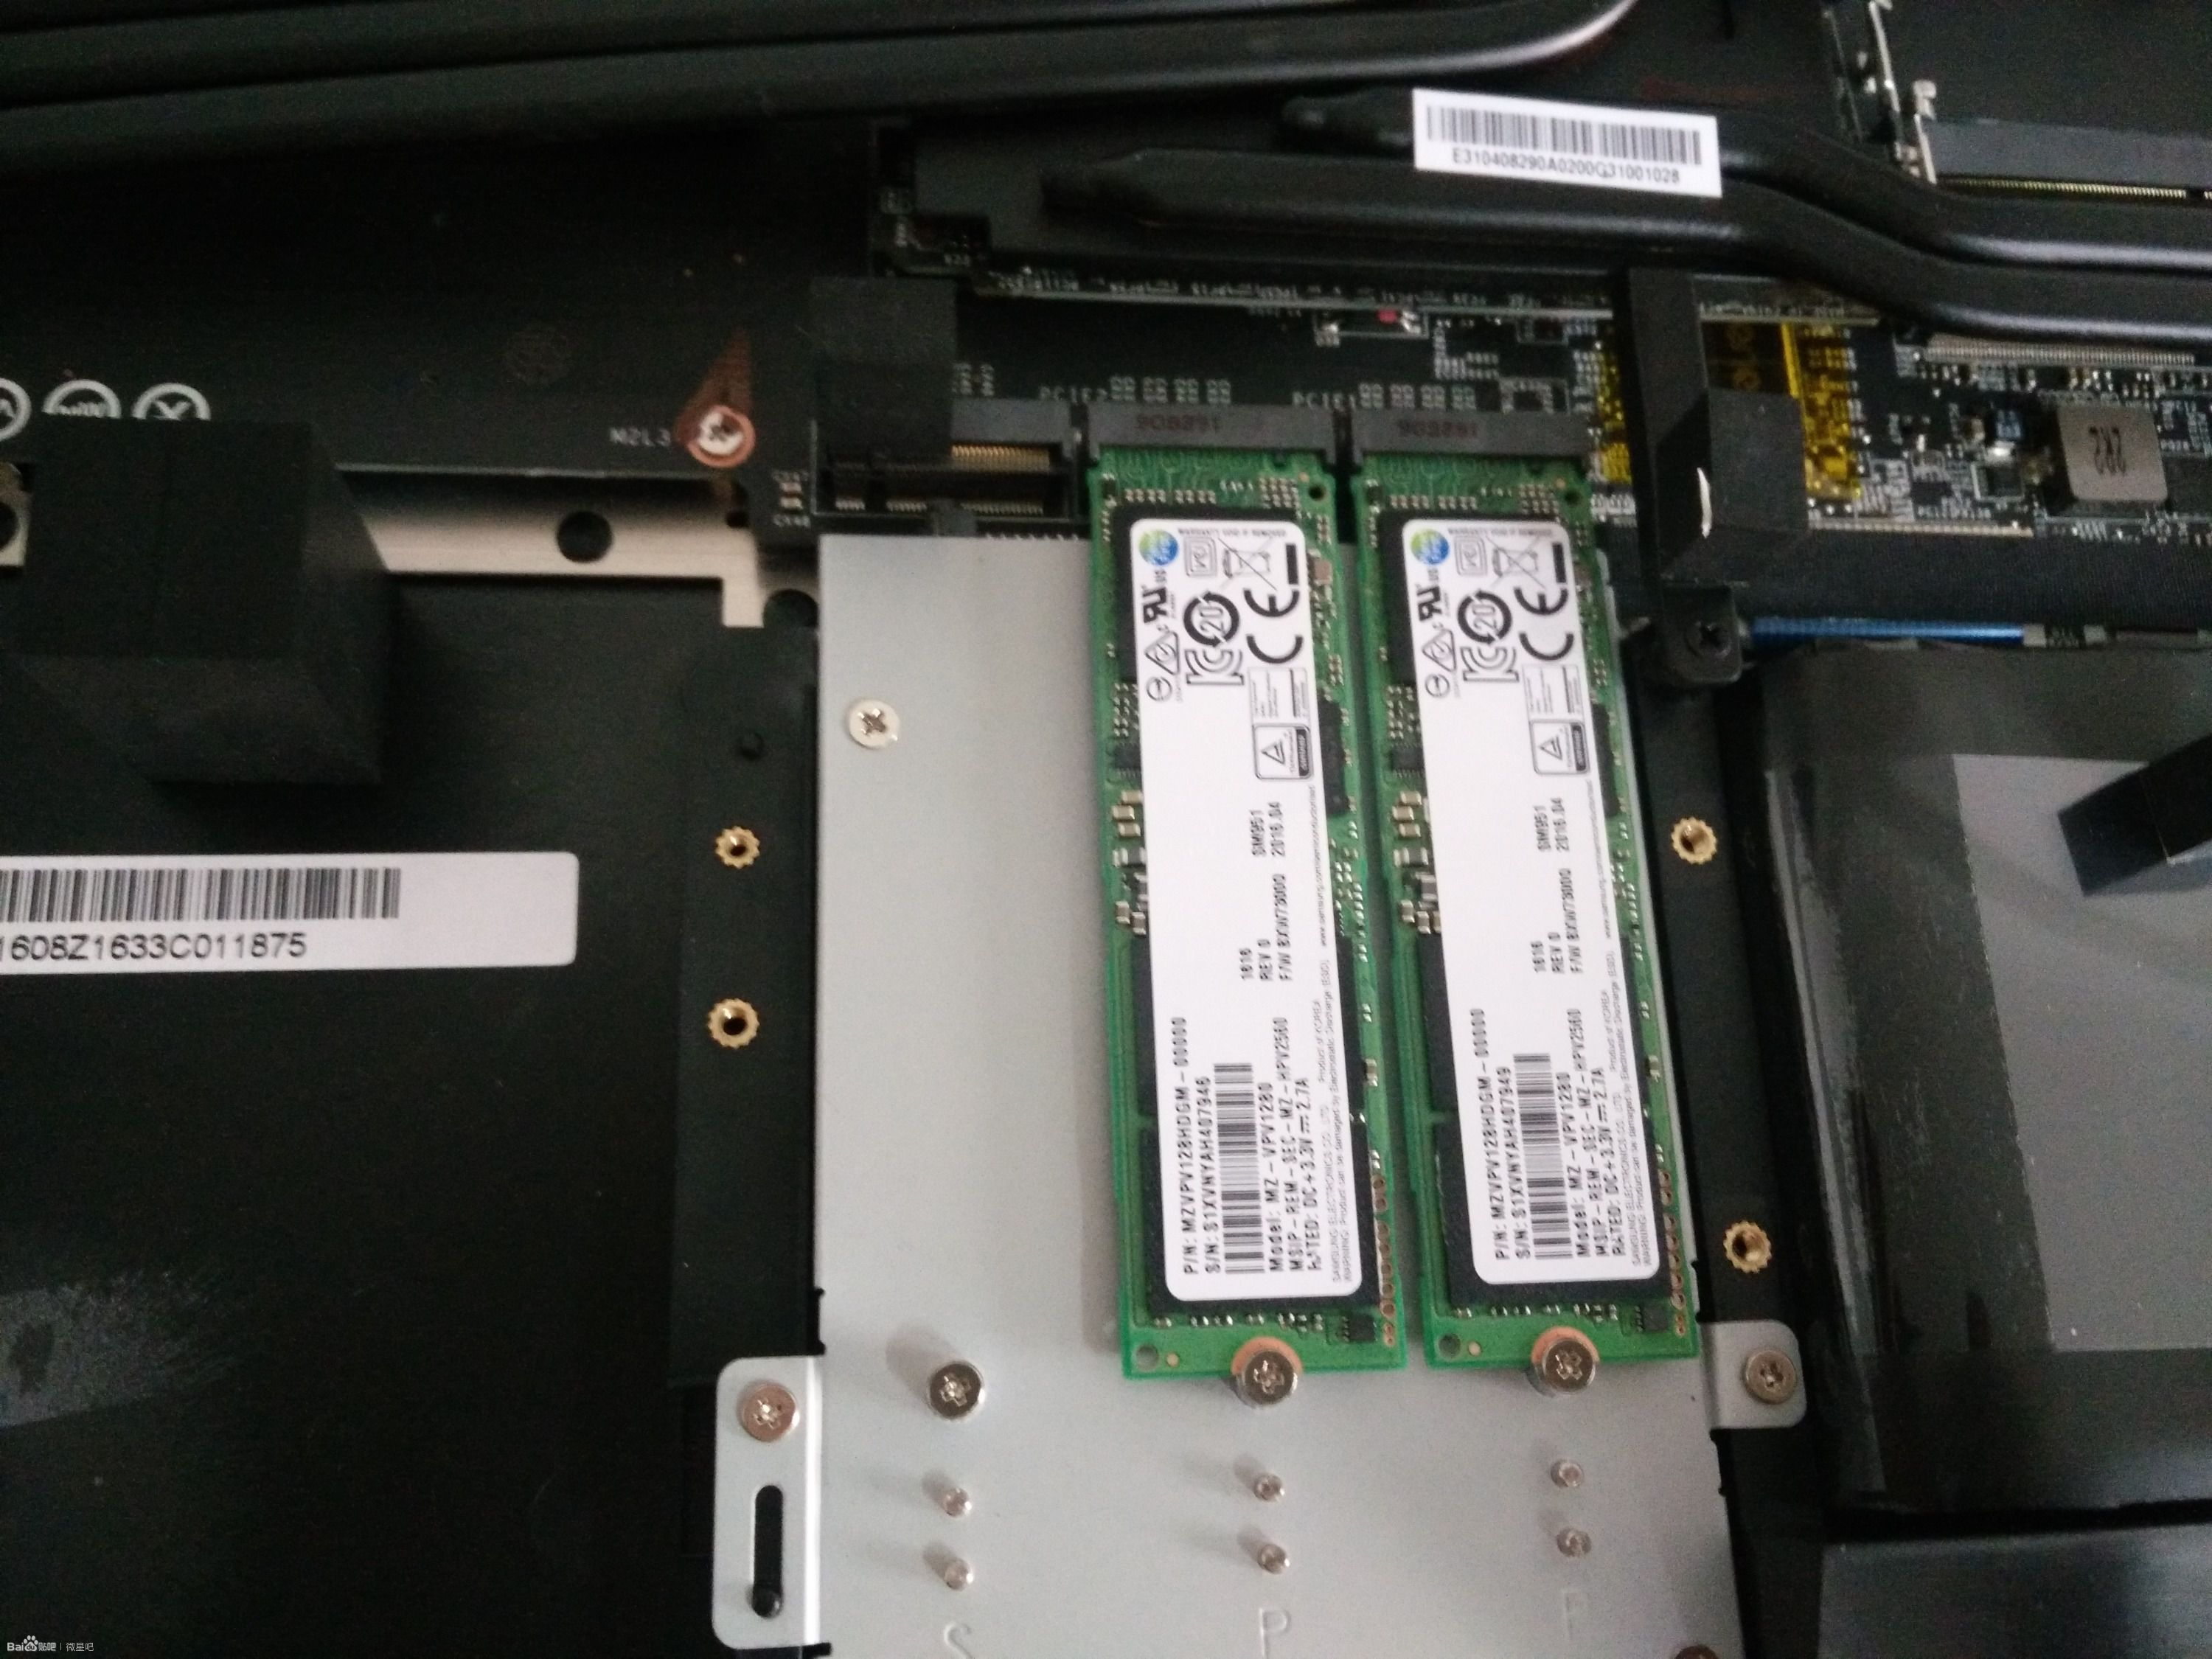
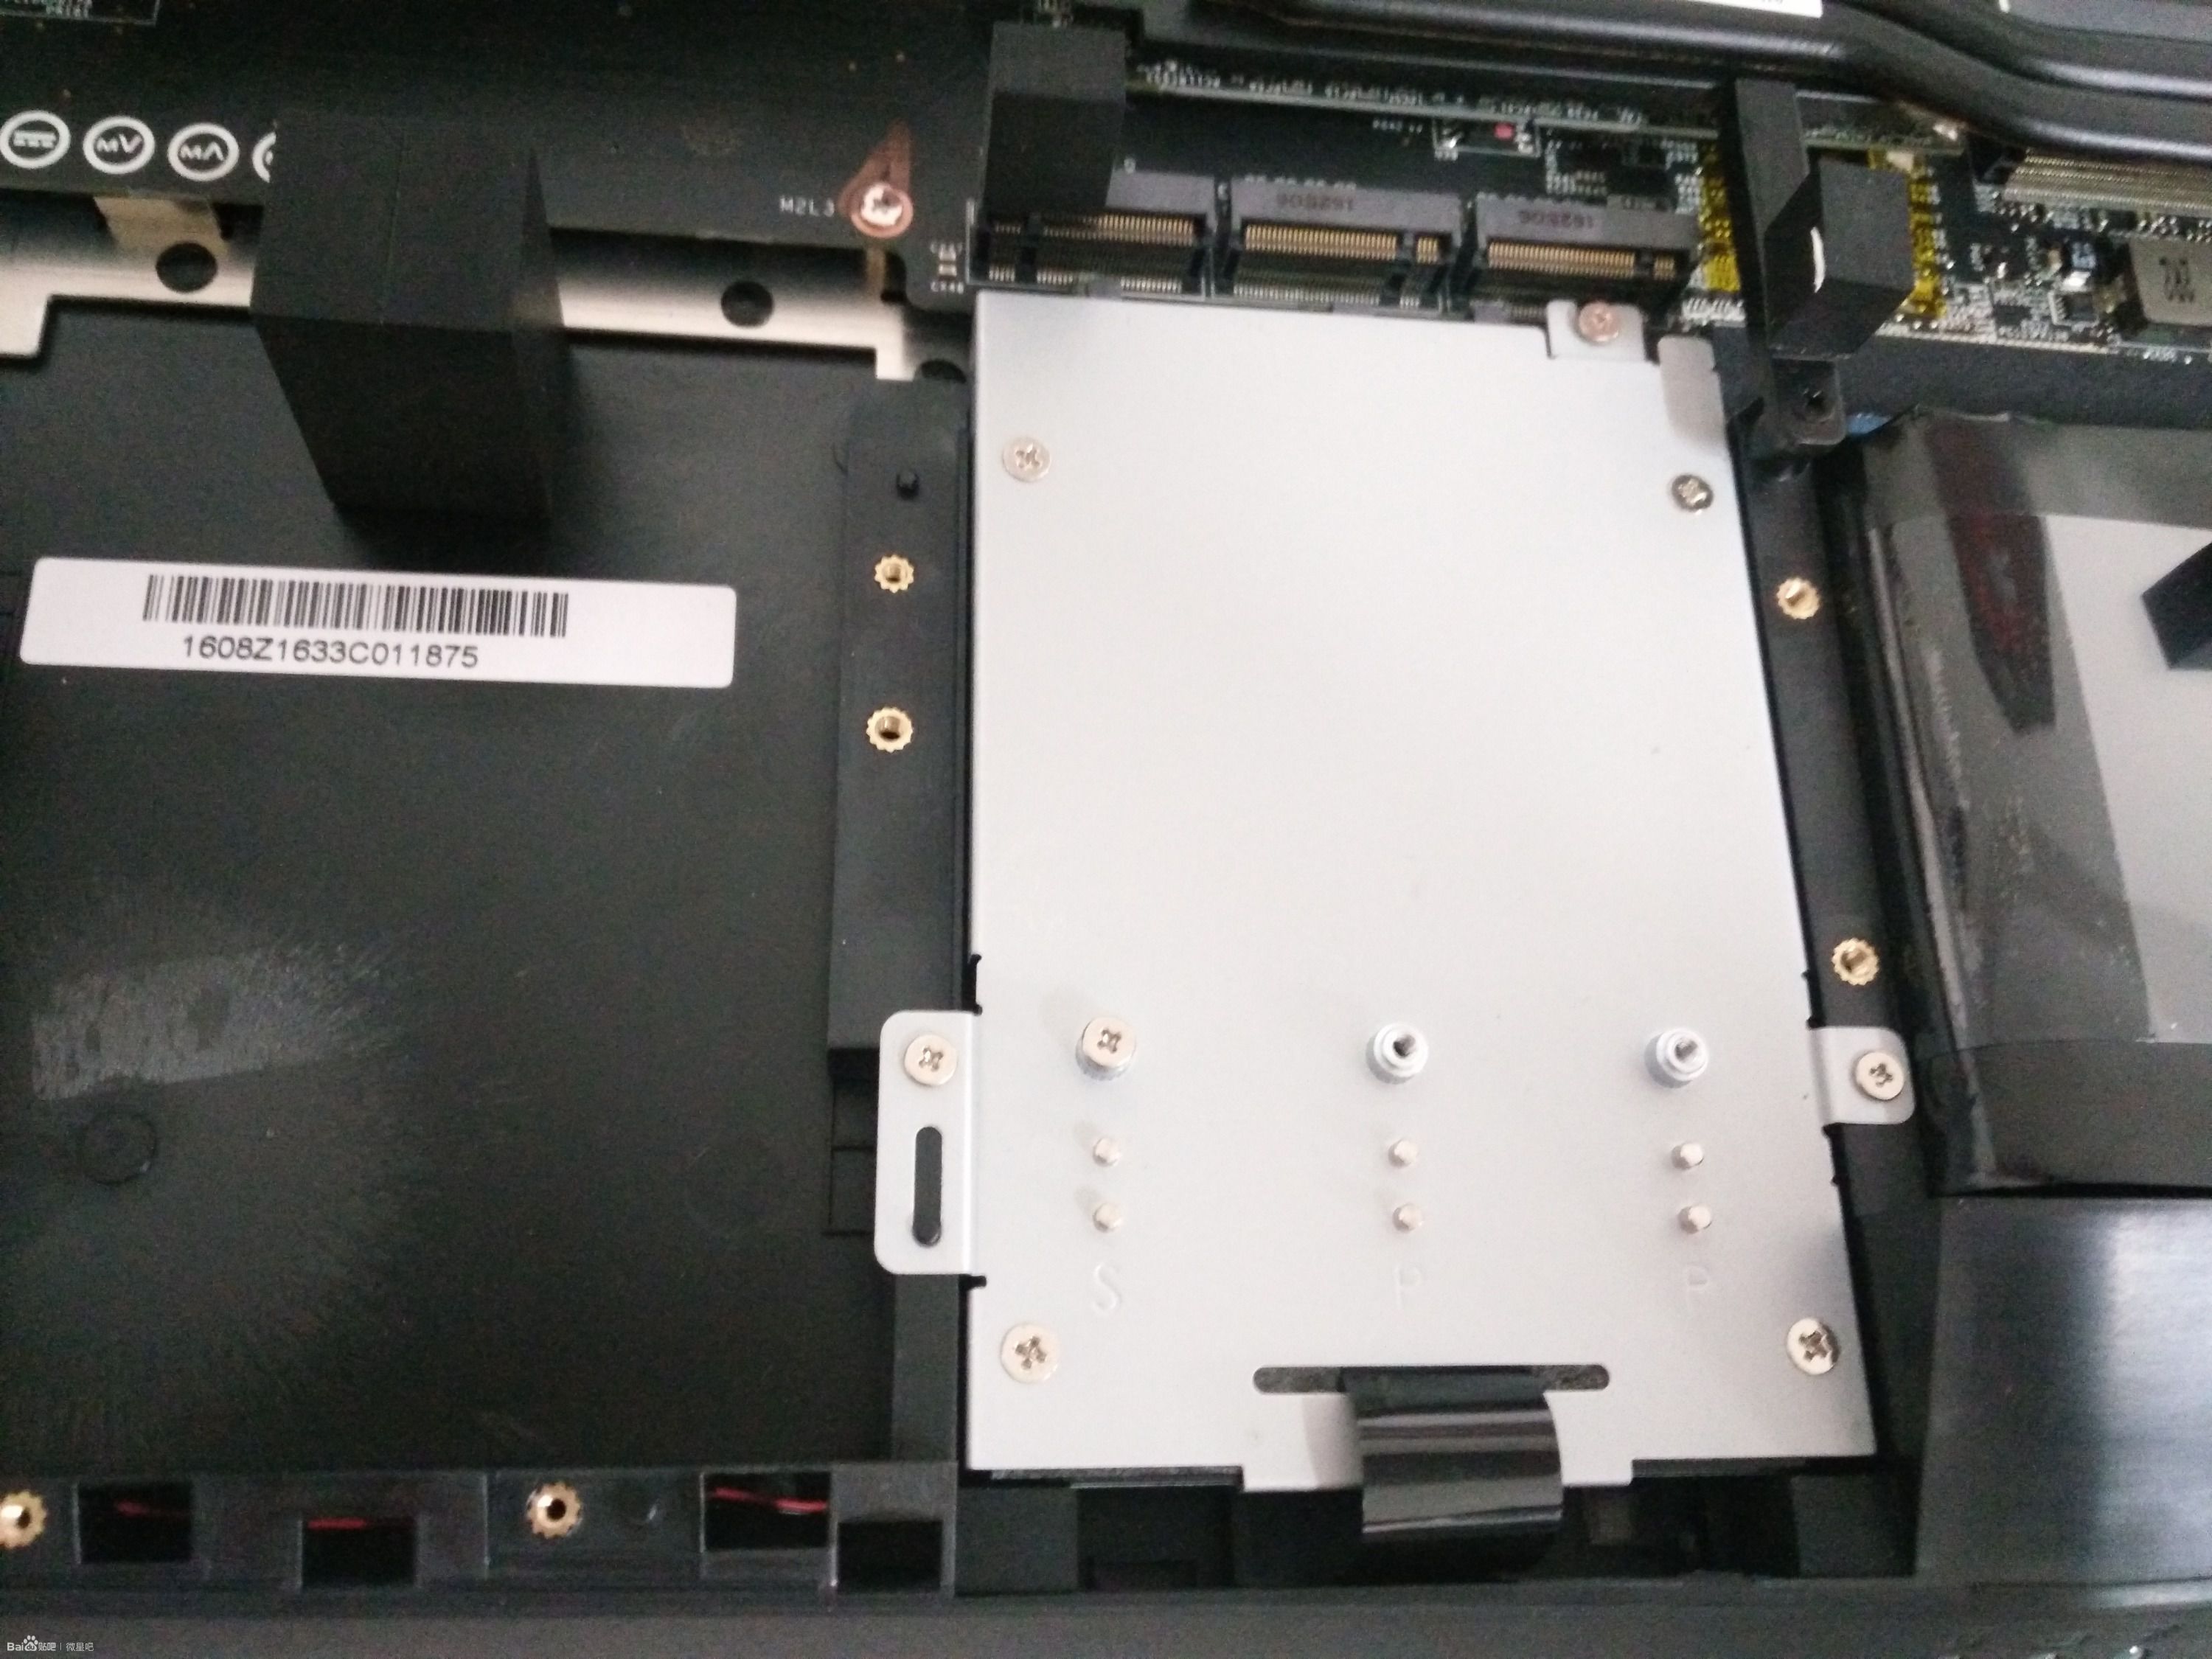
The laptop has three M.2 slots, and it comes with two SSD, so another SSD can be installed.
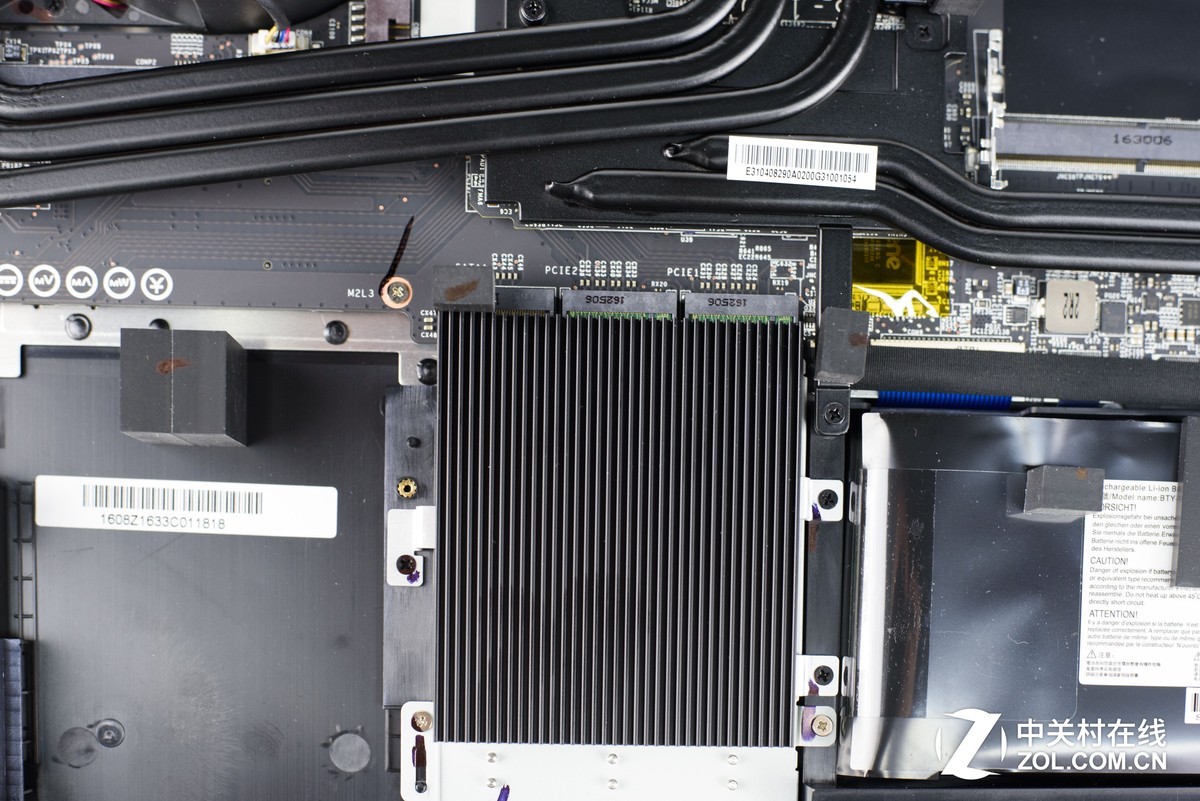
There is a heat sink covering the SSD.
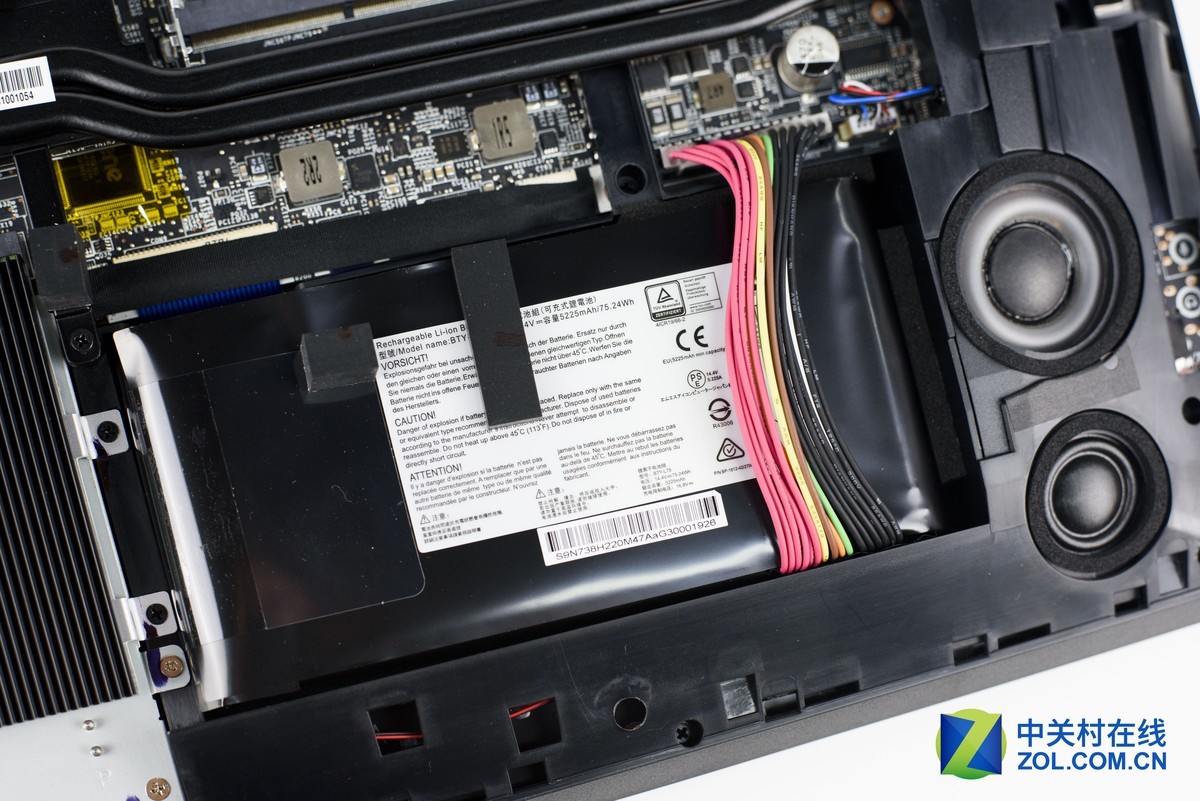
It comes with a 14.4V, 75.4Wh Li-ion battery.
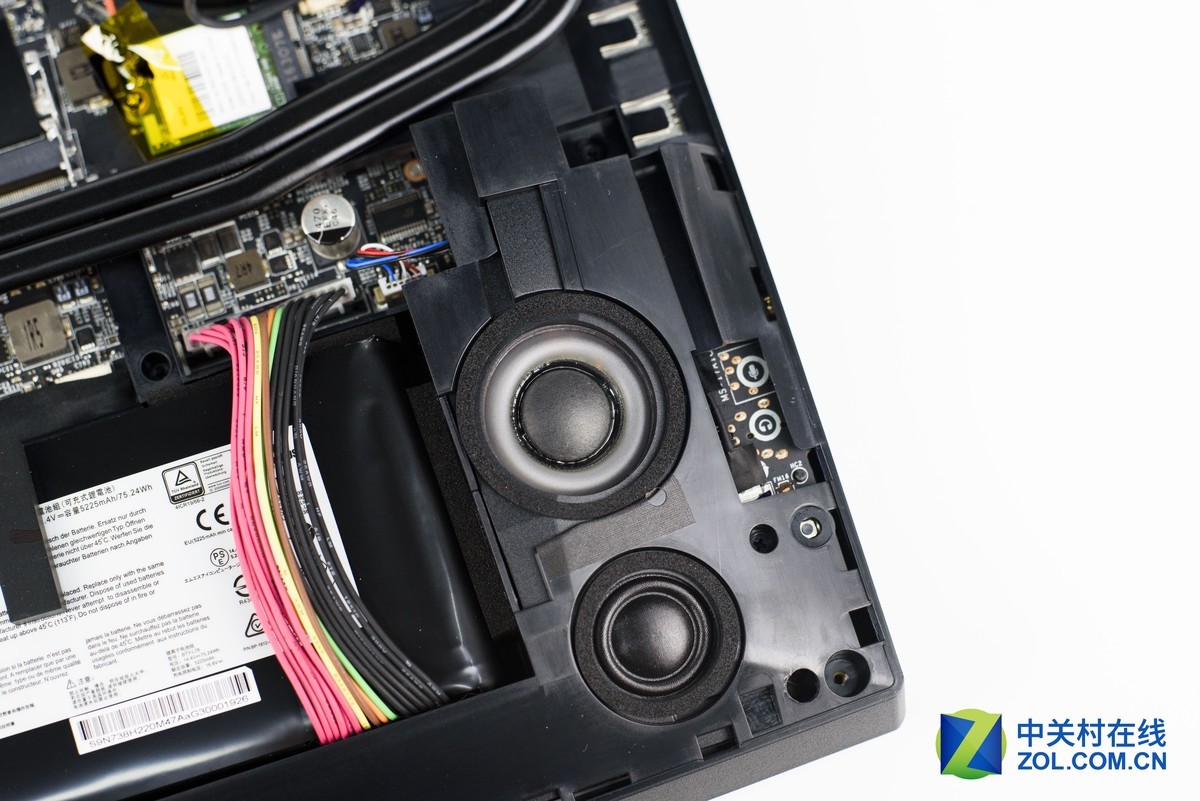
Here’s the speaker module.
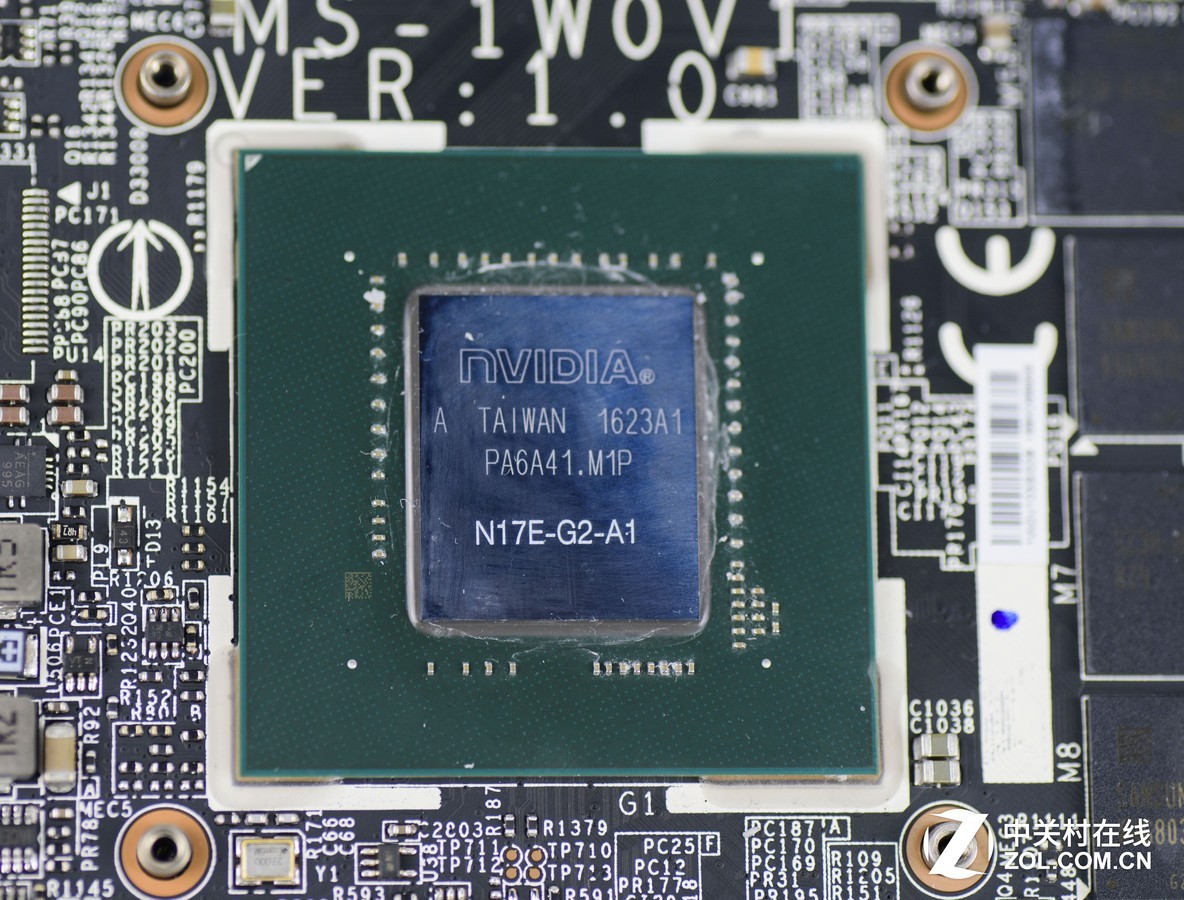
Here’s NVIDIA Geforce GTX 1070 graphics card. Users can freely change the graphics card.
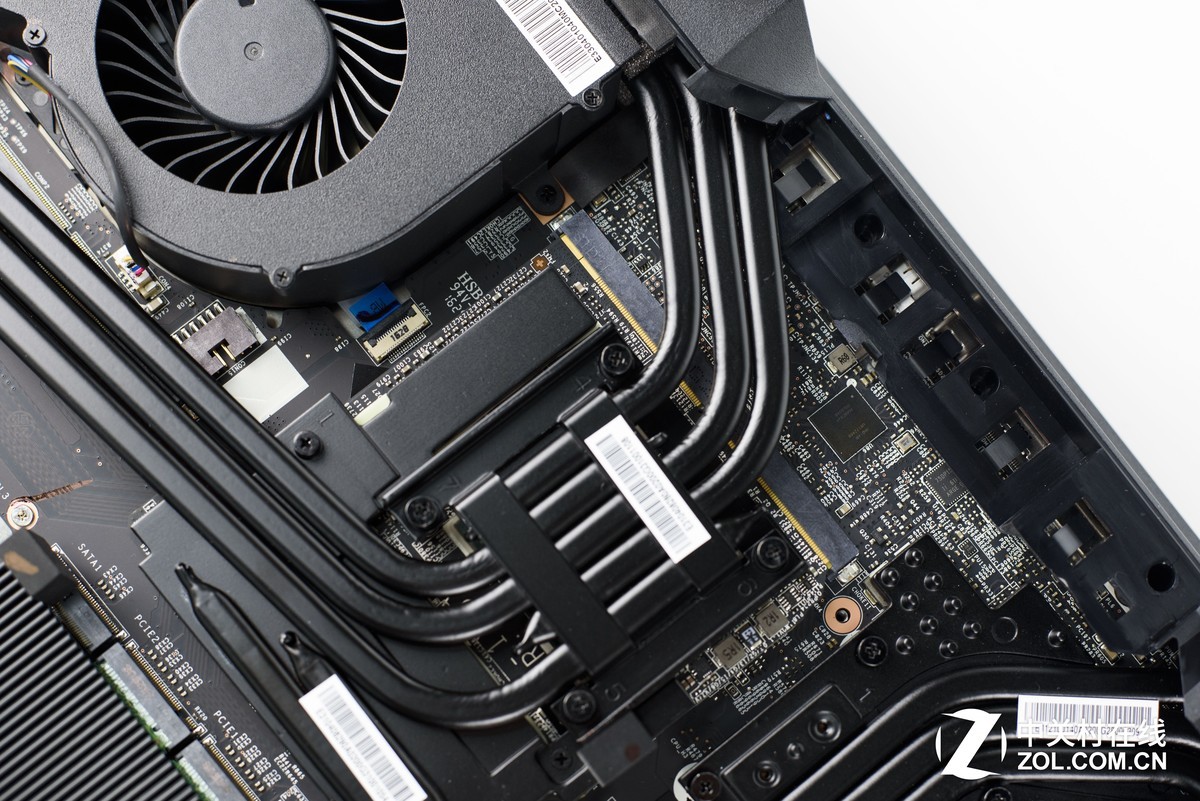
After the heat sink and cooling fan were removed, we find other MXM graphics card slot beside the SSD slots, that means you can add another graphics card.
NVIDIA Geforce GTX 1070 chip, PA6A41.M1P, N17E-G2-A1

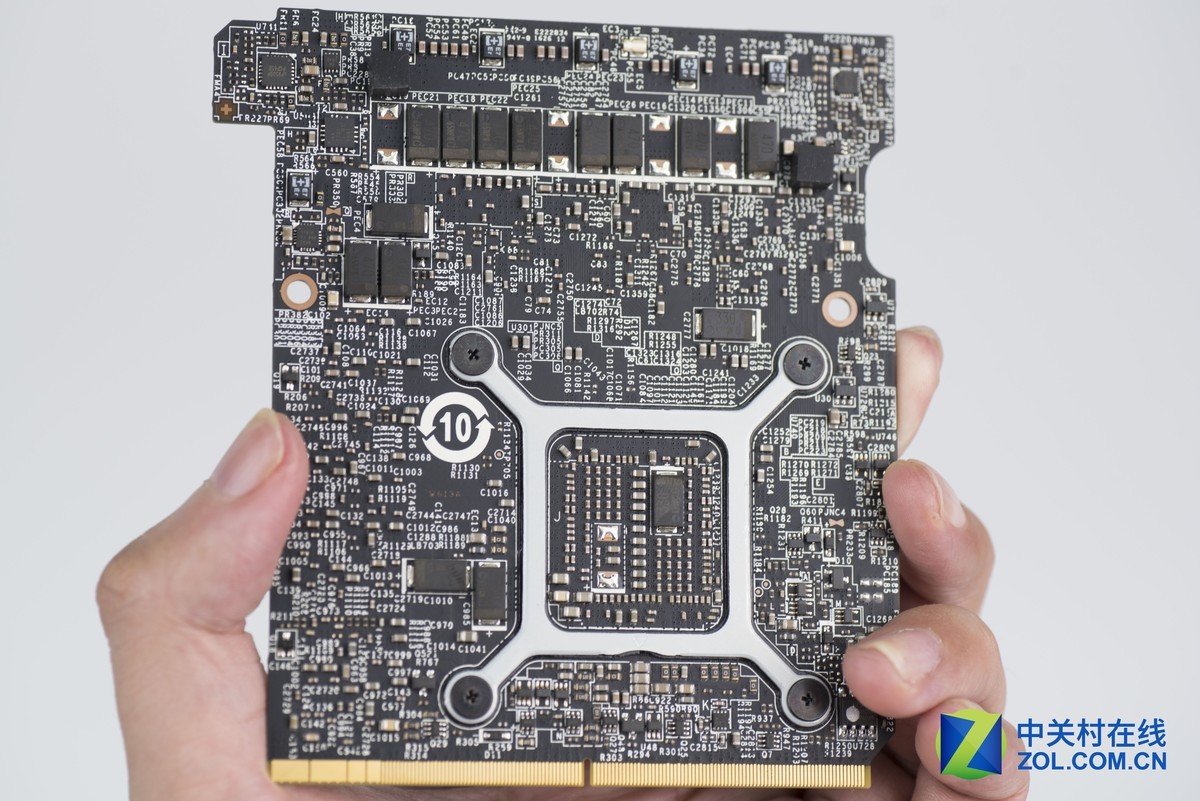
NVIDIA Geforce GTX 1070 graphics card board

Here’s spare MXM graphics card slot.
Heat sink
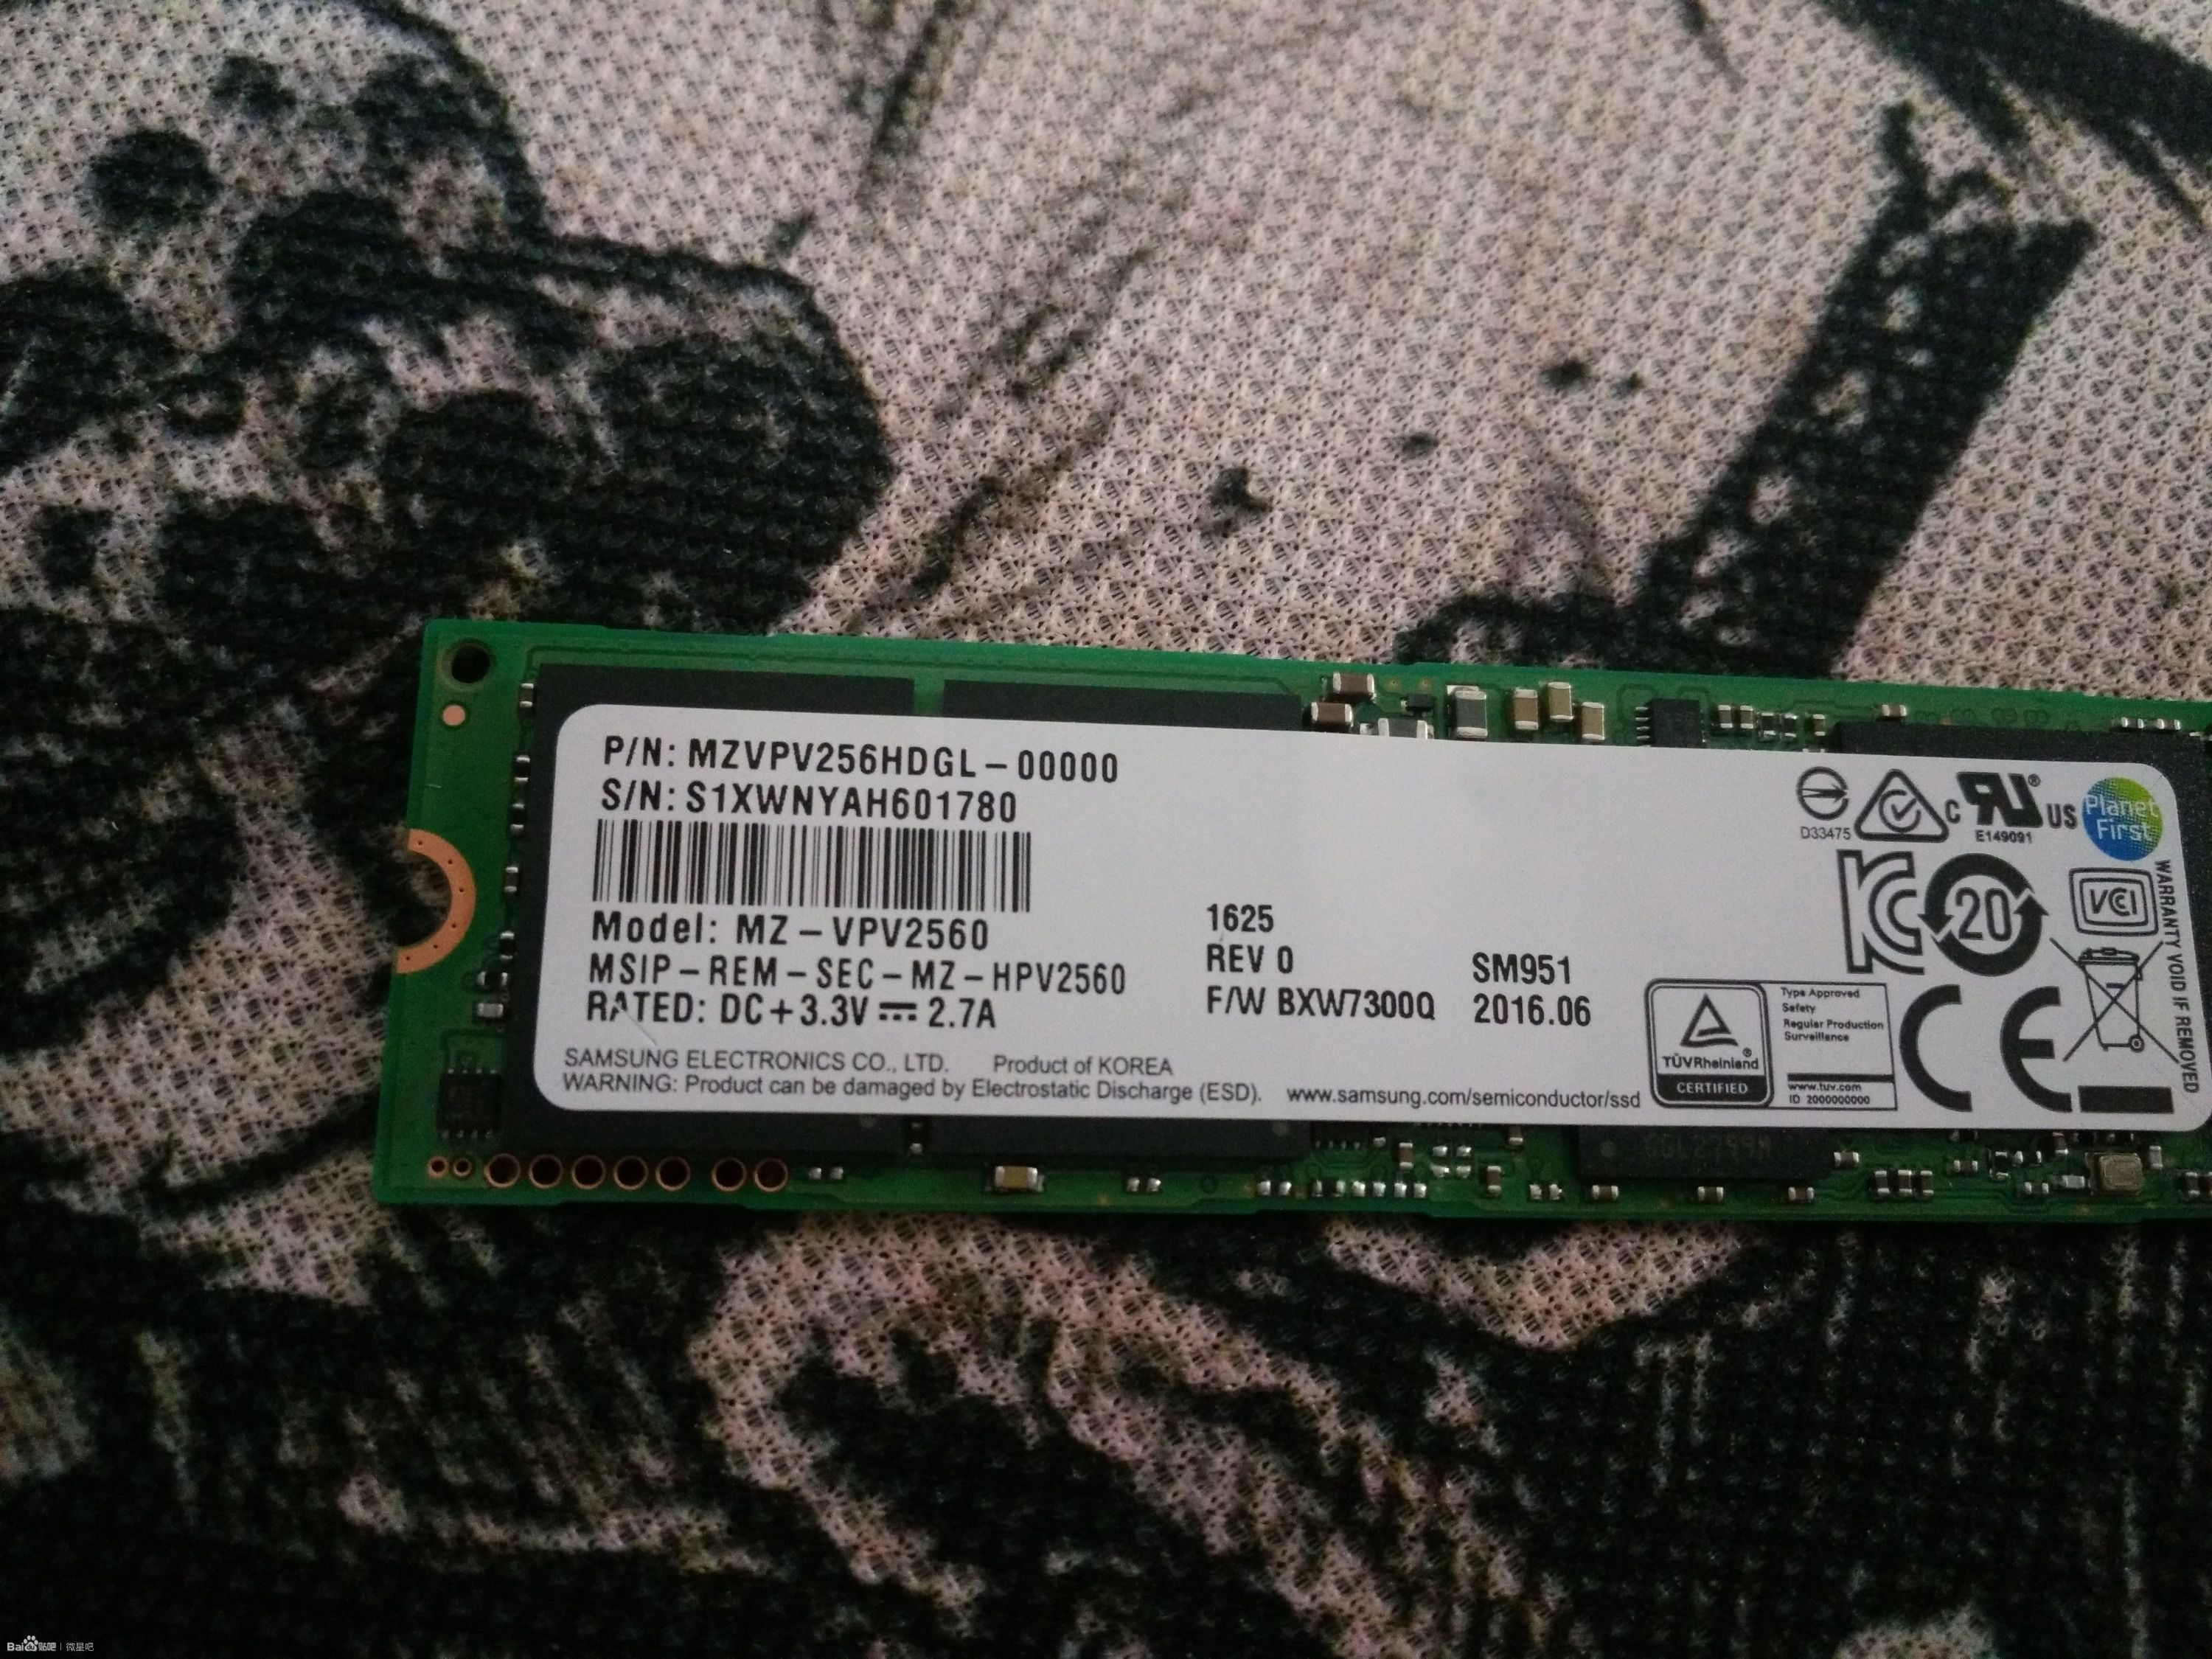
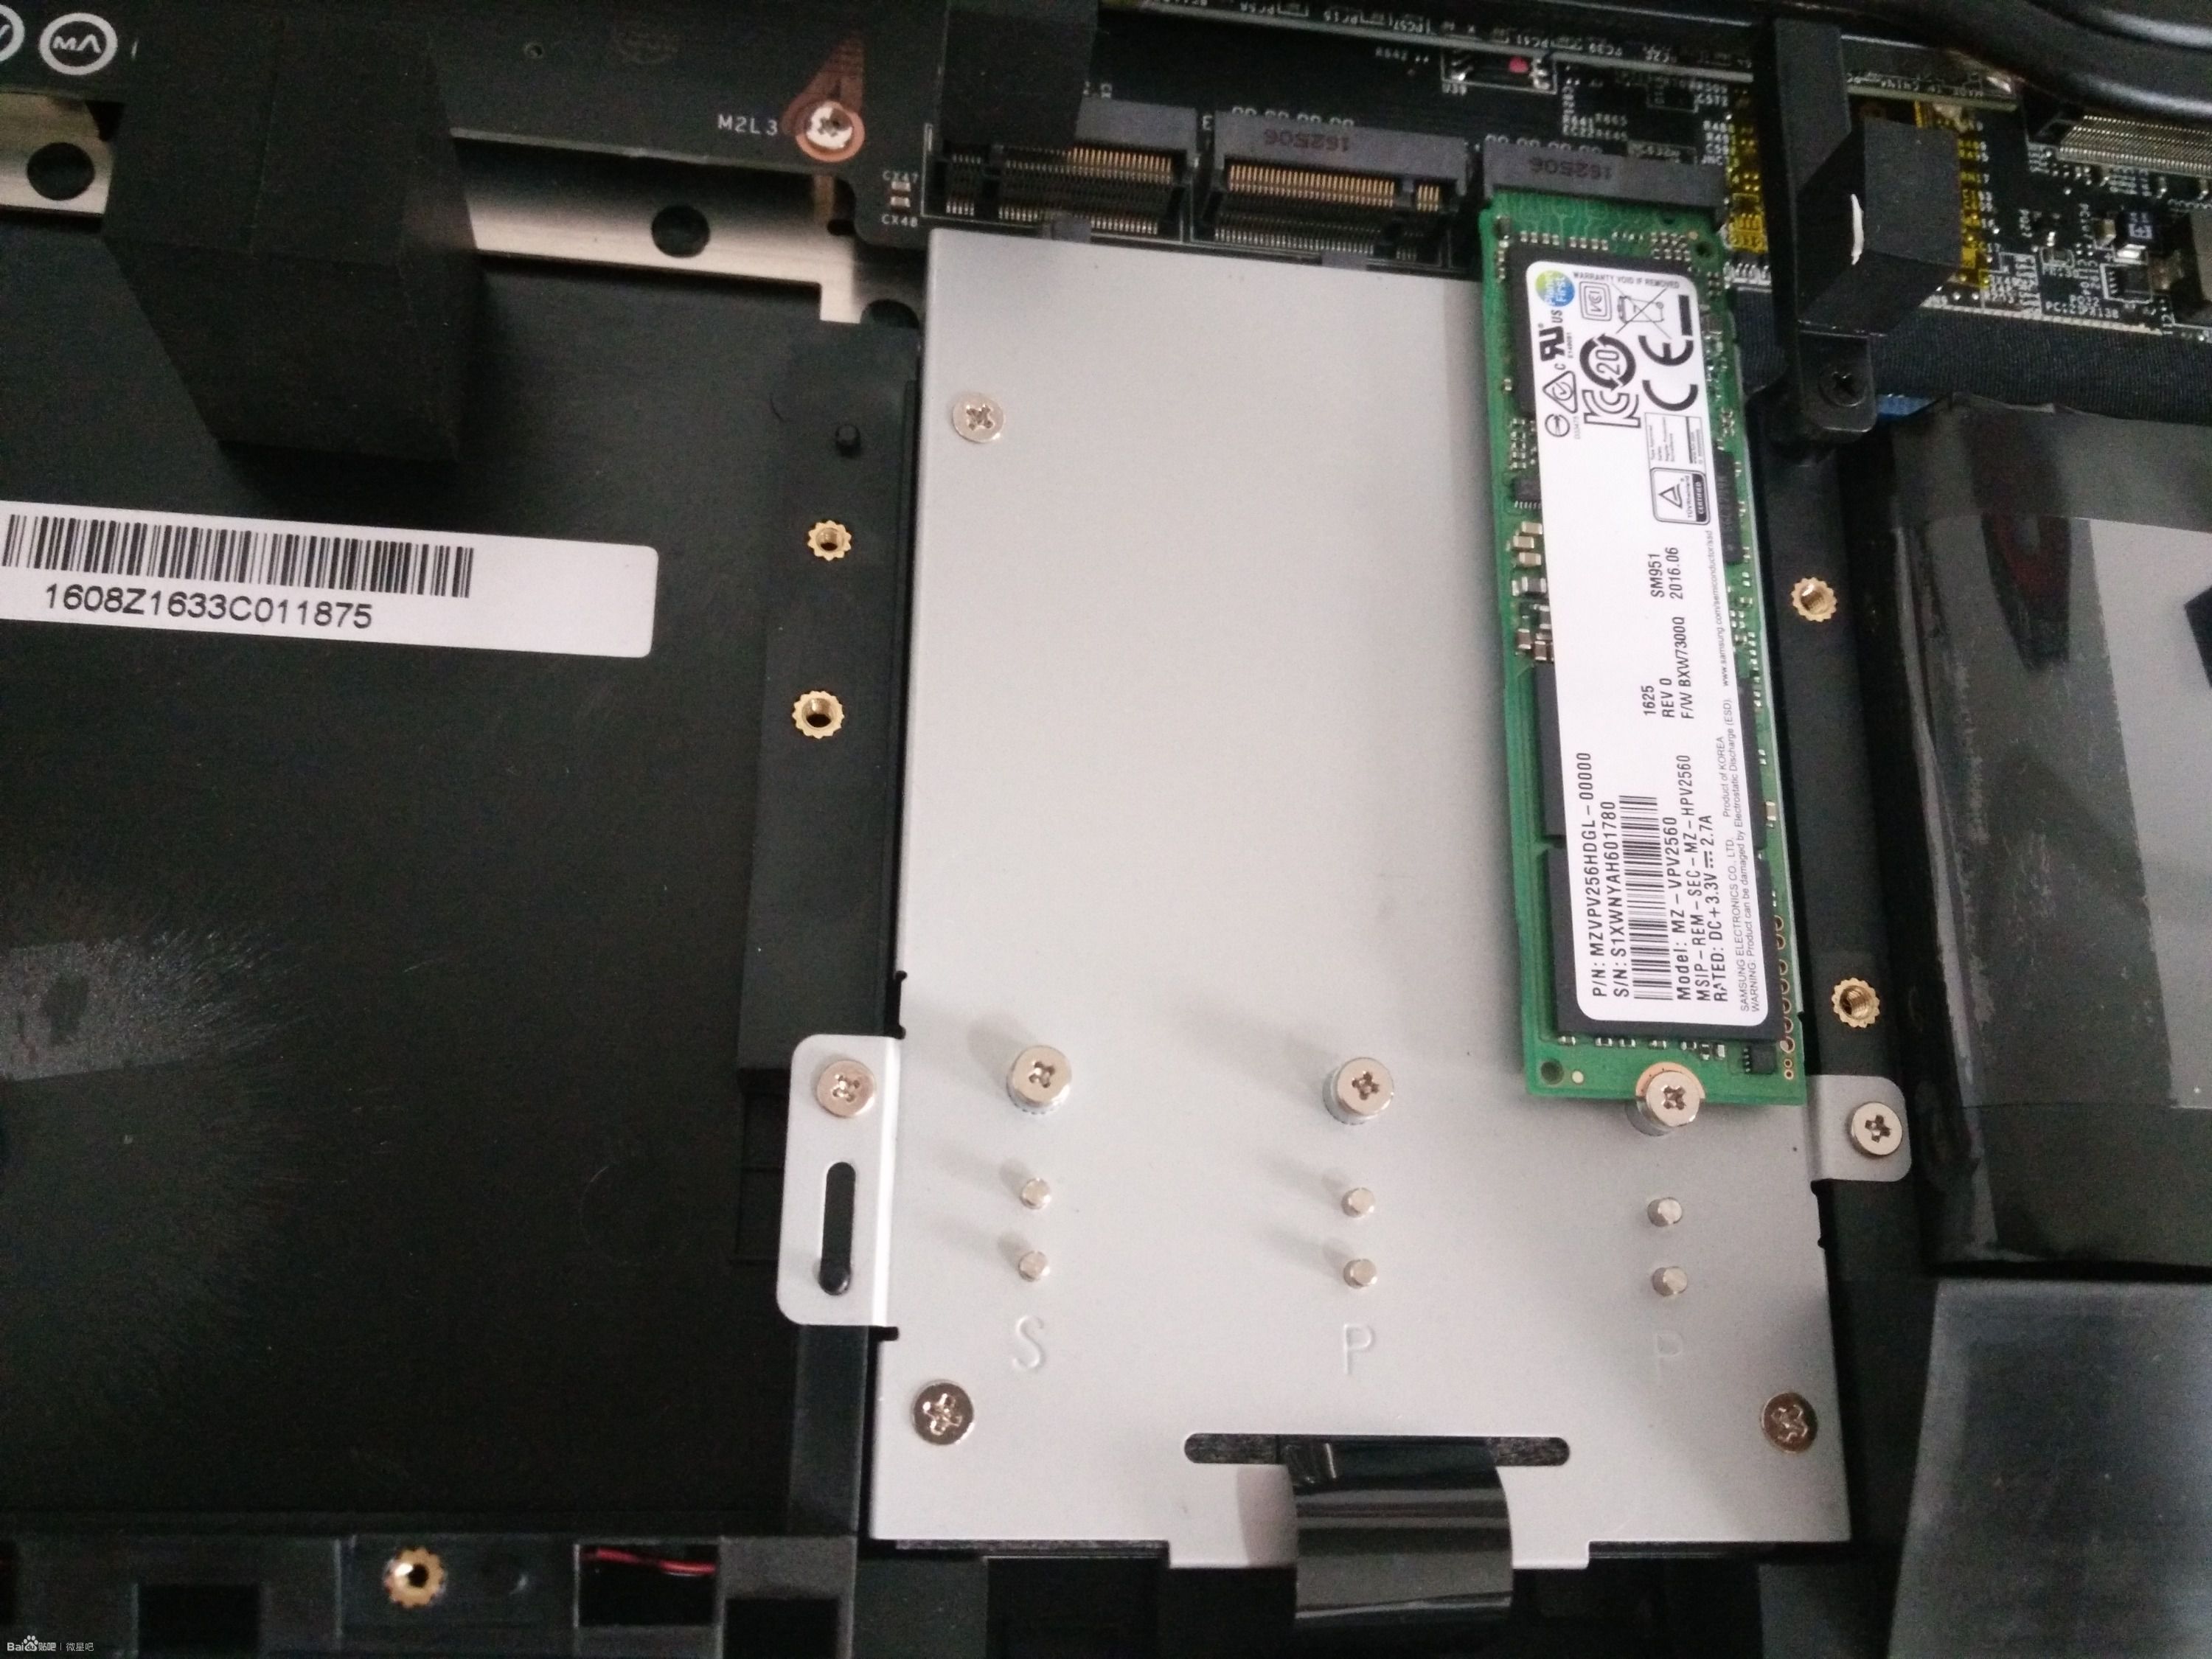
Now let’s upgrade the SSD.
Here’s is new SSD – Samsung MZVPV256HDGL-0000 SM951 M.2 SSD.

Remove the heat sink. You can access two SSDs (Dual NVMe M.2 SSDs by PCIe Gen3 X4 in RAID 0).
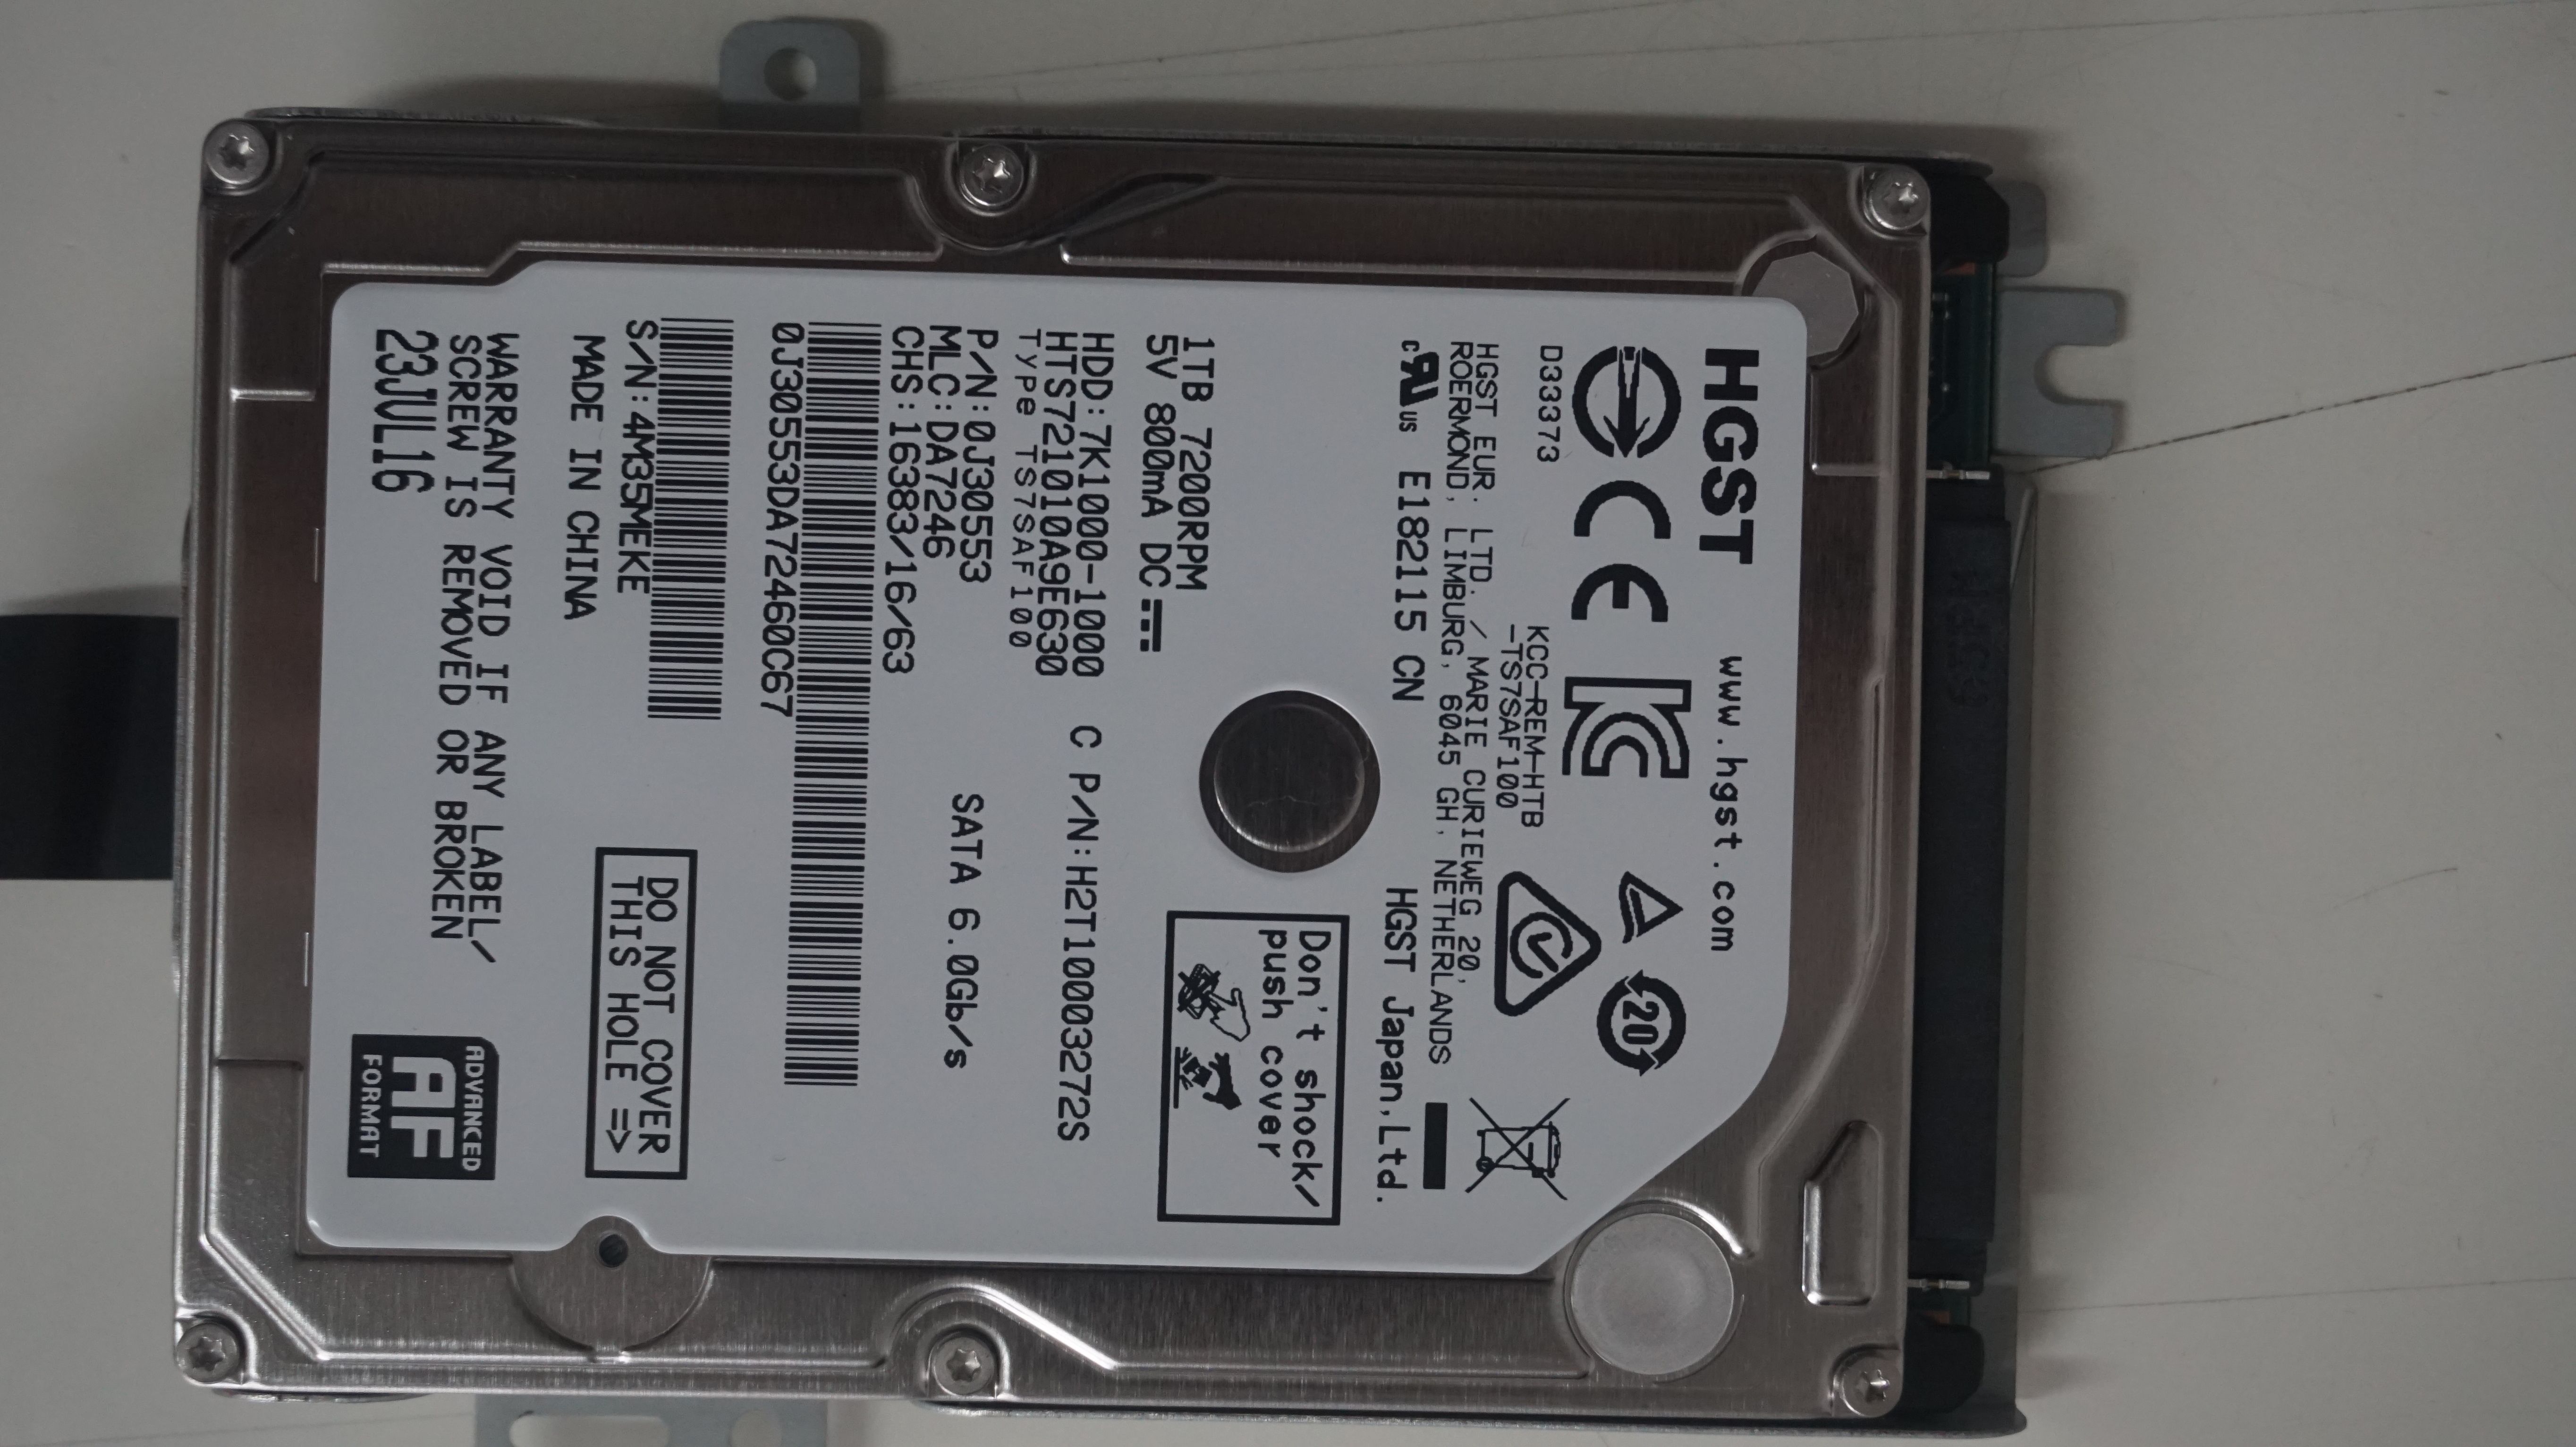
If you remove the white metal plate, you can access the hard drive.
The laptop comes with an HGST 1TB 7200RPM hard drive.
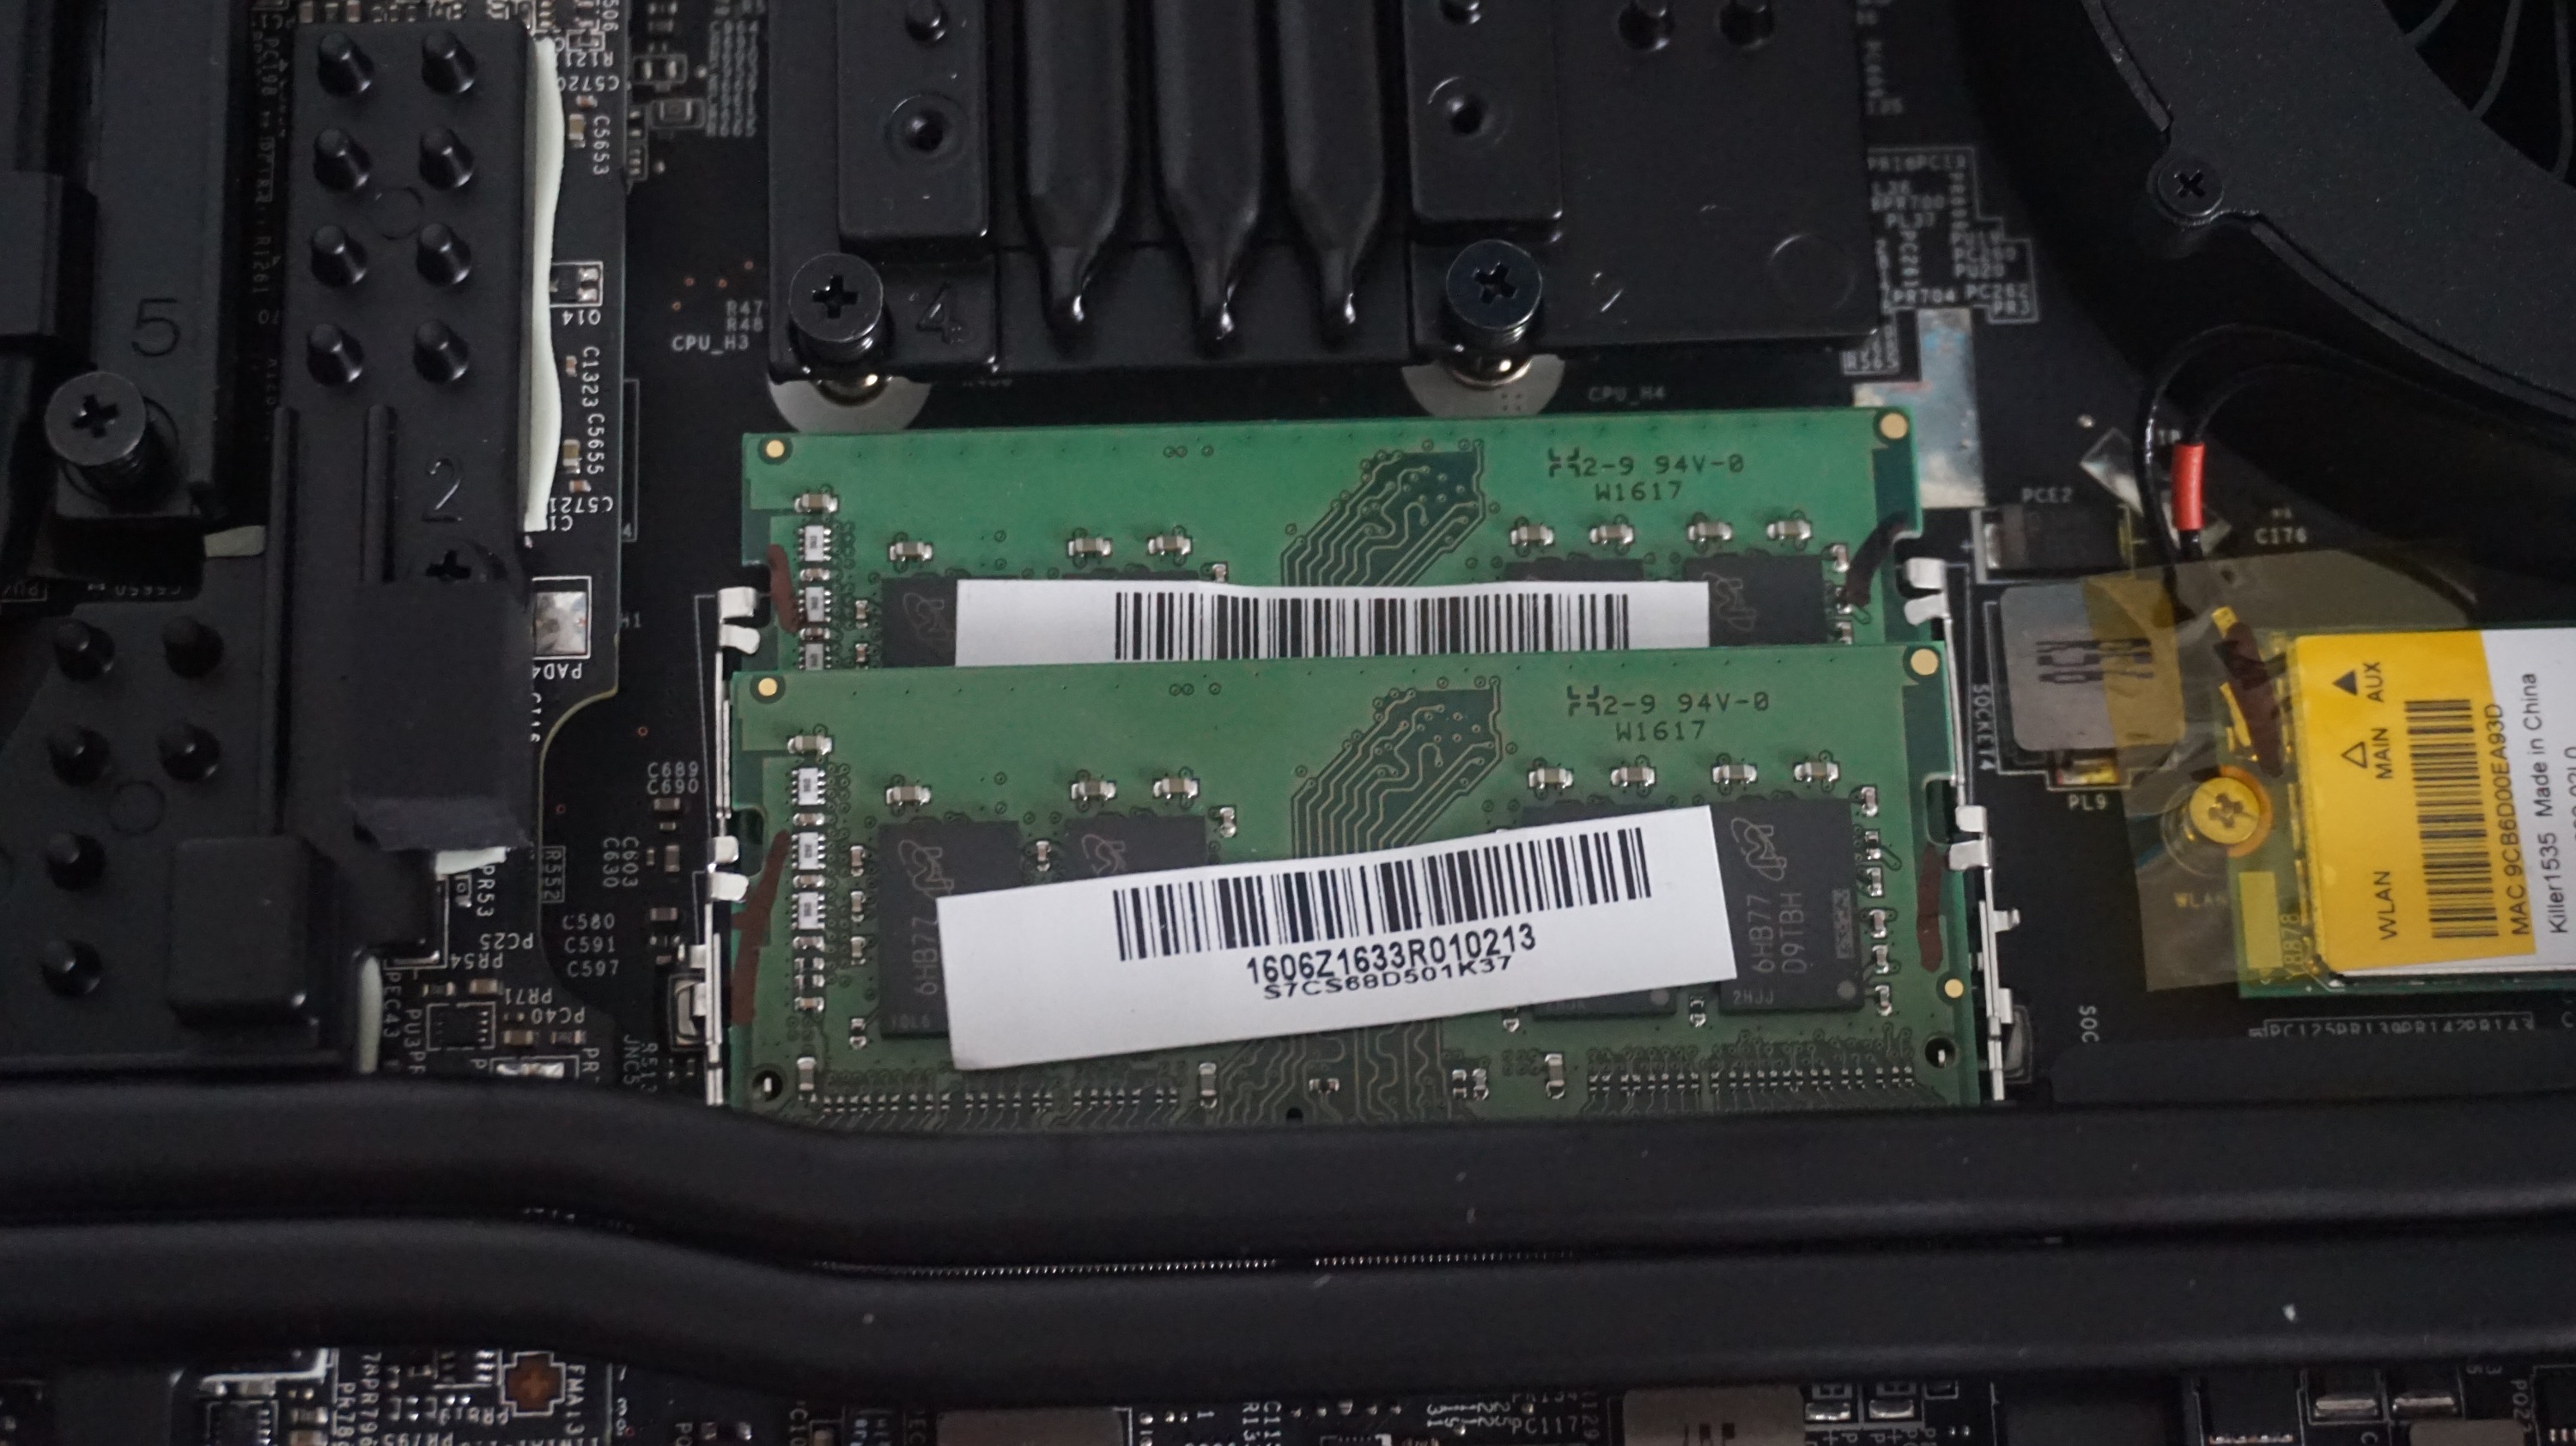
Here are two spare RAM slots.

Two 8GB DDR4 2133 were installed, by the way, the laptop supports up to 64GB RAM.
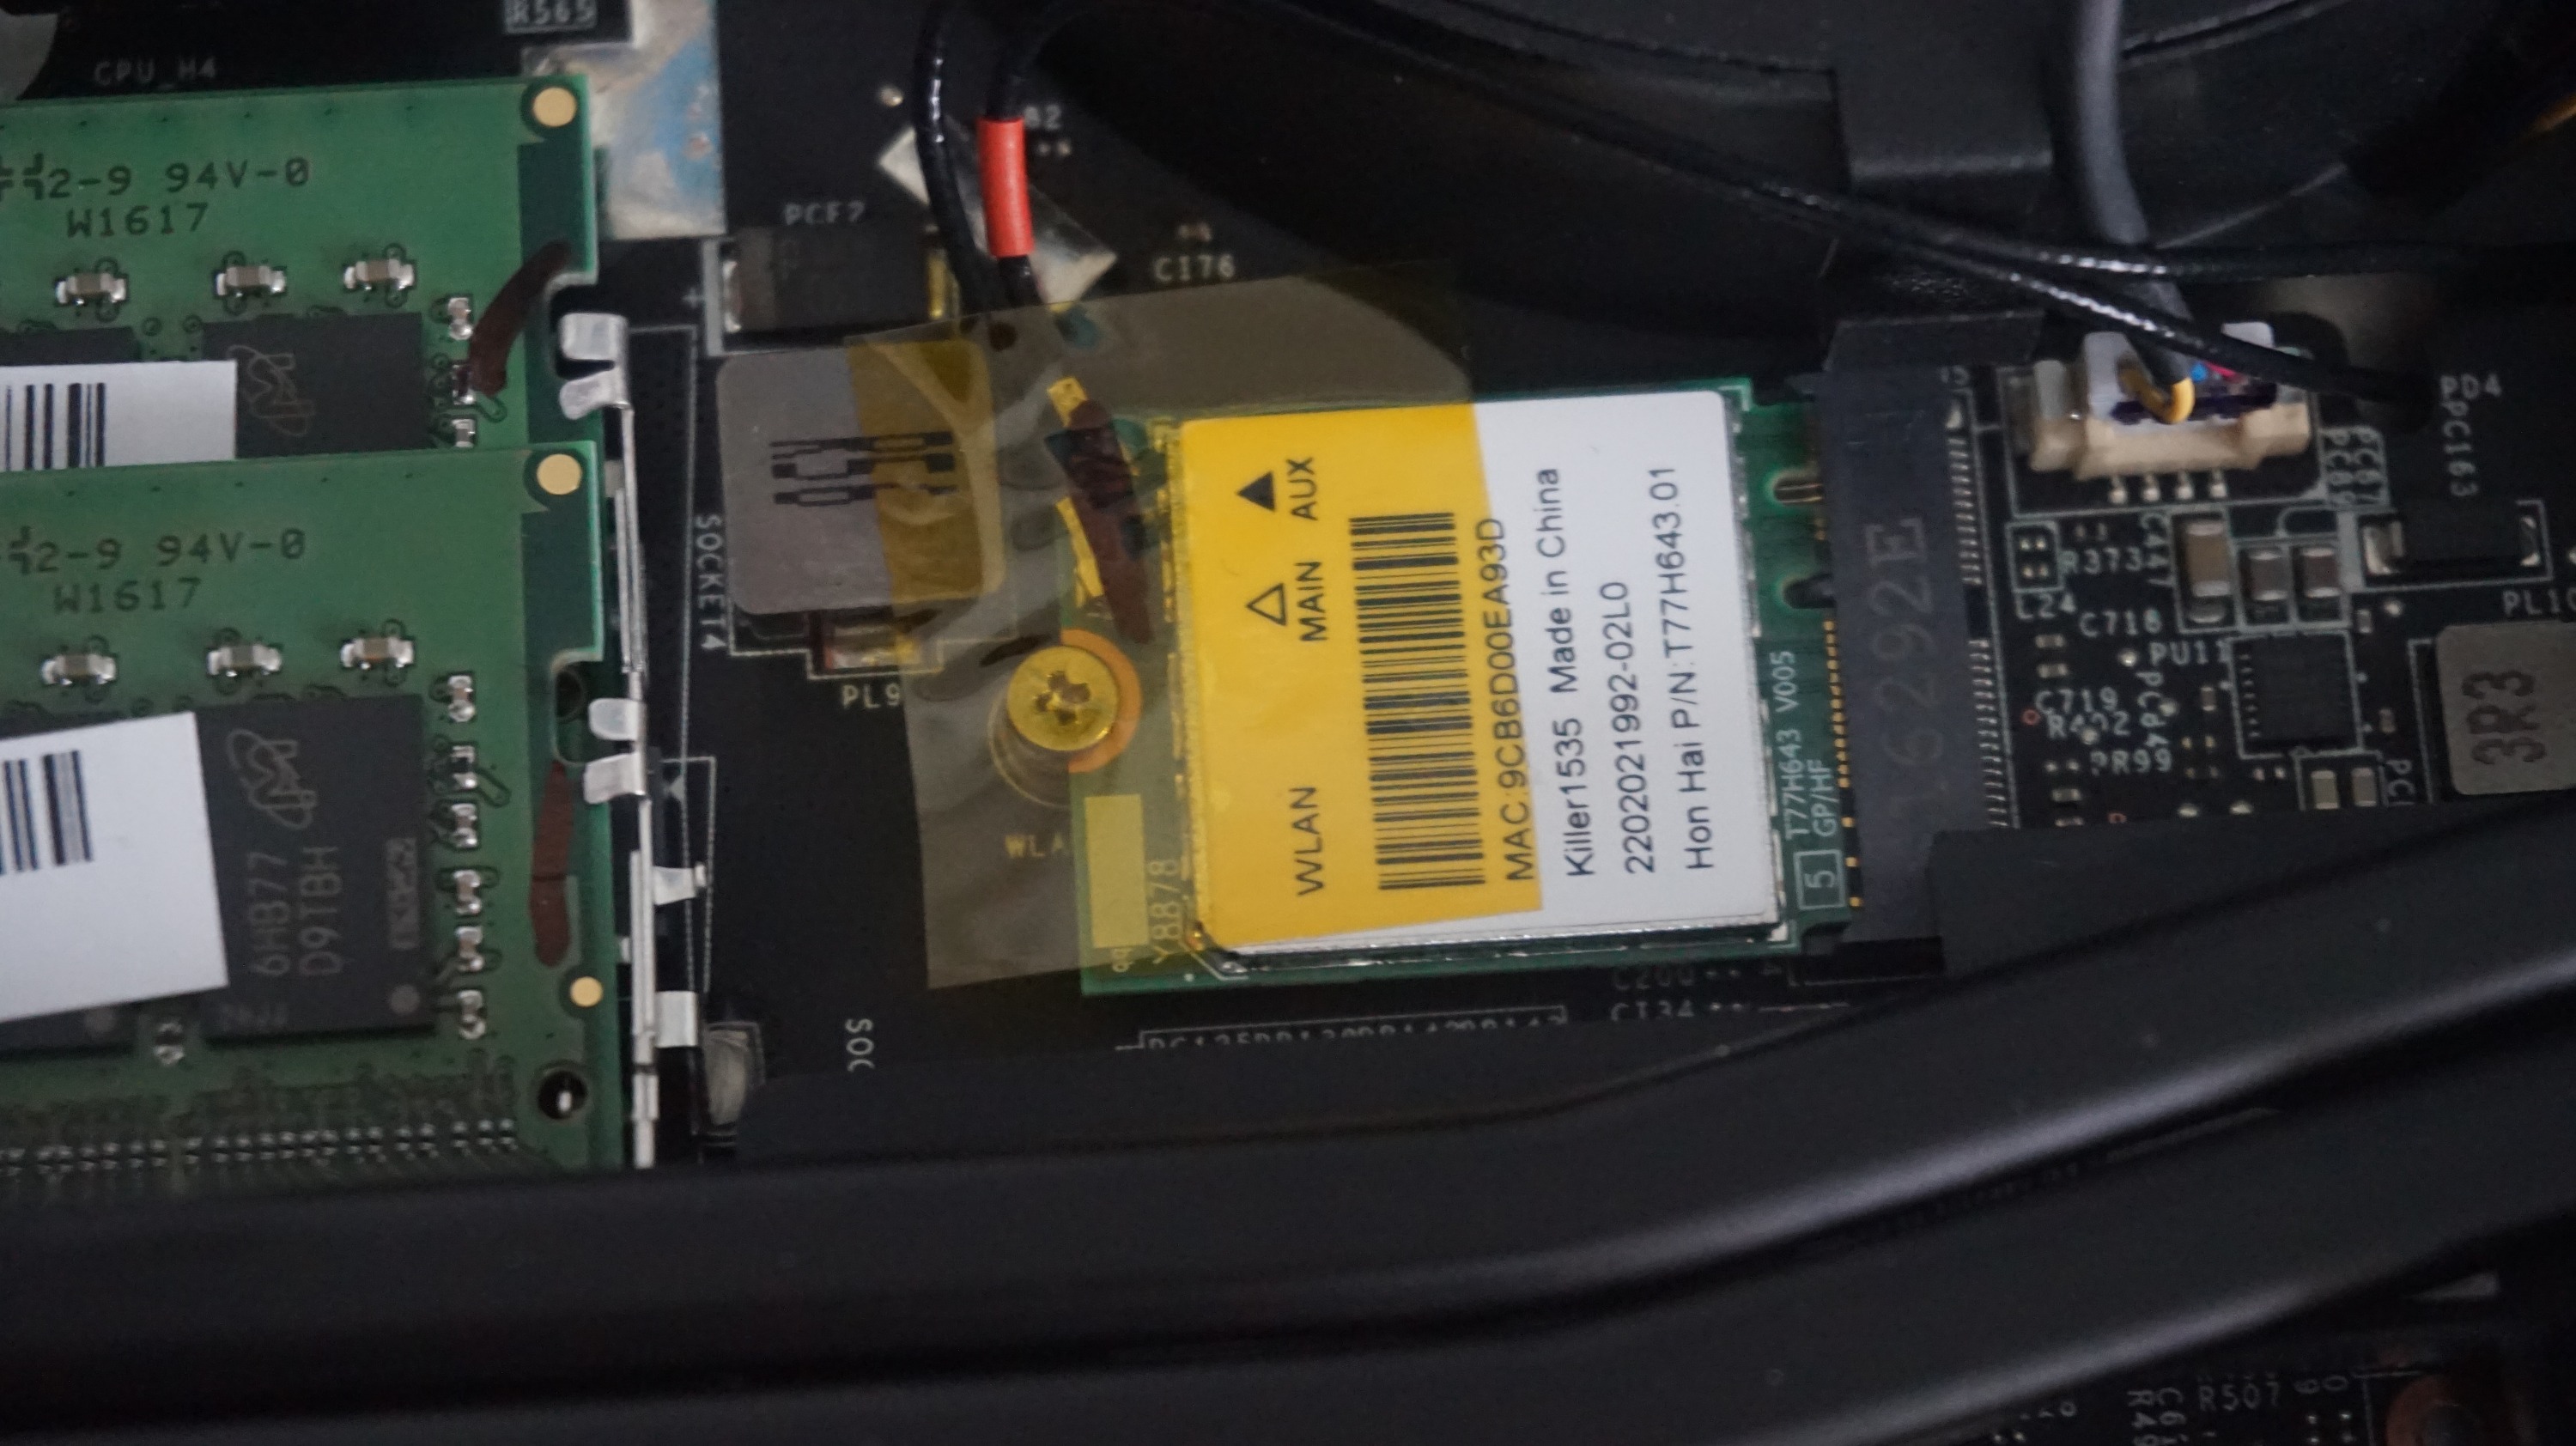
Killer 1535 wireless card, the card supports dual bands (2.4 GHz and 5GHz), IEEE standards-based 802.11a/b/g/n/ac, and Bluetooth connectivity.


On the left in the eighth picture, after removing the heat sink, what is that white / gray slab of endorsing part of the heat pipe?
What material is it made of?
in the ninth picture, after removing the heat sink, what is that white / gray cuboid of endorsing part of the heat pipe? what material is it made of?
Do you have also a guide how reach the hidden ram sticks pre installed?
I have this laptop. It doesn’t have 3 M.2 NVME slots. It only has 2 which can be put in raid. I currently have two 512GB samsung pro NVME drives in raid-0 in those slots. I purchased a third when I bought the laptop because every review on this laptop said it had 3 slots but it doesn’t the slot on the left side in the pictures is a SATA slot. I had to return the third NVME drive and pay a 25% restocking fee because it was opened.
Laptop if your wondering:
48GB RAM
GTX 1080 SLI (200+clock OC)
120HZ-3MS FHD LCD upgraded from 5MS panel current have GT75 version installed
i7-6820hk @ 3.9GHZ with Kryonaut paste on CPU/GPUs
This laptop with stock thermal paste idled around 55C on both CPU and GPU. Under load the CPU and GPU both thermal throttled as they got into high 90’s. After replacing stock thermal paste with Kryonaut thermal paste idles dropped to 33c (CPU) 39c (GPU) and CPU never goes over 62c stock clocks and GPU 71c. Both CPU and GPU overclocked and they max out around 80-82c. Could push it further but don’t want to. I also tried liquid metal and the GPU had a 3 degree drop under load and the cpu had a 2 degree drop under load with idles very similar to Kryonaut paste. I removed the liquid metal because there are many places for the liquid to bridge and a 2-3 degree difference wasn’t worth it to me.