On CES2016 consumer electronics conference, Huawei not only brought its Mate 8 and GX8 two new phones, but also officially launched a new tablet PC – MediaPad M2. The tablet PC not only with a metal body, but also joined the fingerprint recognition, and supports stylus and is equipped with four Harman Kardon speakers with 10-inch touch screen and Kirin 930 processor, with a minimum price of $349, or about 2300 yuan.
Looking for more guides from laptopmain.com? Follow us on Facebook for all the latest repair news.
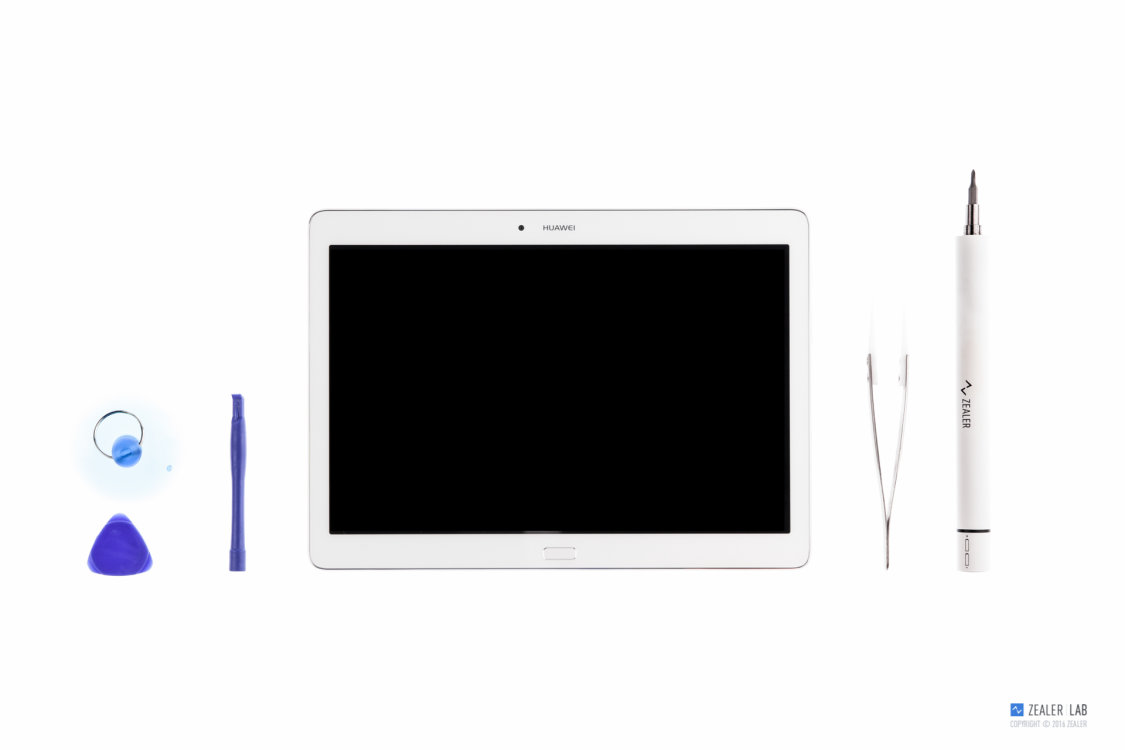
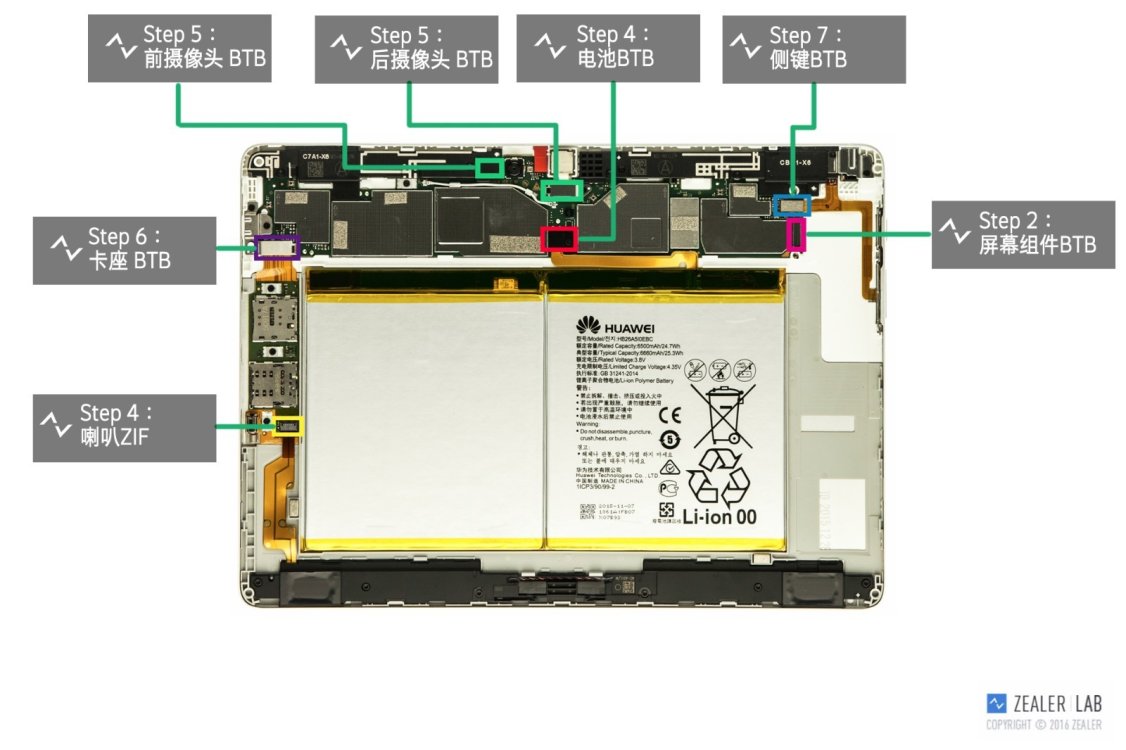
Tools needed: screwdriver, tweezers, crowbar, suction cup, guitar pick, heat gun

Remove the SIM card and SD card trays.
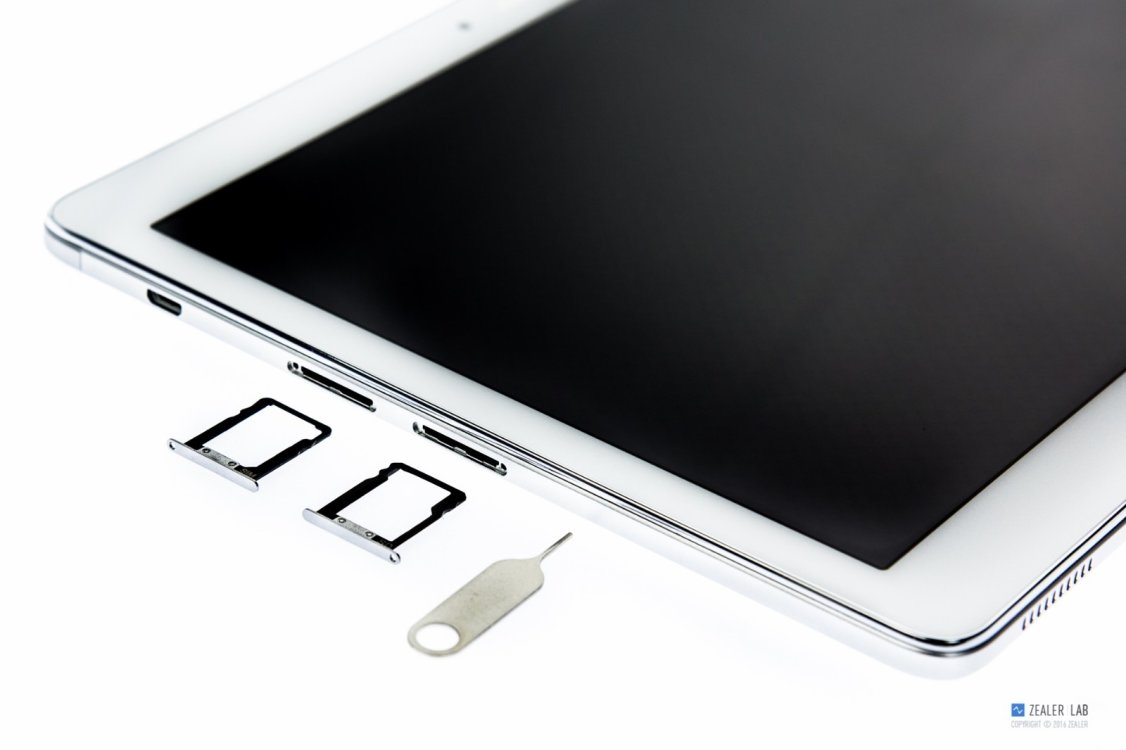
Here’re SIM card and SD card trays.

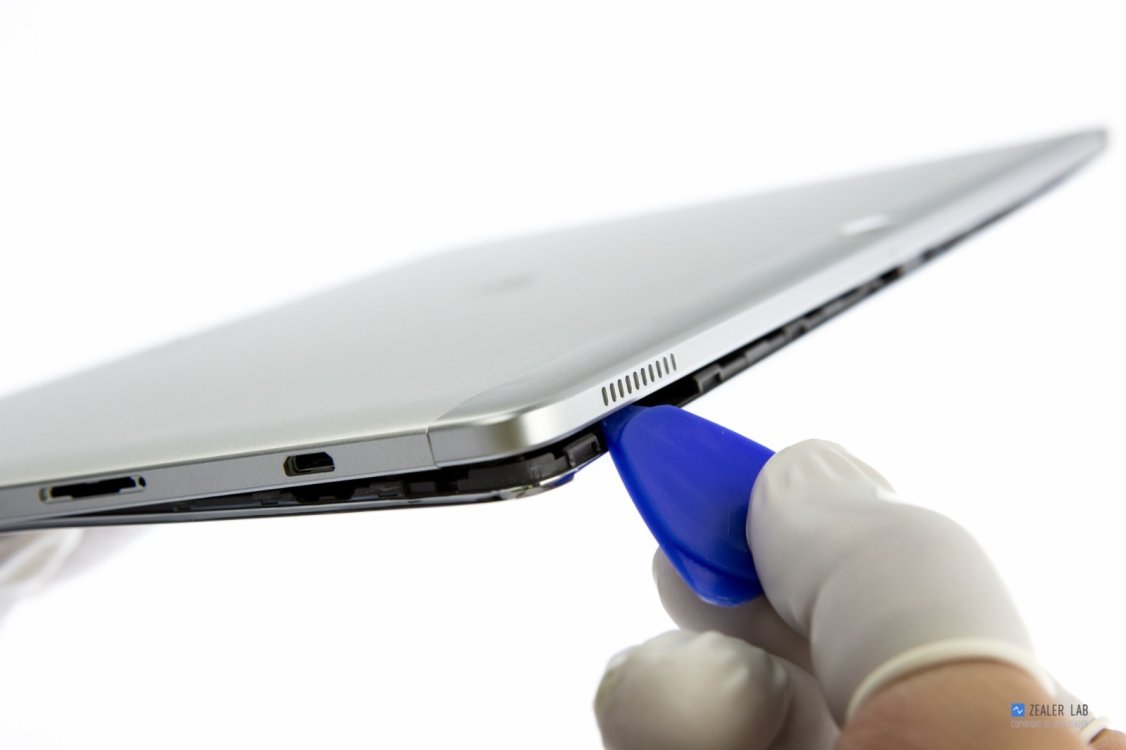
Insert the guitar pick between the display assembly and the tablet body.
Slide the pick by the edges to separate the display from the tablet.
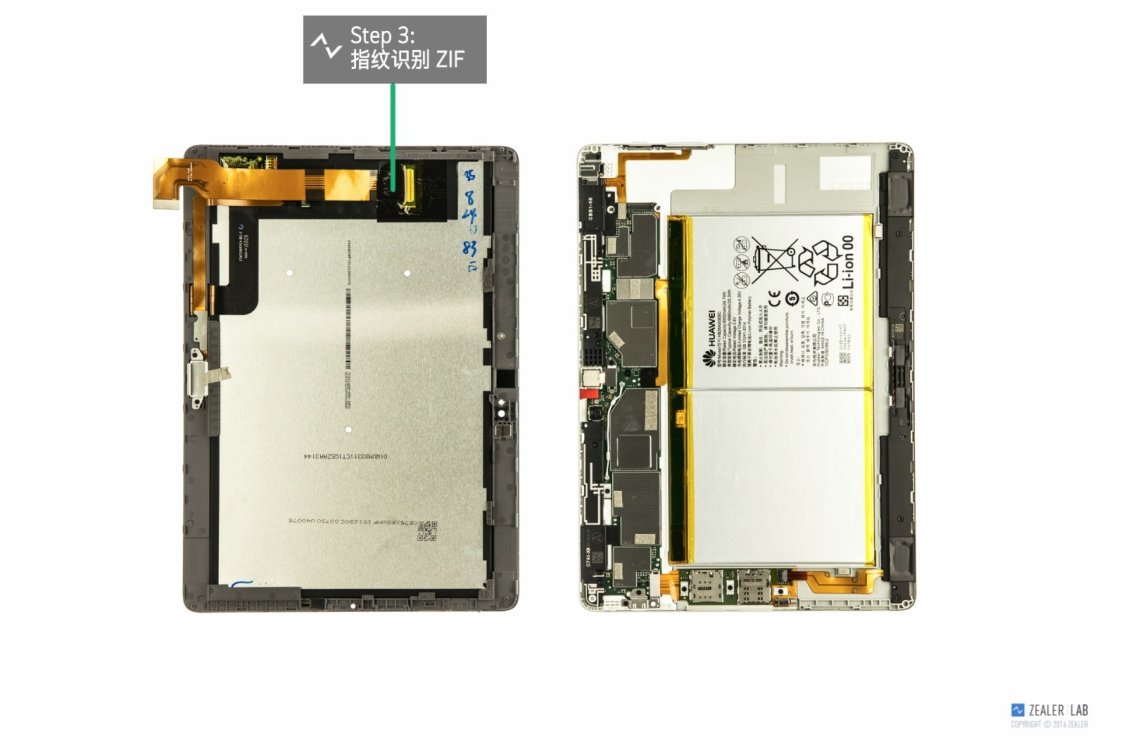
Lift up and display assembly a little bit. Be careful. The display assembly is still connecting to the tablet by LCD cable.
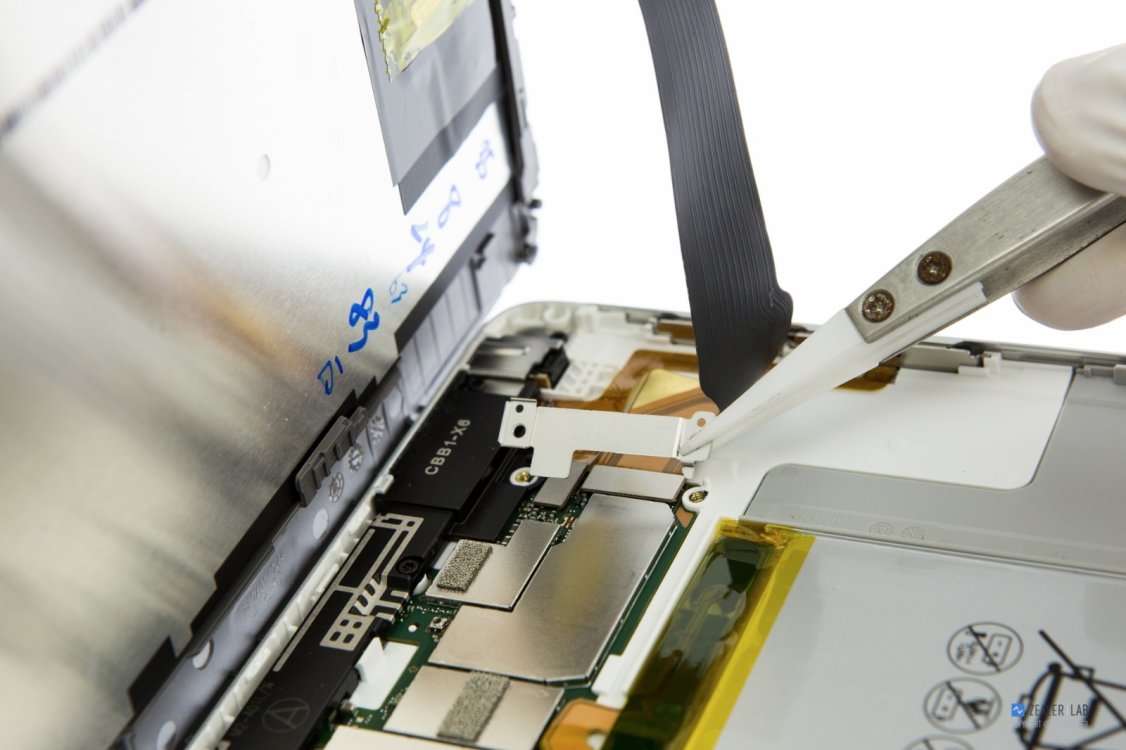
Remove two screws securing the metal plate. And then disconnect the LCD cable from the motherboard.
Now you can remove the display assembly completely.
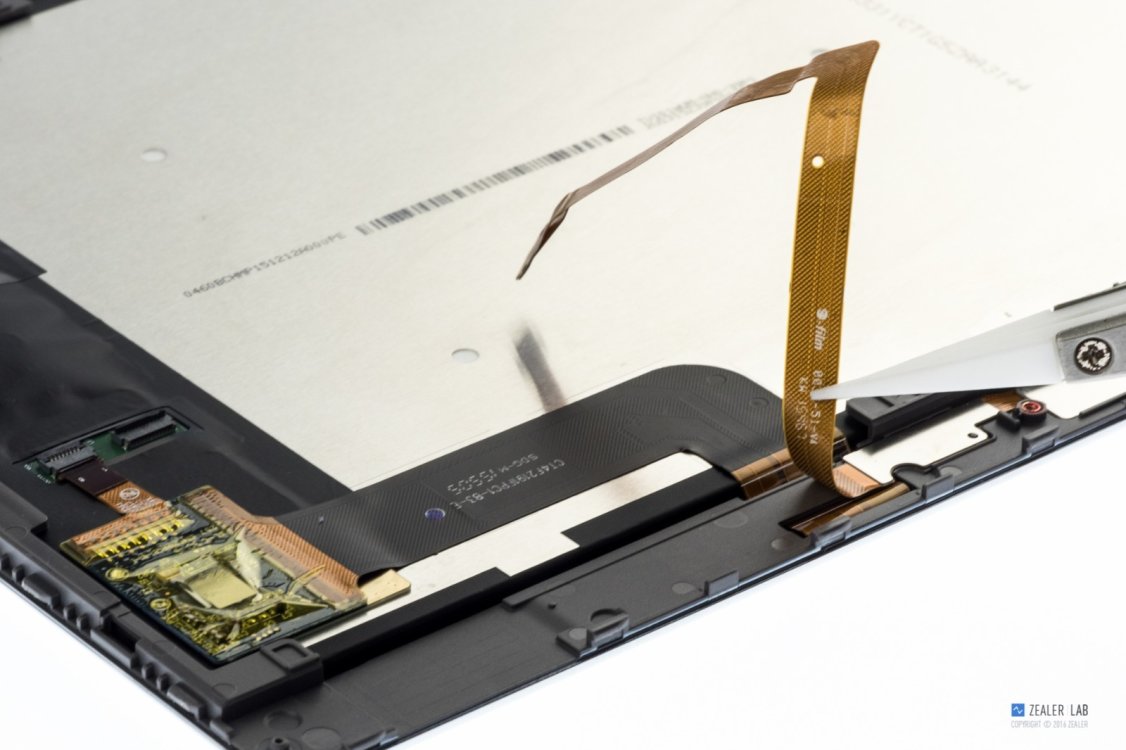
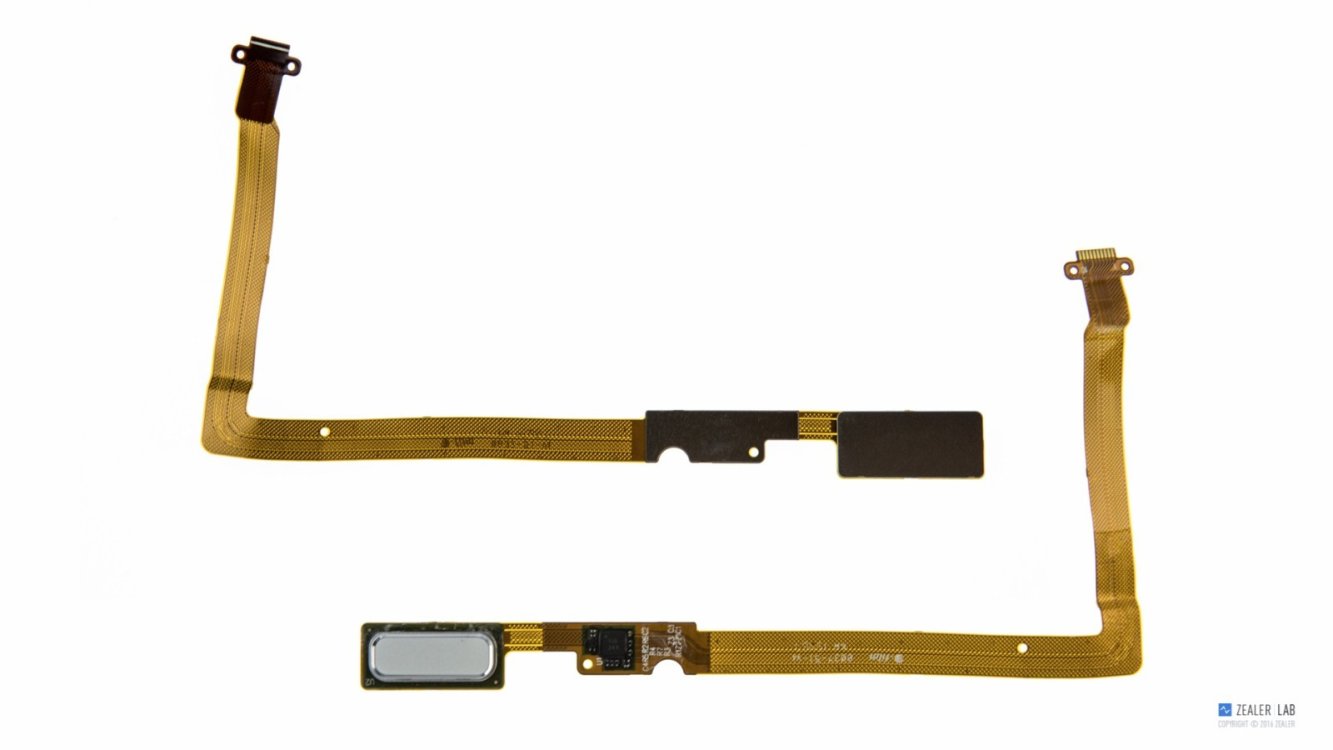
Remove the fingerprint recognition module from the display assembly.
Huawei MediaPad M2 10.0 uses a Fingerprint Cards AB’s FPC1155 sensor.
Remove all marked screws from the tablet.
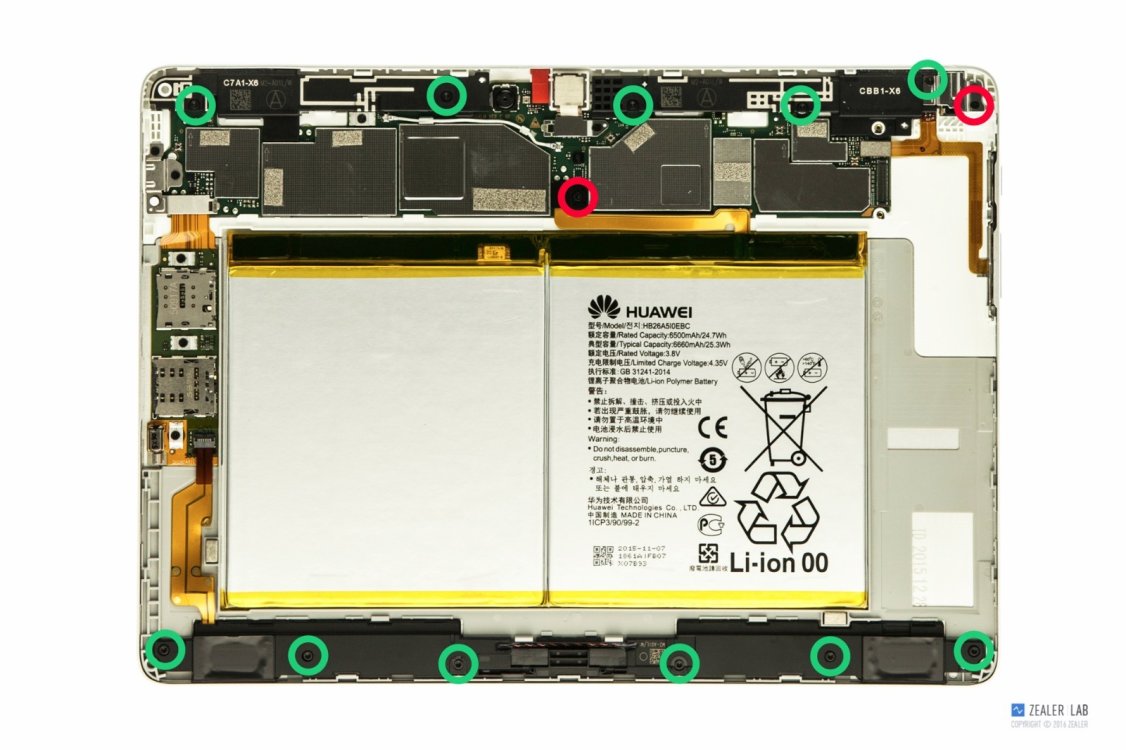
Two kinds of screws, red circle are Phillips screws, the green circle is Torx screws.
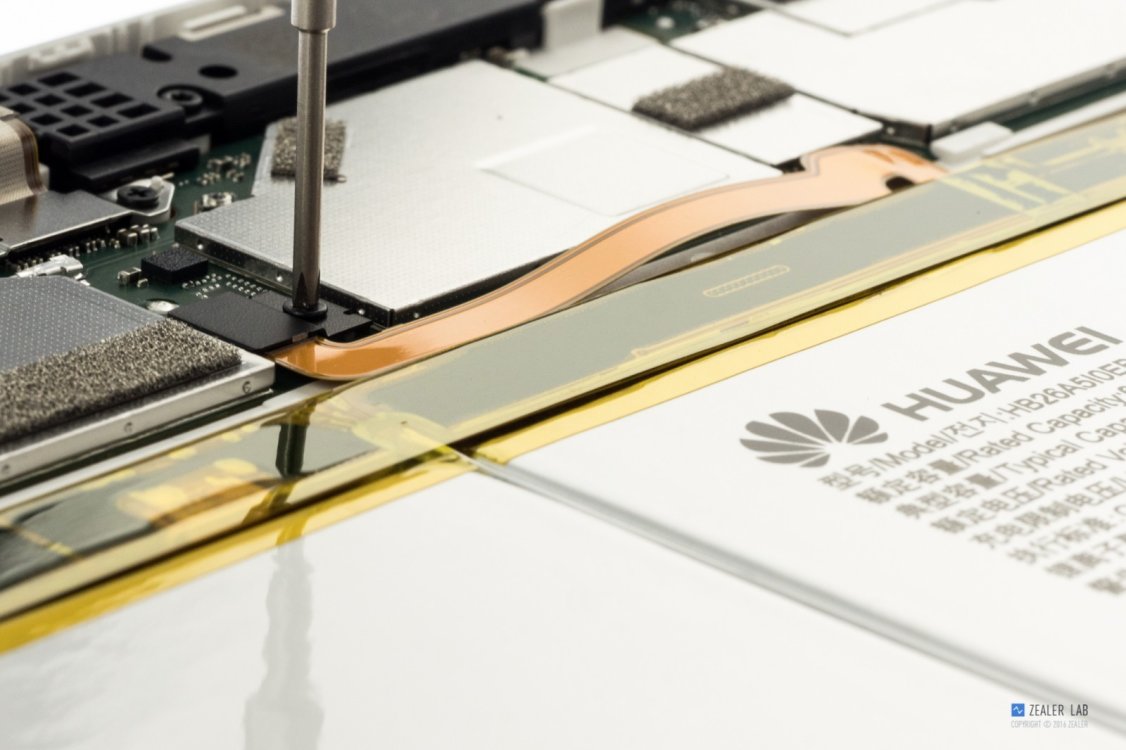
Remove the metal plate and disconnect the battery connector from the motherboard.
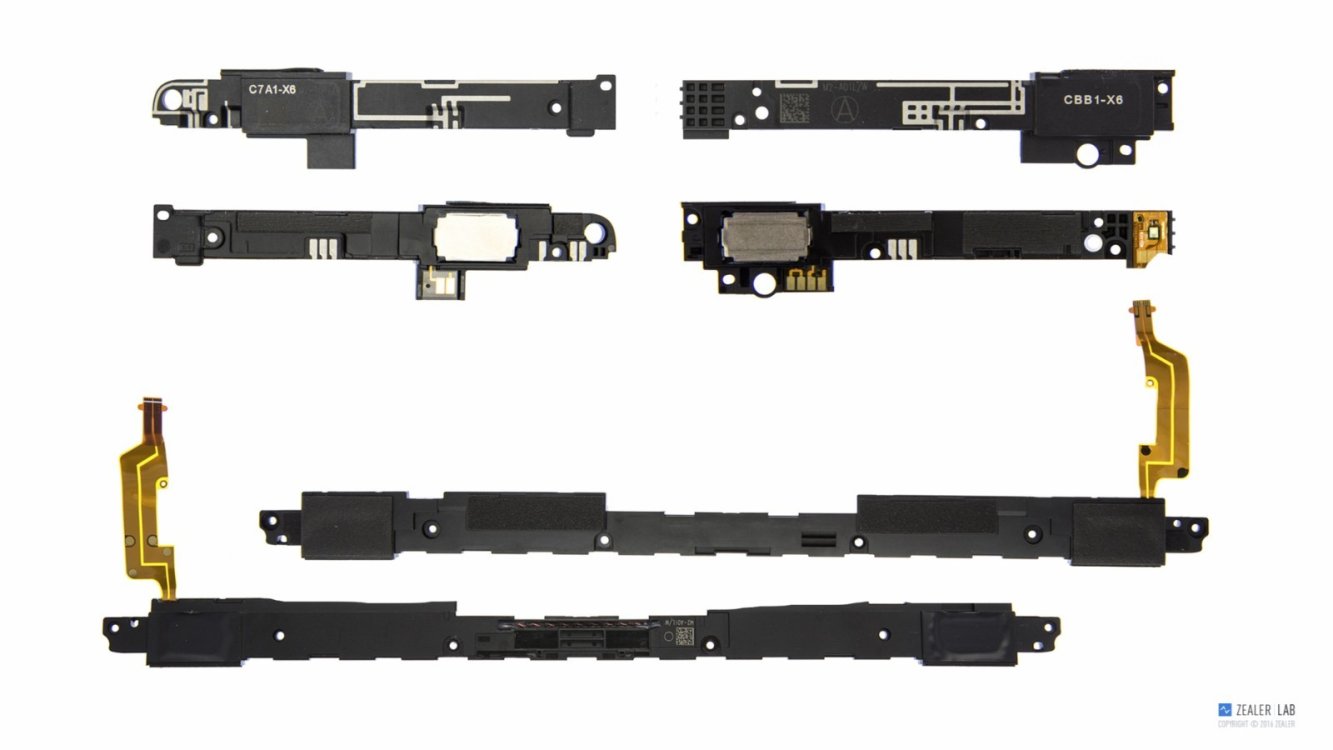
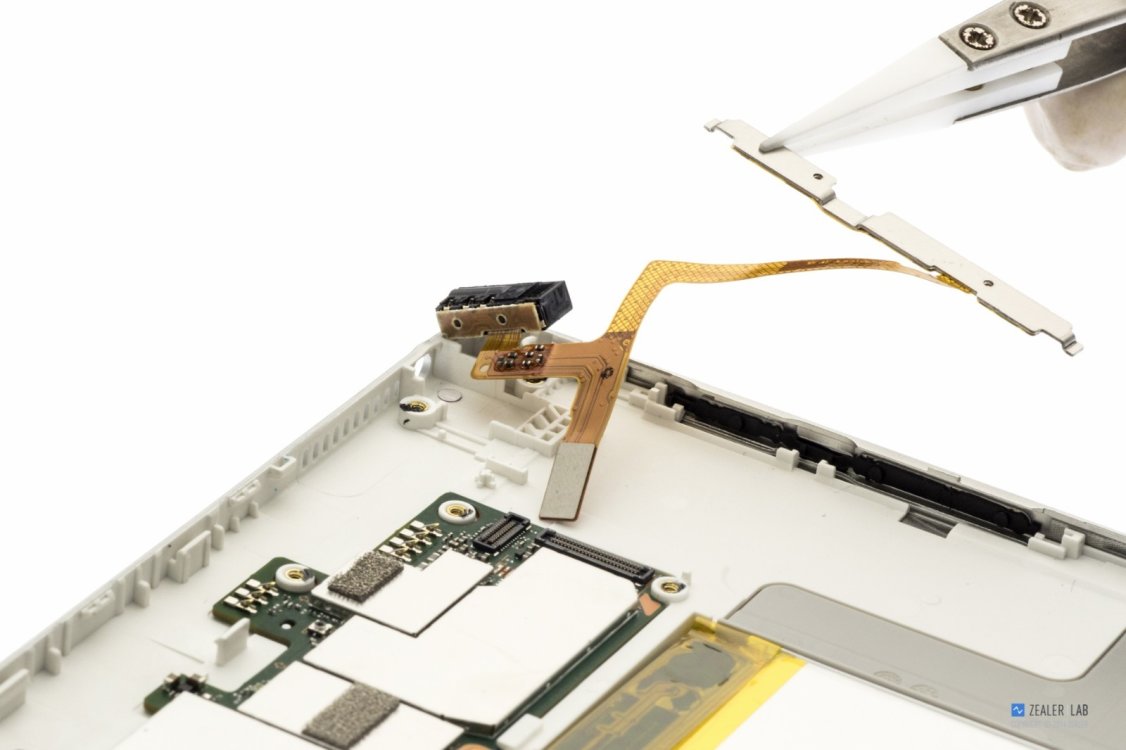
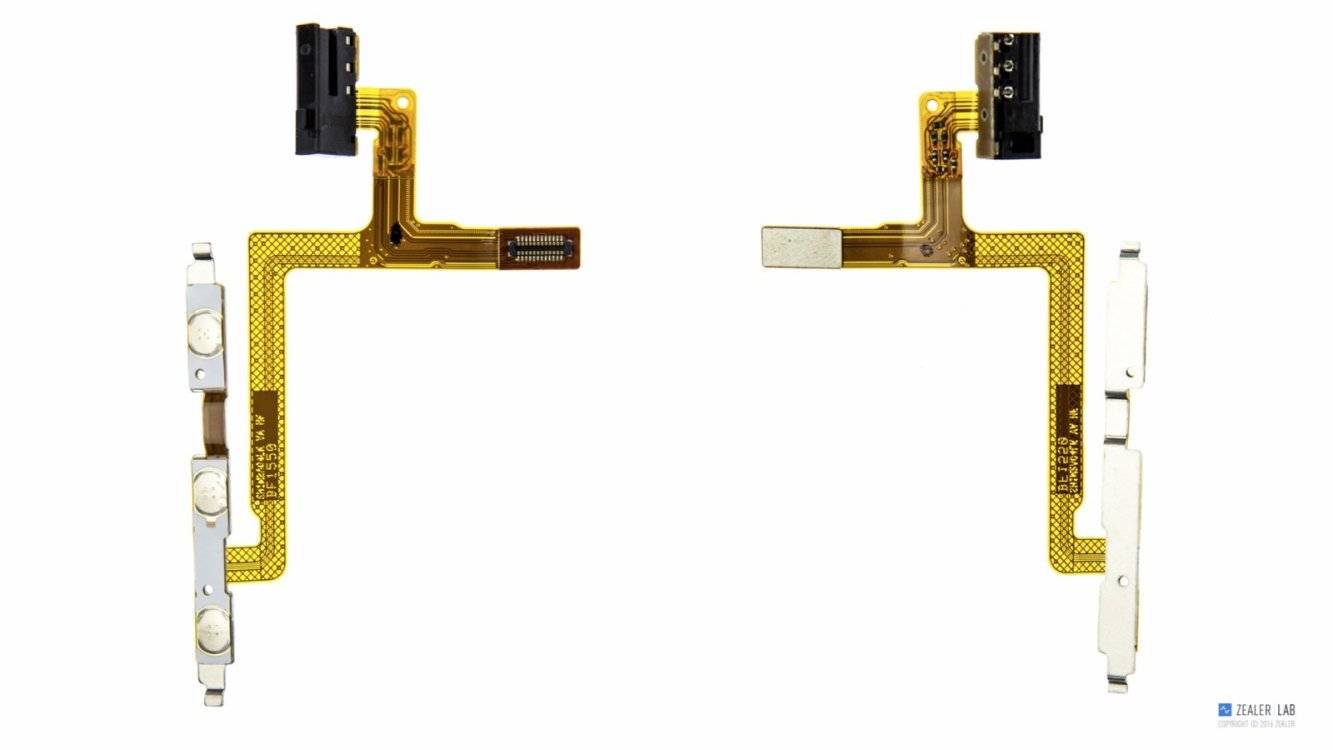
Pry up and remove the top speaker module.
Pry up and remove the bottom speaker module.
Here’re Huawei MediaPad M2 speaker modules.
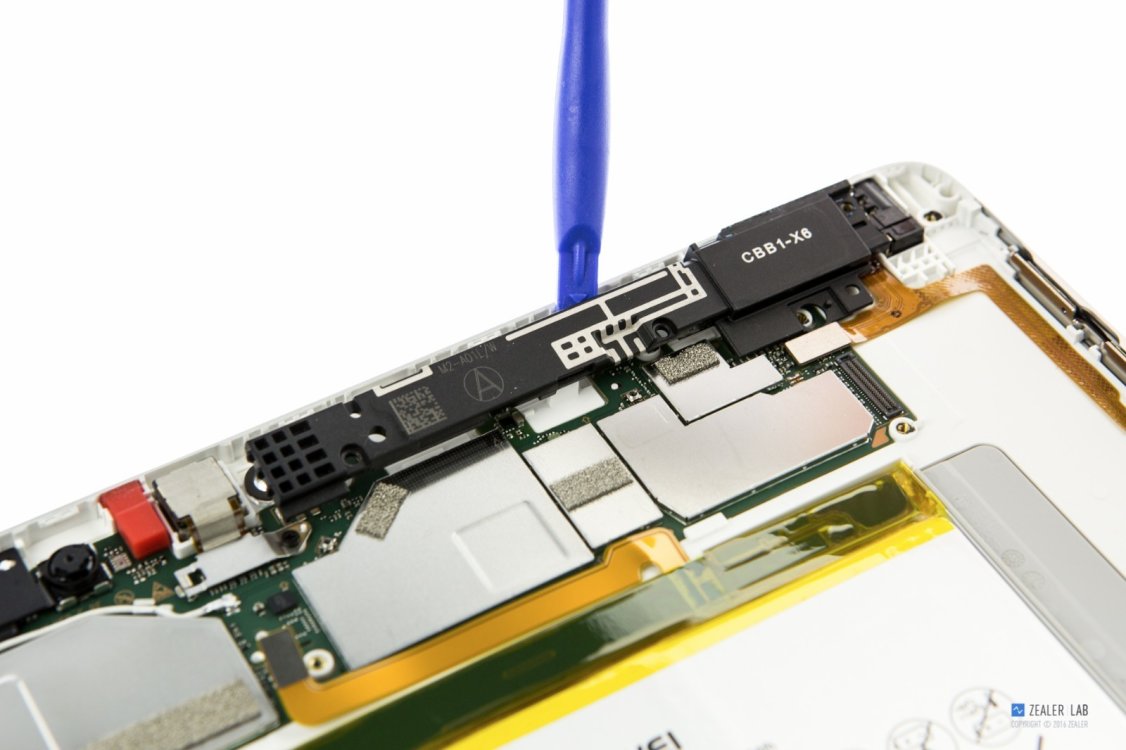
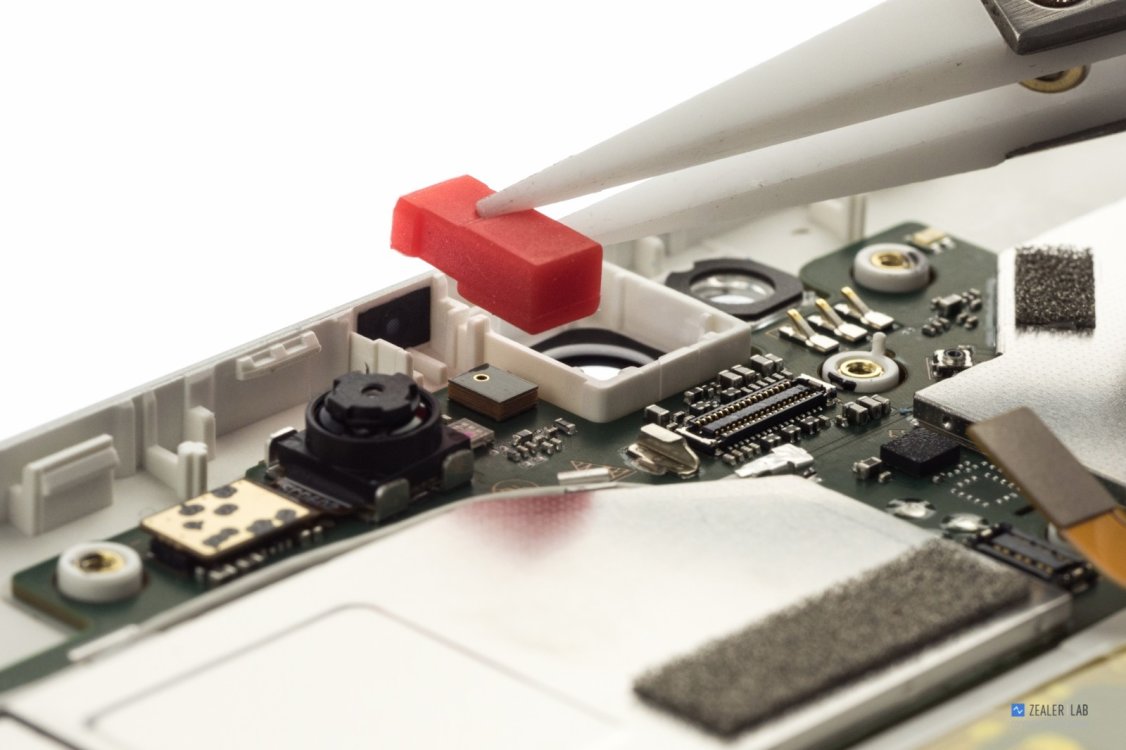
Remove the metal plate and disconnect the rear camera from the motherboard.
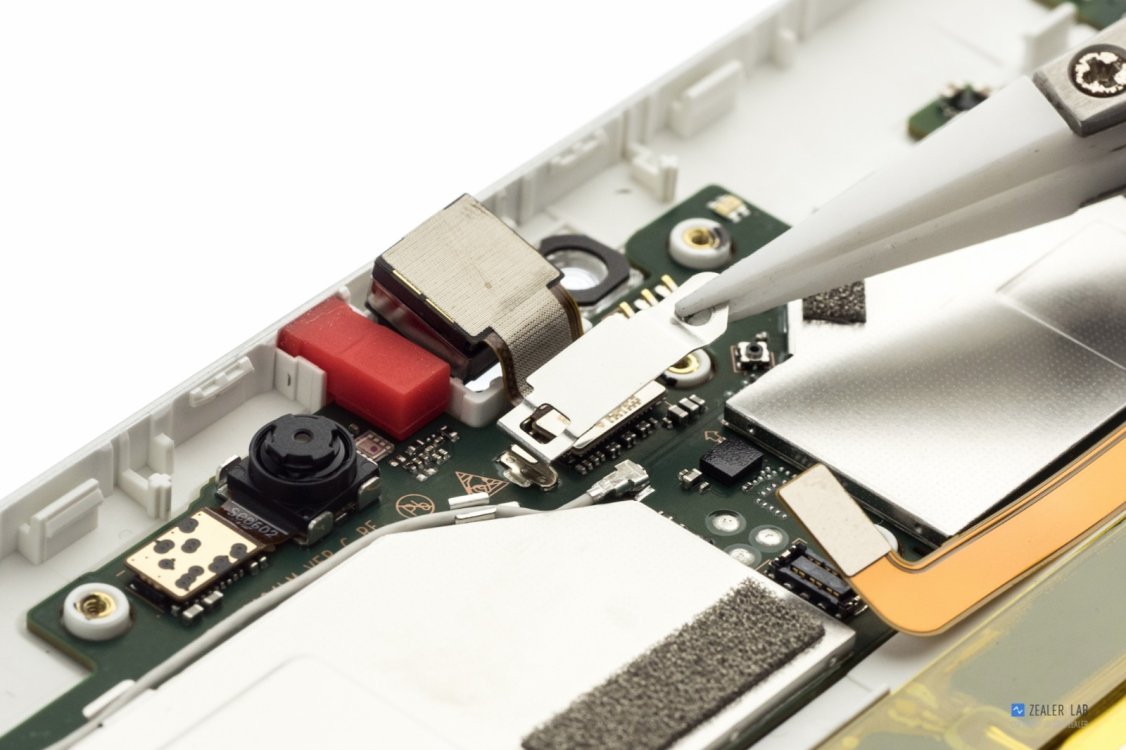
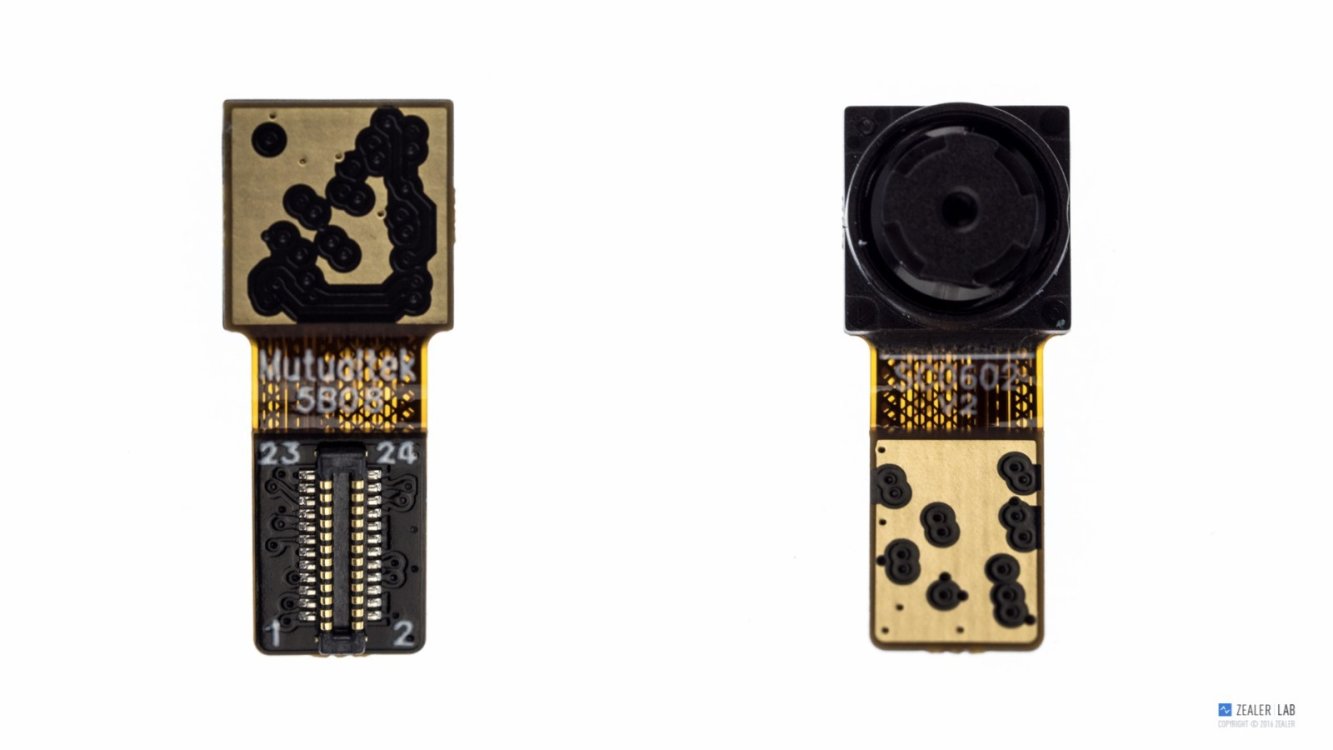
Rear camera: 13 million pixels, F / 2.0 aperture, 5 precision lenses, autofocus
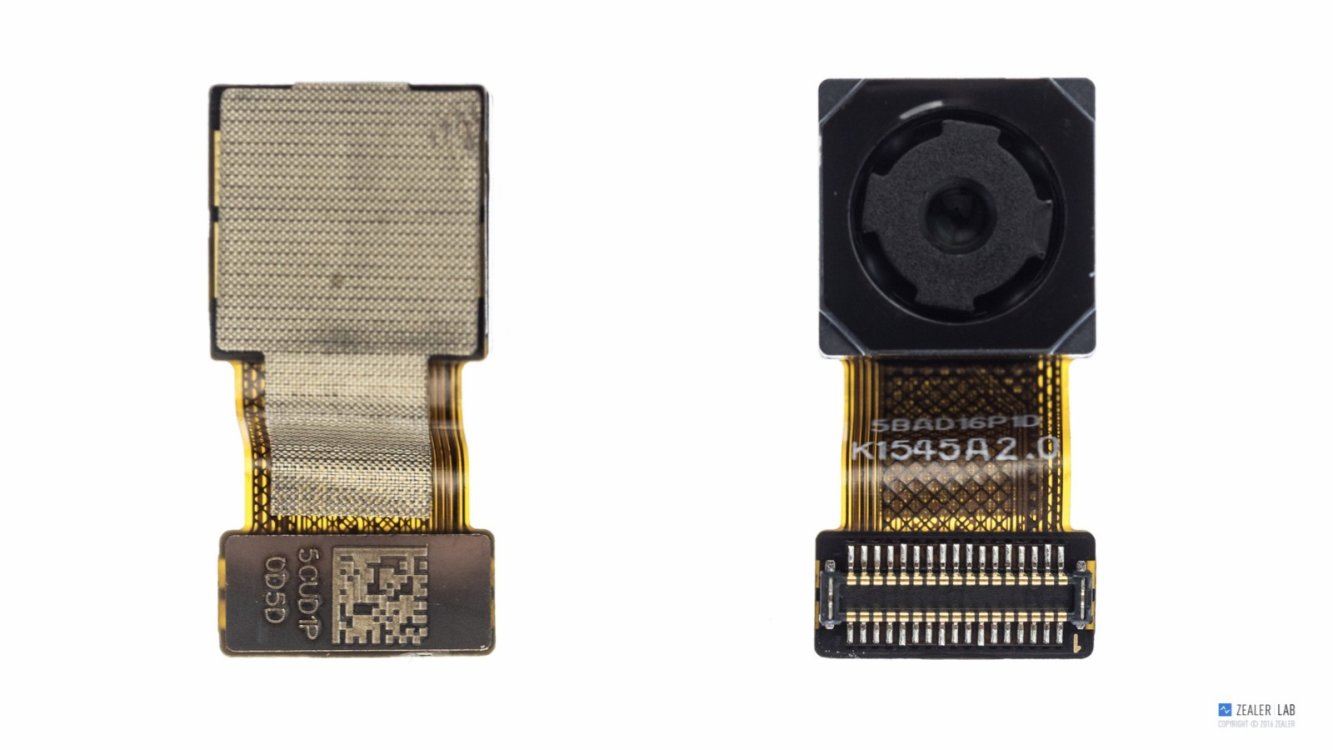
Front camera: 500 million pixels, F / 2.4 aperture, single pixel size 1.4 μm, fixed focus.
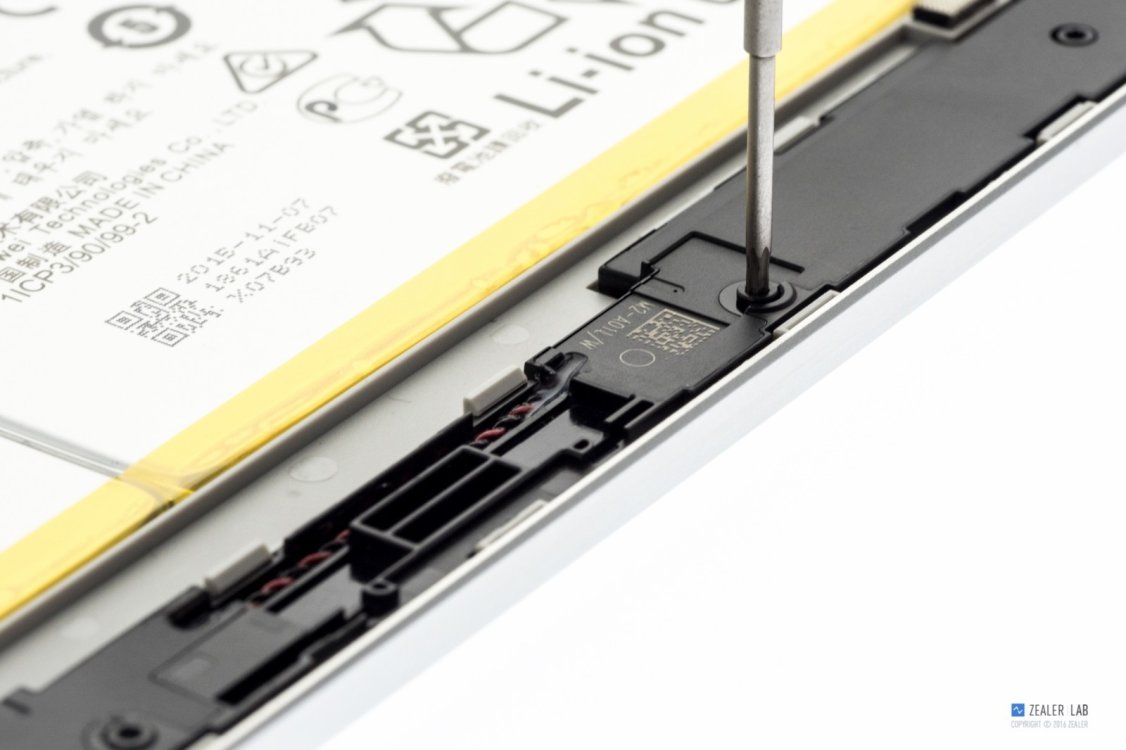
Remove the metal plate and three screws securing the SIM card tray board.
Remove the small board.

Remove the side key component.
Remove all screws securing the motherboard.

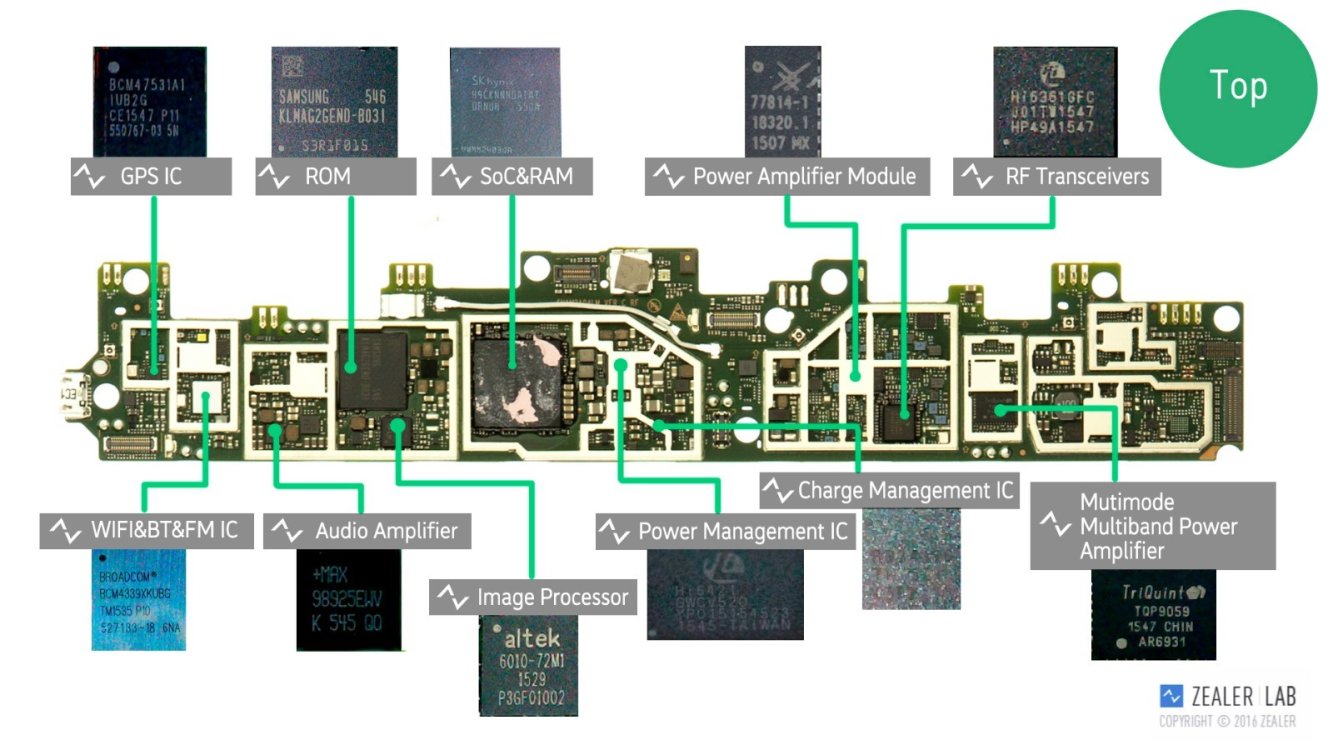
GPS IC: BROADCOM, BCM47531A1, Integrated Monolithic GPS、GLONASS、BeiDou and QZSS Receiver IC
WI-FI & BT & FM IC : BROADCOM, BCM4339XKUBG, TM1535 P10
Audio Amplifier: Maxim, MAX98925EWV, (2PCS), a high-efficiency mono Class DG audio amplifier featuring an integrated boost converter and ADCs for sensing speaker current, speaker voltage, and battery supply voltage
ROM: SAMSUNG, 546, KLMAG2GEND-B031, eMMC 5.0, 16GB
Image Processor: ALTEK, 6010-72M1,
SOC: HUAWEI Hisilicon 930, eight-core, 4*2.0GHz, 4*1.5GHz
RAM: SKhynix, H9CKNNNDATAT, DRNUH, 550A, LPDDR3, 3GB
Power Management IC: Hisilicon, Hi6421
Charge Management IC: TI, BQ24196, 2.5-A Single Cell USB / Adapter Charger with Narrow VDC Power Path Management and USB OTG
RF Transceivers: Hisilicon, Hi6361GFC, 001TW1547, HP49A1547
Power Amplifier Module: SKYWORKS, 77814-11, Power Amplifier Module for LTE FDD Band 7 (2500–2570 MHz) and Band 30 「2305–2315 MHz」 and LTE TDD Bands 38/41 「2496–2690 MHz」, Band 40 「2300–2400 MHz」 and AXGP Band 「2545–2575 MHz」
Multimode Multiband Power Amplifier Module: TriQuint, TQP9059, multimode multiband Power Amplifier Module, WCDMA/HSDPA/HSUPA/HSPA / LTE QB GMSK EDGE B34, B39 TD-SCDMA, TD-LTE BC0, BC1 CDMA2000
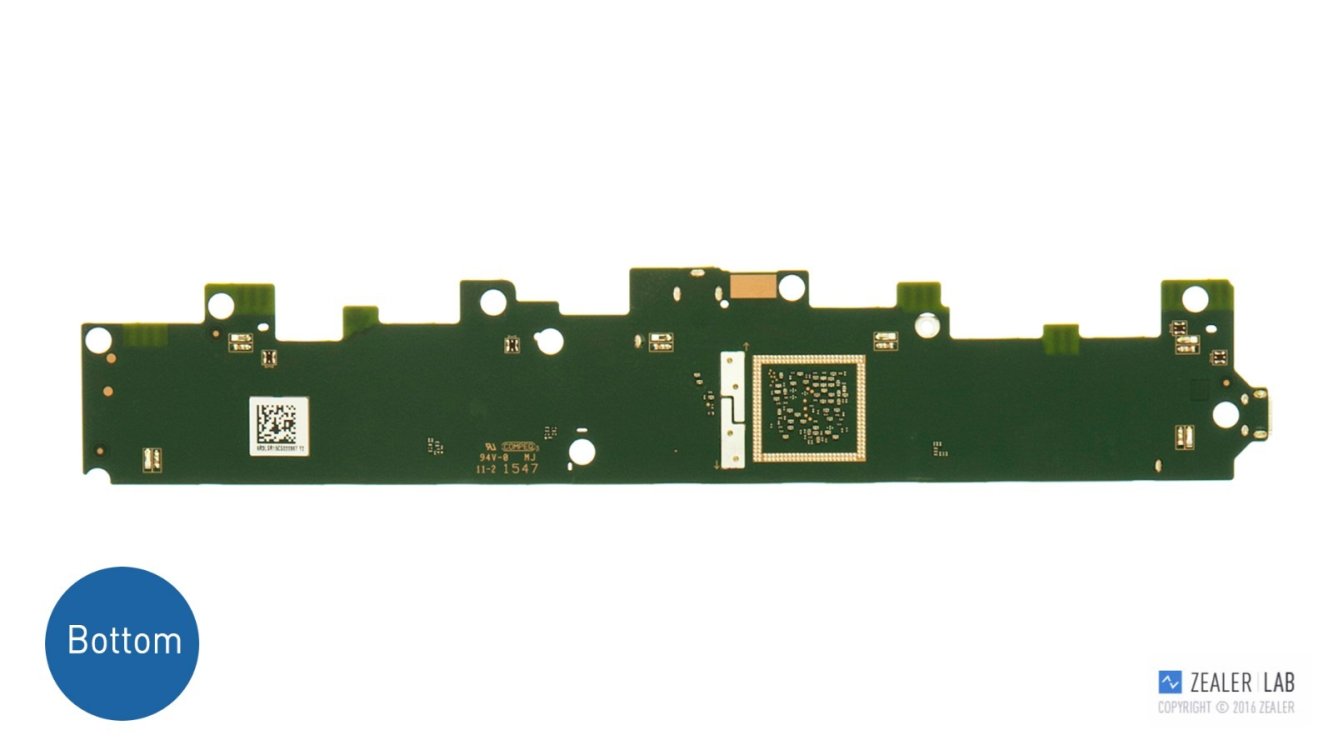
The back side of the motherboard
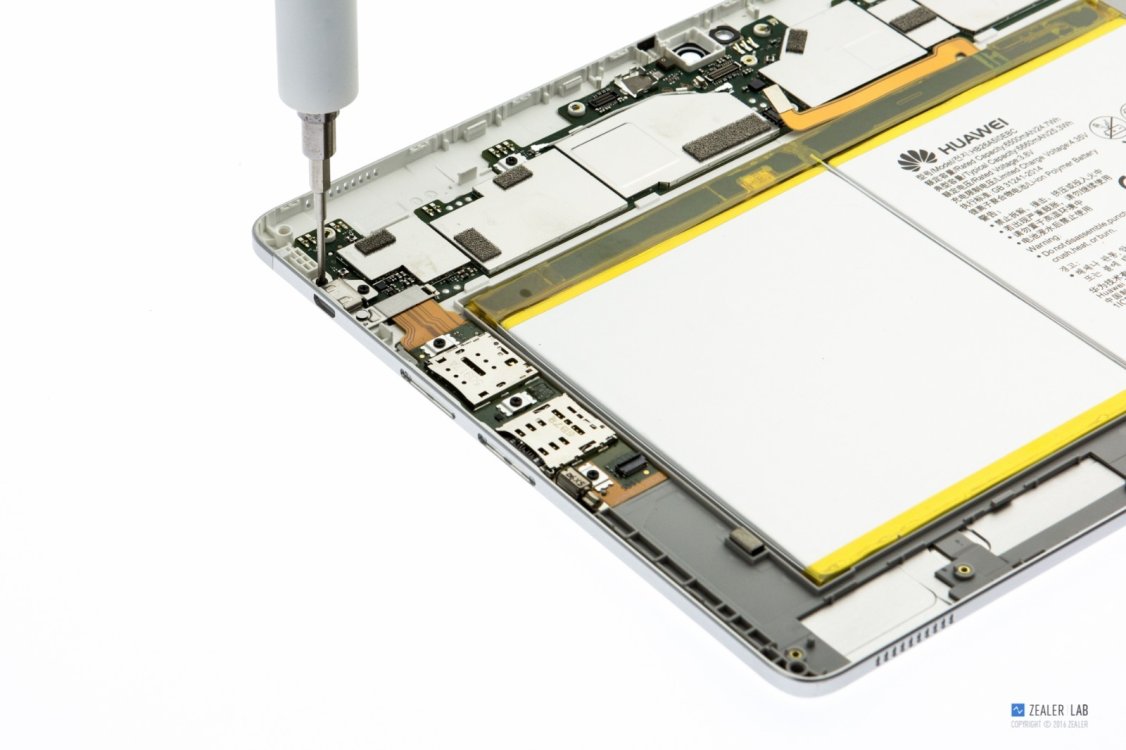
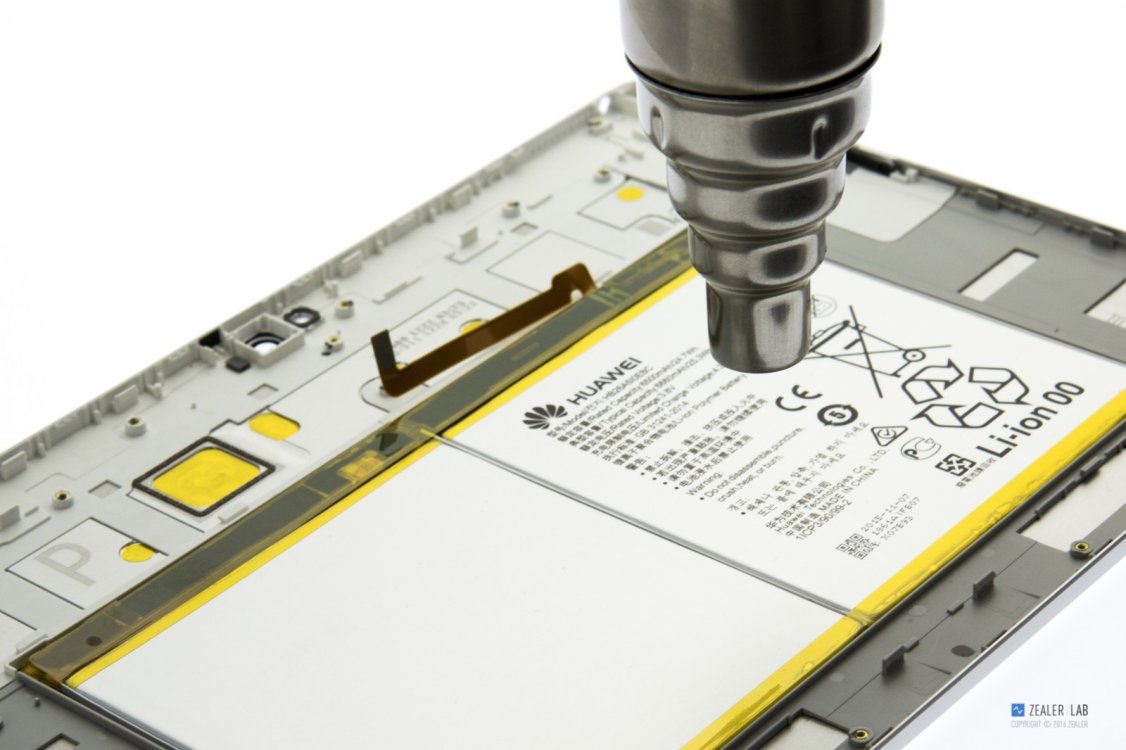
Heat up the battery with a heat gun about five minutes.
Pry up and remove the battery.
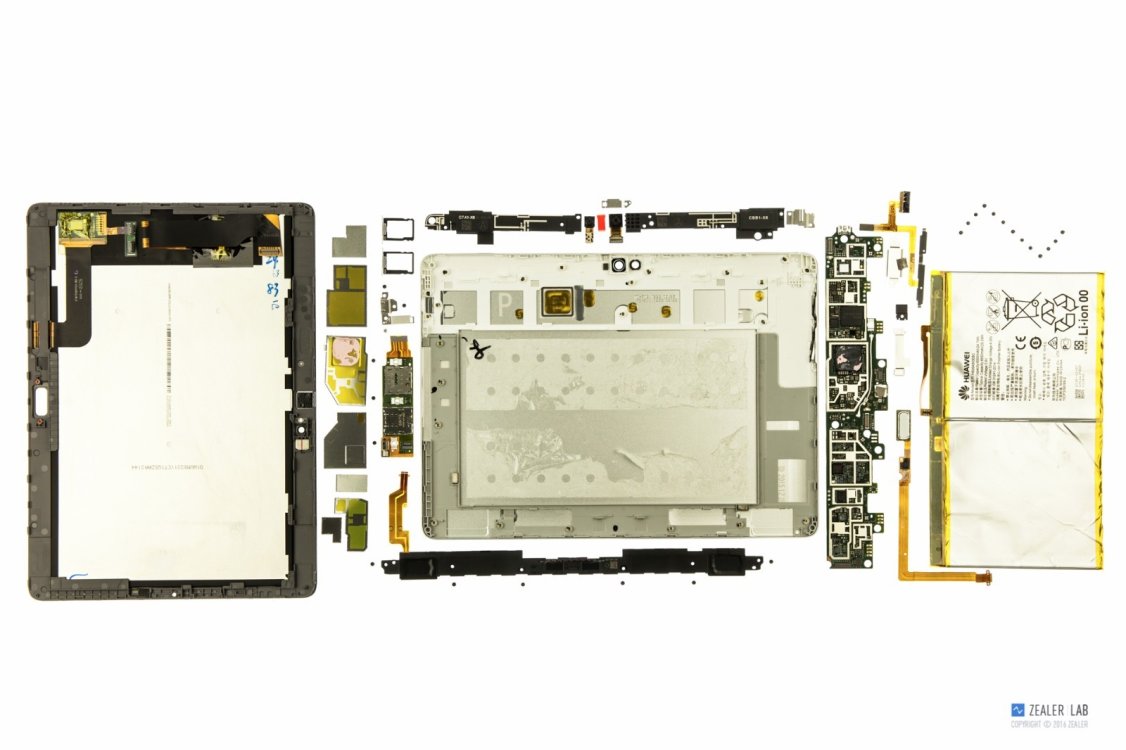
Lithium-ion polymer battery with ATL cells, the charging voltage of 4.35V,
Rated Capacity: 6500mAh / 24.7Wh (MIN);
Typical capacity: 6660mAh / 25.3Wh (TYPE).

Source: zealer


