The MSI GL62 offers great gaming performance at a lower price point. The 6th generation Skylake i5-6200HQ processor offers great performance, while the Samsung DDR4 RAM runs up to 30% faster than its predecessors. The 8GB of RAM will run most software and games, and it can cheaply and easily be upgraded to 16GB as only one slot is in use. While the hard drive offers enough space for modern gaming and usage, the slower hard drive speed does hurt its overall performance. Upgrading the hard drive and RAM requires the removal of the entire bottom cover, which is easily done and worth the extra bit of effort. As a bonus, MSI allows for an m.2 SSD to be installed alongside the standard 2.5-inch drive.
Looking for more guides from laptopmain.com? Follow us on Facebook for all the latest repair news.
Remove one screw securing the optical drive. Pull the optical drive to the left to remove it from the laptop.
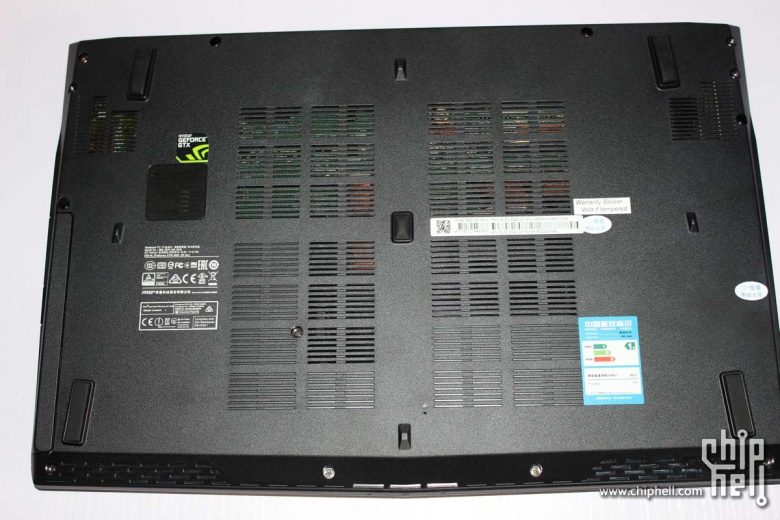
Remove all screws securing the bottom case. You also need to remove three screws in the optical drive.
Pry up and remove the bottom case.
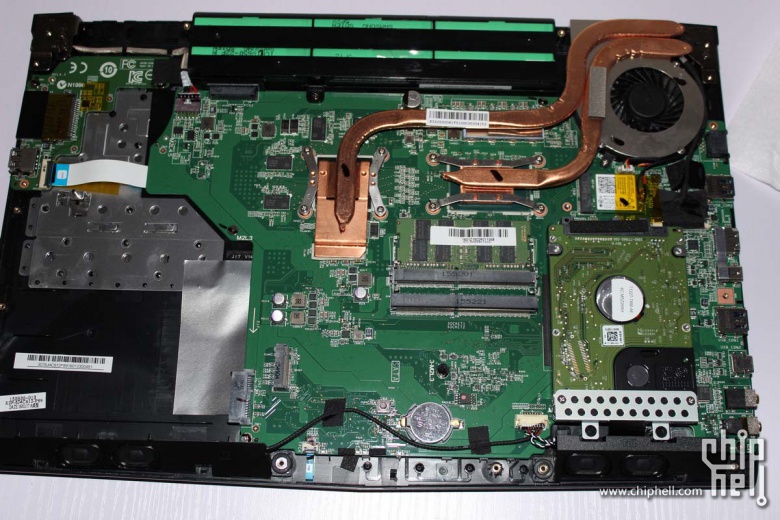
Under the case, you will be able to access the hard drive, RAM, M.2 slot, speaker, cooling fan and motherboard.
Here’s 1TB 7200RPM HDD.

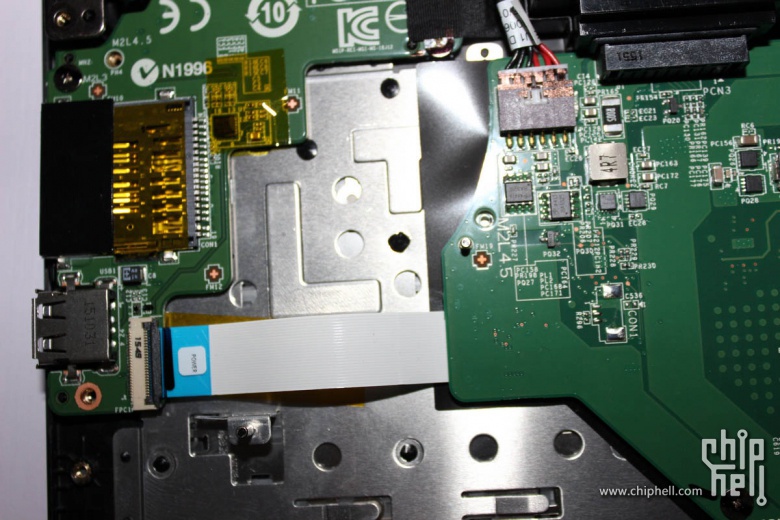
Here’s the USB board.
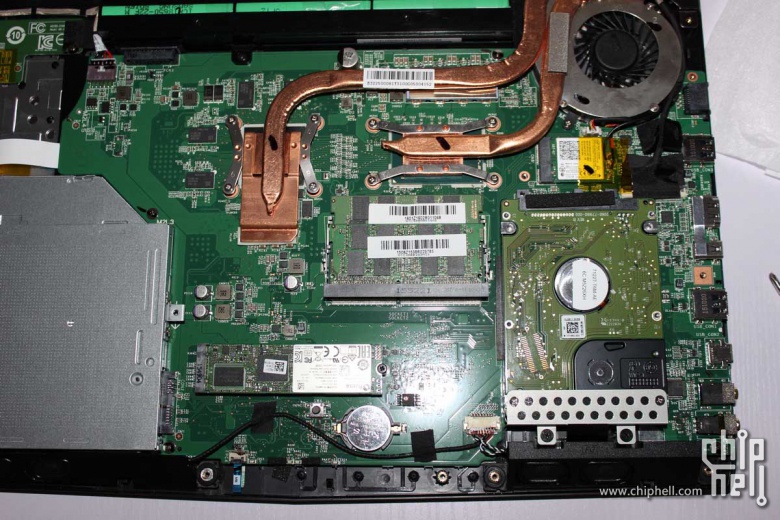
Installed the Plextor 128GB SSD to the M.2 slot.
Installed the Hynix 8GB DDR4 RAM to the second RAM slot.


Laptop is impossible to pry open because audio ports stick out of he laptop. As I was prying it open the audio ports and another port (unknown to me) was coming up with it and realized I might’ve been damaging it. Could you possibly help me? I don’t know what to do about the audio ports and would like to upgrade my ram.
i had the exact same issue david. i brought it in to a guy that thankfully could do it in no time, but the only thing you need to do is use a guitar pic and pry the plastic cover away from the audio ports and pull and it should pop out. also if you think something looks bent up like i thought i did he showed me it was only the mount holding the usb to the mother board everything vital is fine
What type of screwdriver for the 3 screw on the optical drive? Plz reply asap
Any small instrument screwdriver with X tip will do the job, the three screws on the bottom case where the optical drive slot is, have extremely flat heads and you will not need excessive force to unscrew them. They do not support any weight.