In this guide, I will disassemble a Razer Blade 15 2018. I will remove the bottom case in order to access the battery, SSD, Wi-Fi card, RAM, cooling fan, speaker, heatsink, and motherboard.
We have disassembled the Razer Blade 14 2017 and the Razer Blade Stealth a few months ago.
I believe that you, like me, choose the Razer Blade 15 2018, in order to pursue the ultimate, whether it is performance, appearance, battery life, heat dissipation, portable, I hope that the Razer Blade 15 is the best. This new mold, Razer design is good enough to blur the boundaries between the game laptop and the ultrabook, to ensure the ultimate performance and relatively good heat dissipation. However, there are still some places. For us, it is possible to make some changes and let the Razer Blade 15 become more strong. The following is the most detailed introduction in several aspects. I believe you just follow me step by step. You can successfully disassemble it and upgrade hardware.
1. Razer Blade 15 supports self-upgrade. The warranty is still available after disassembling. So don’t worry about it.
2. Tools required: multiple models of screwdrivers, JKcrv-t5 (removed back cover), JKcrv + 2.0 (removed laptop inside parts)
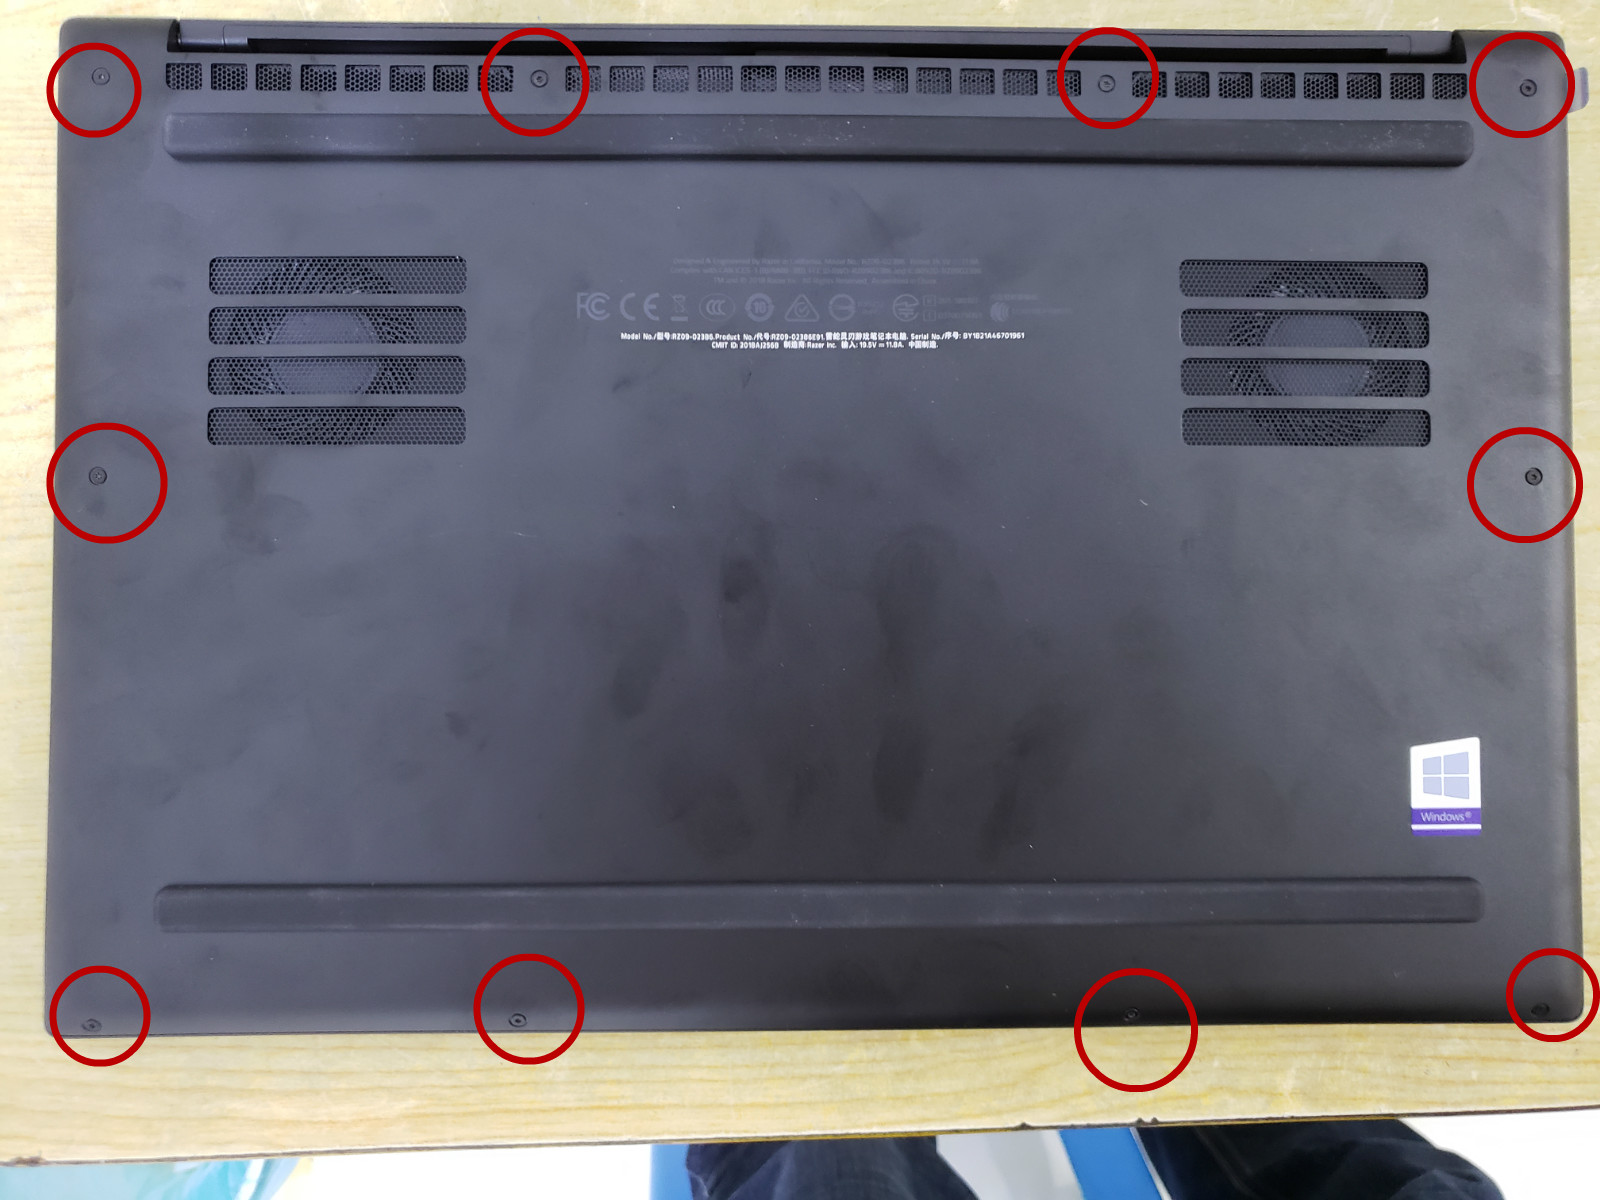
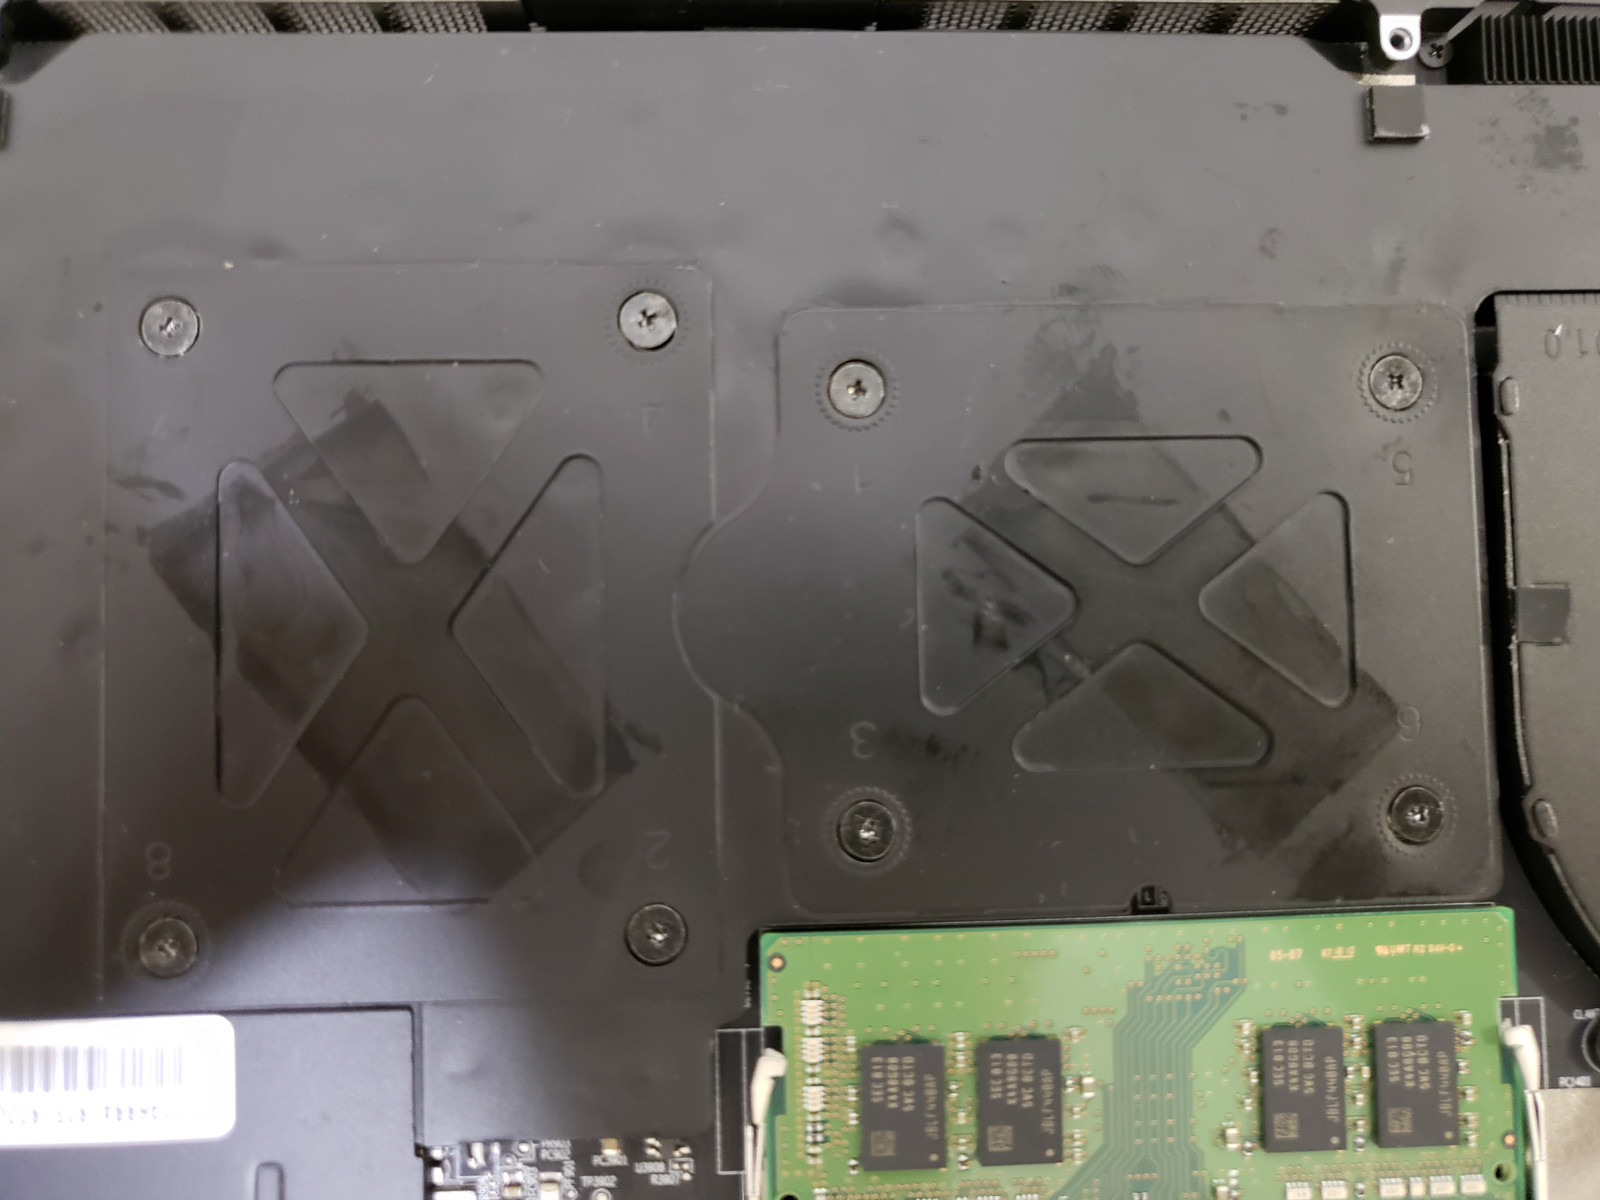
First, remove the ten screws on the back cover with a T5 screwdriver, then you can easily remove the back cover because there are no latches on the back cover.
In order not to damage the hardware, you need to disconnect the battery connector from the motherboard before you touch the internal components with your hands.
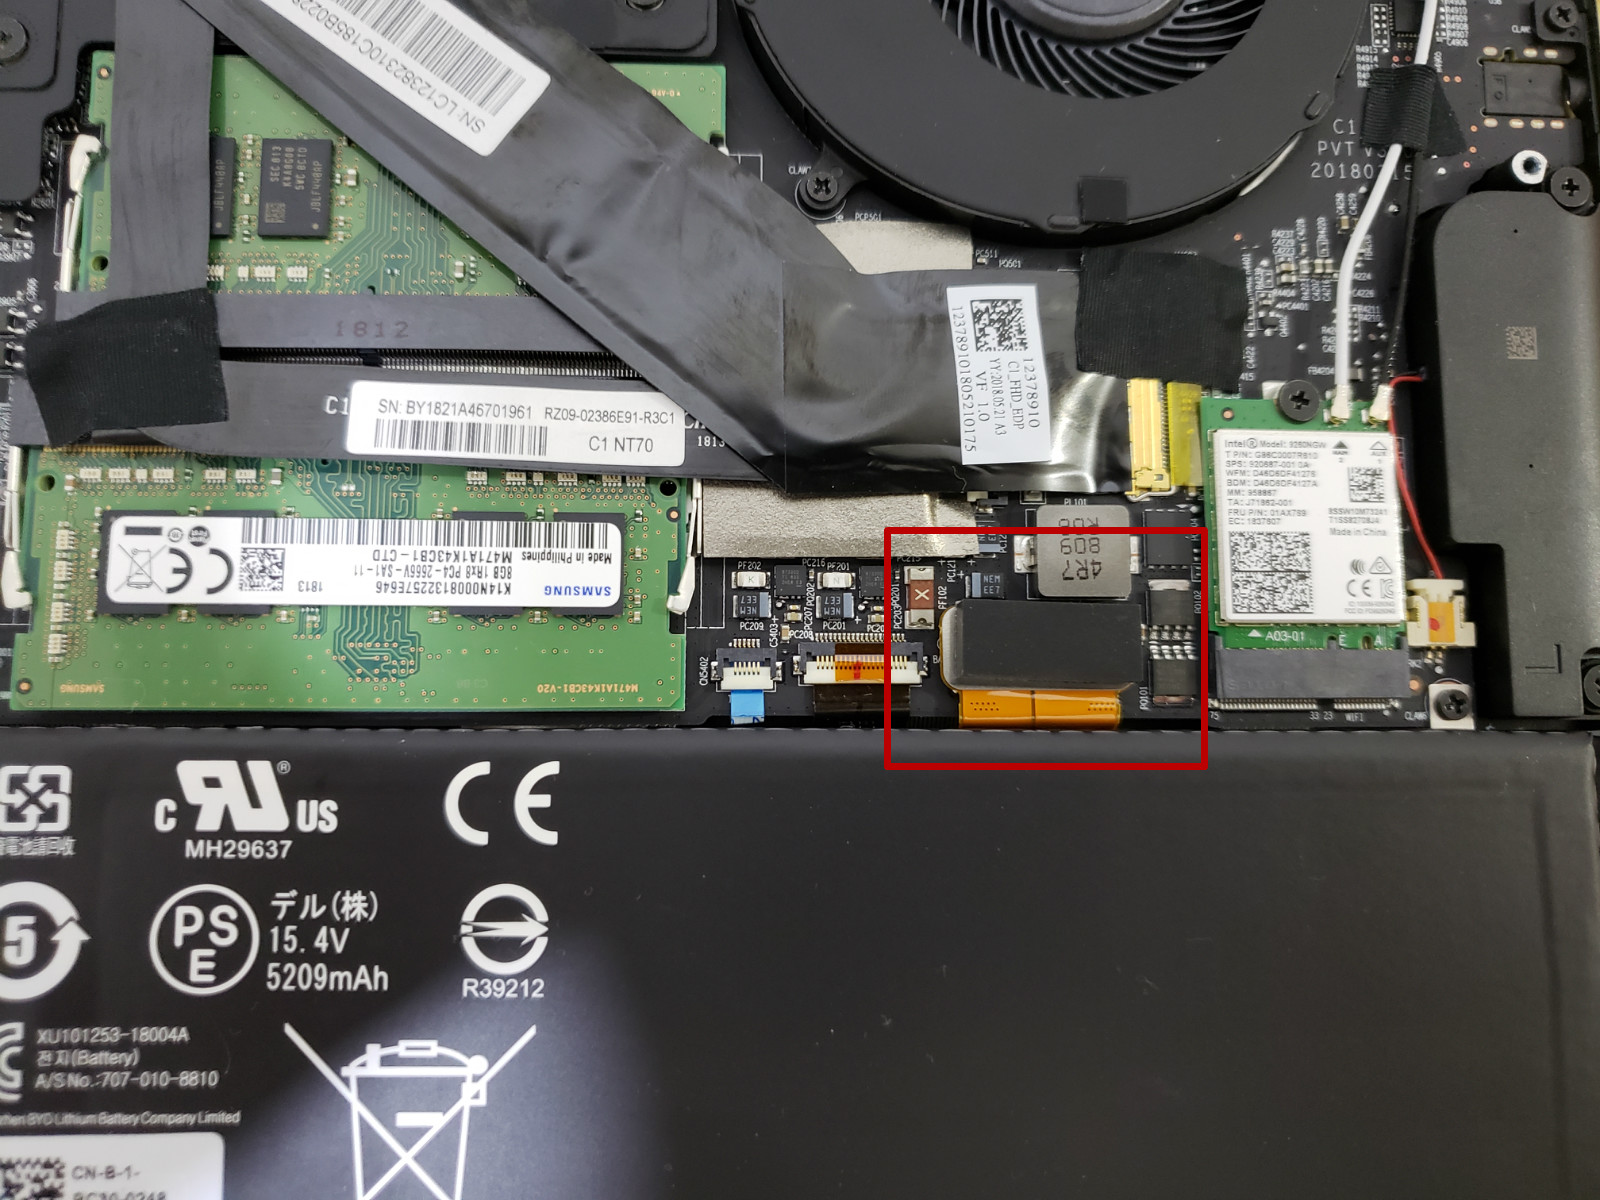
After disconnecting the battery cable, we can start to remove the internal components.
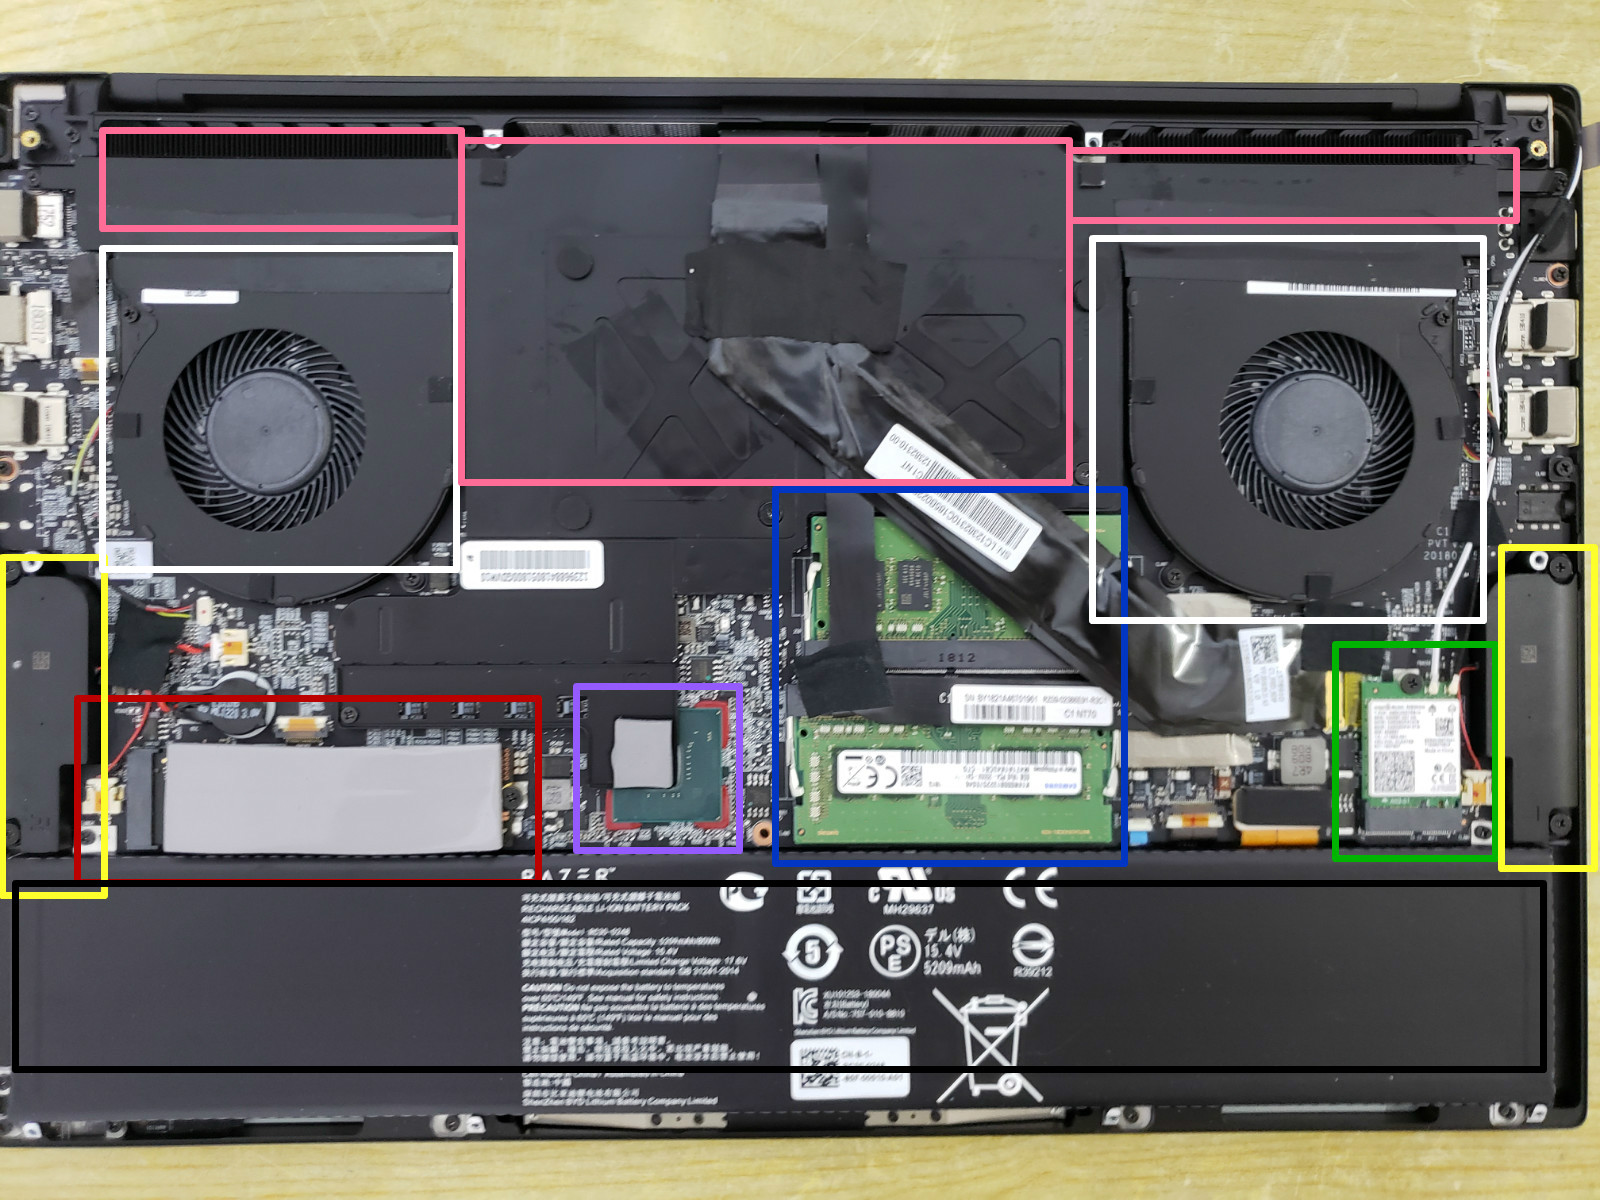
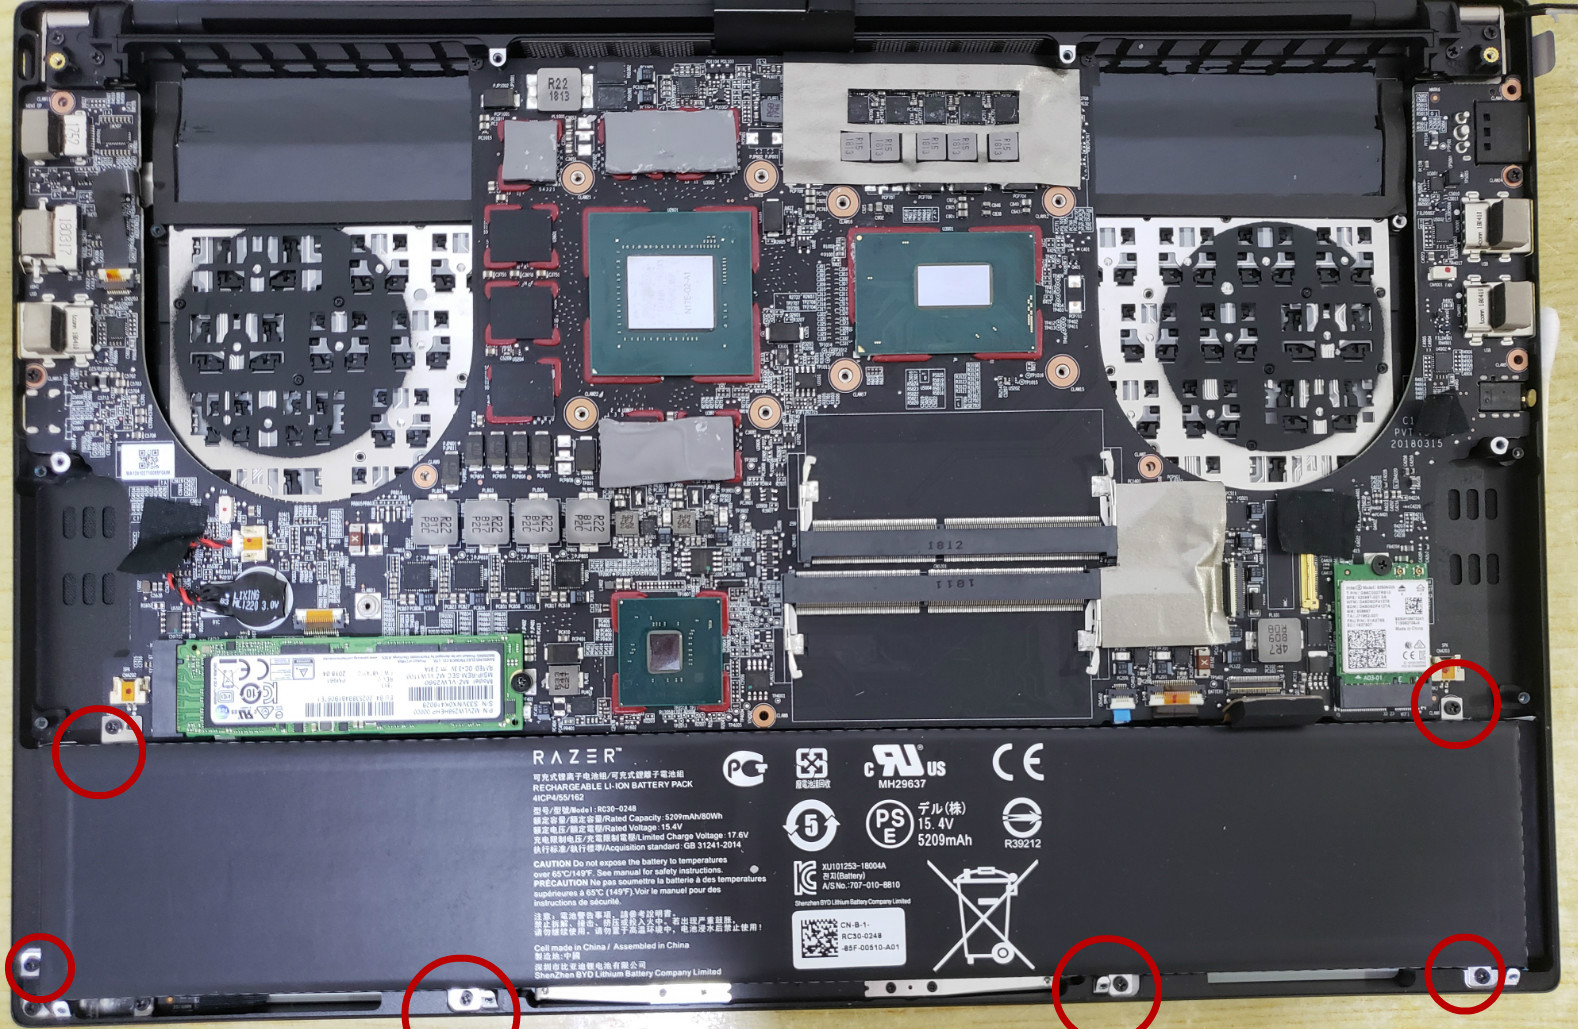
As shown in the picture, from top to bottom, from left to right, white is two fans, pink is the heatsink, yellow is the speaker, red is the M.2 SSD, purple is the south bridge chip, blue is the memory, green is wireless network cards, black is the battery.
Remove a screw that secures the SSD and removes the SSD.

This laptop is equipped with a 256GB Samsung PM961 M.2 SSD that supports the NVMe protocol.

After opening the back cover, you need to disconnect the LCD cable and the logo light cable to replace the memory.
Uncover the tape that securing the LCD cable. Pay attention to the uniform force when uncovering, and slowly uncover it, so as not to loosen the small capacitor below because of too much force.
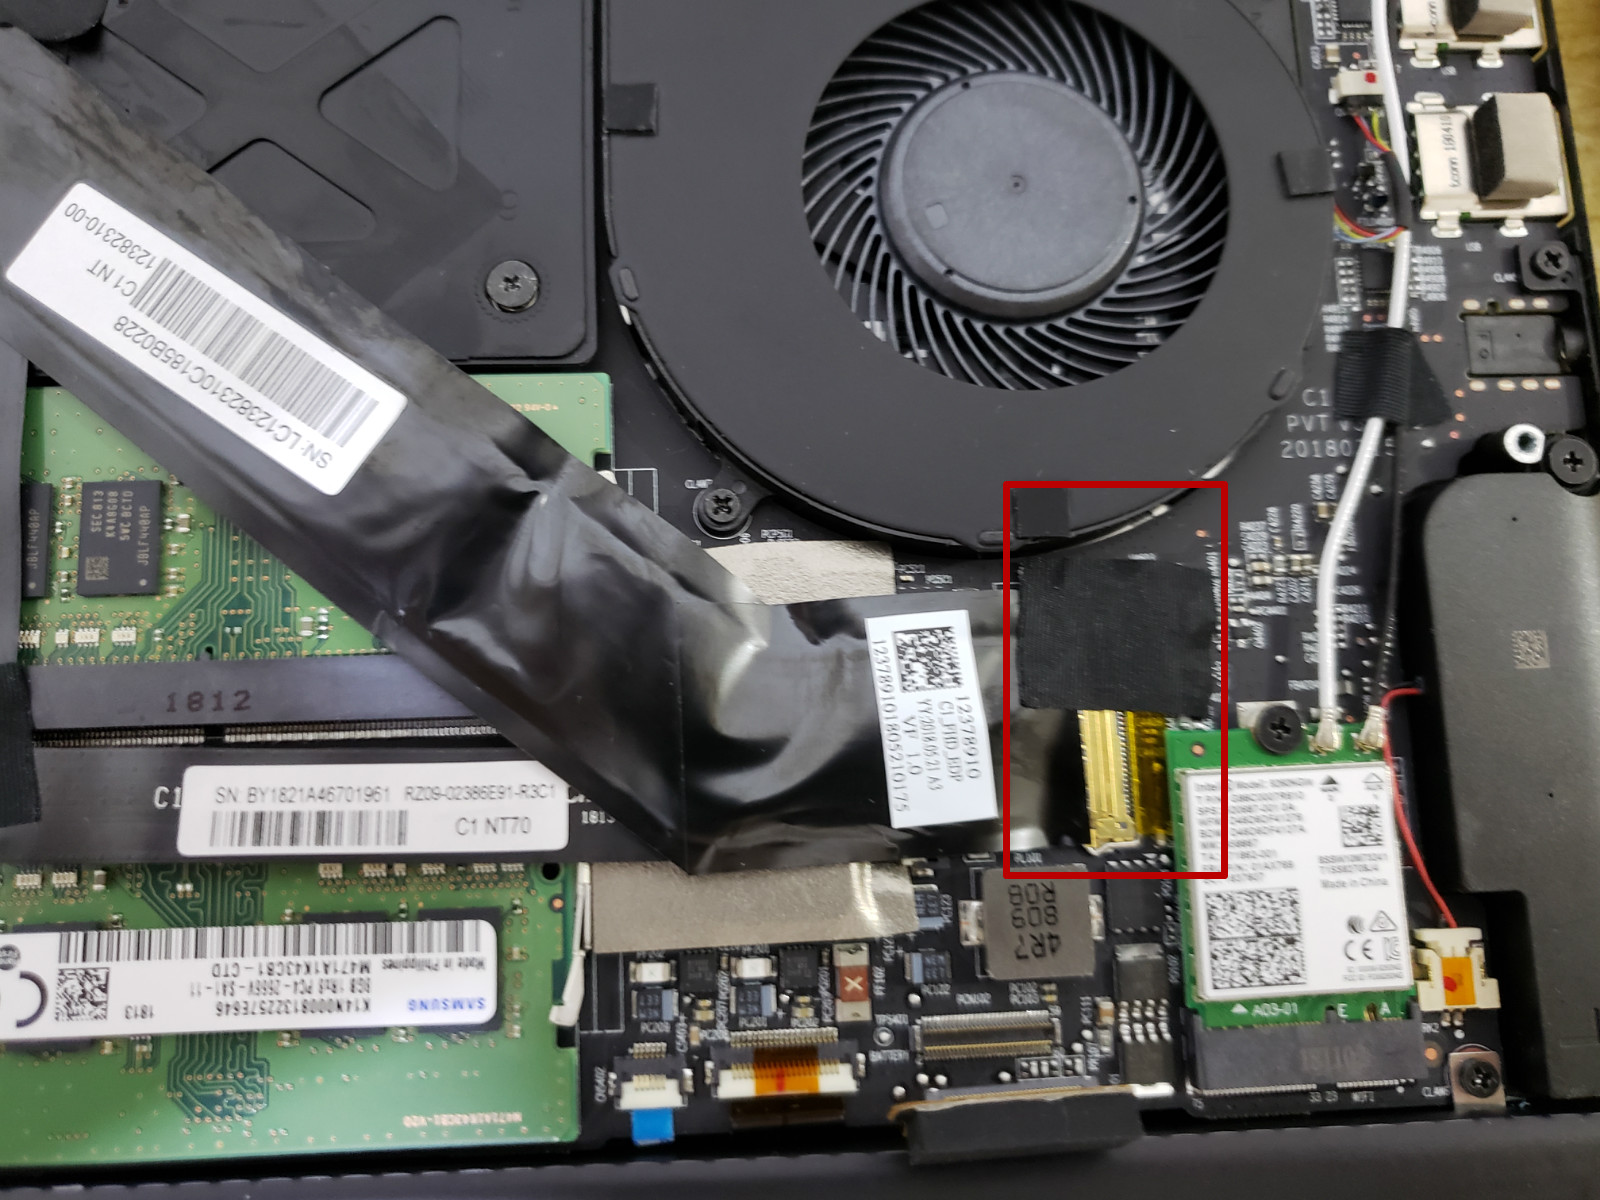
Next, disconnect the LOGO LED light cable from the motherboard.
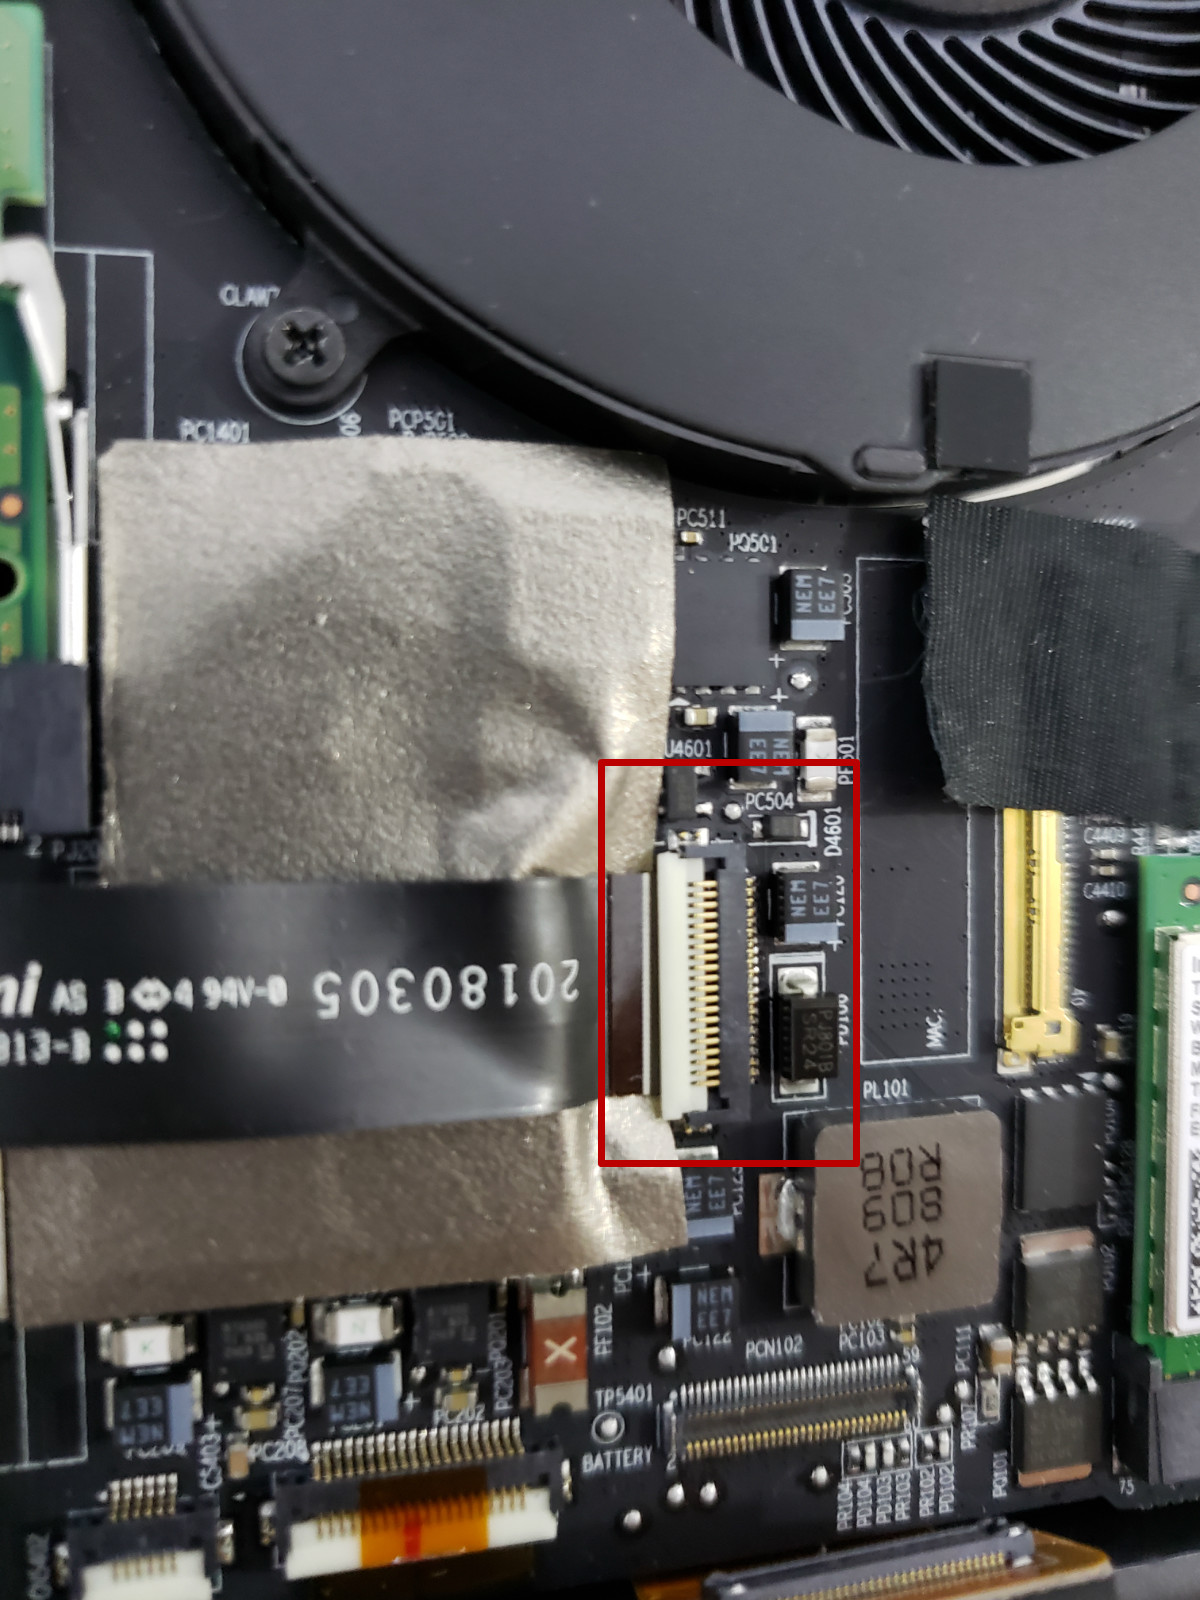
Then you need to uncover several tapes that secure the cable on the memory.
The method of fixing the cable with tape seems to be very unprofessional. We have disassembled several Razer notebooks and can see a lot of tape inside it.

Next, the memory is completely exposed, you can replace the memory, separate metal buckle with fingers to both sides, memory strip will automatically pop up, you can replace it.
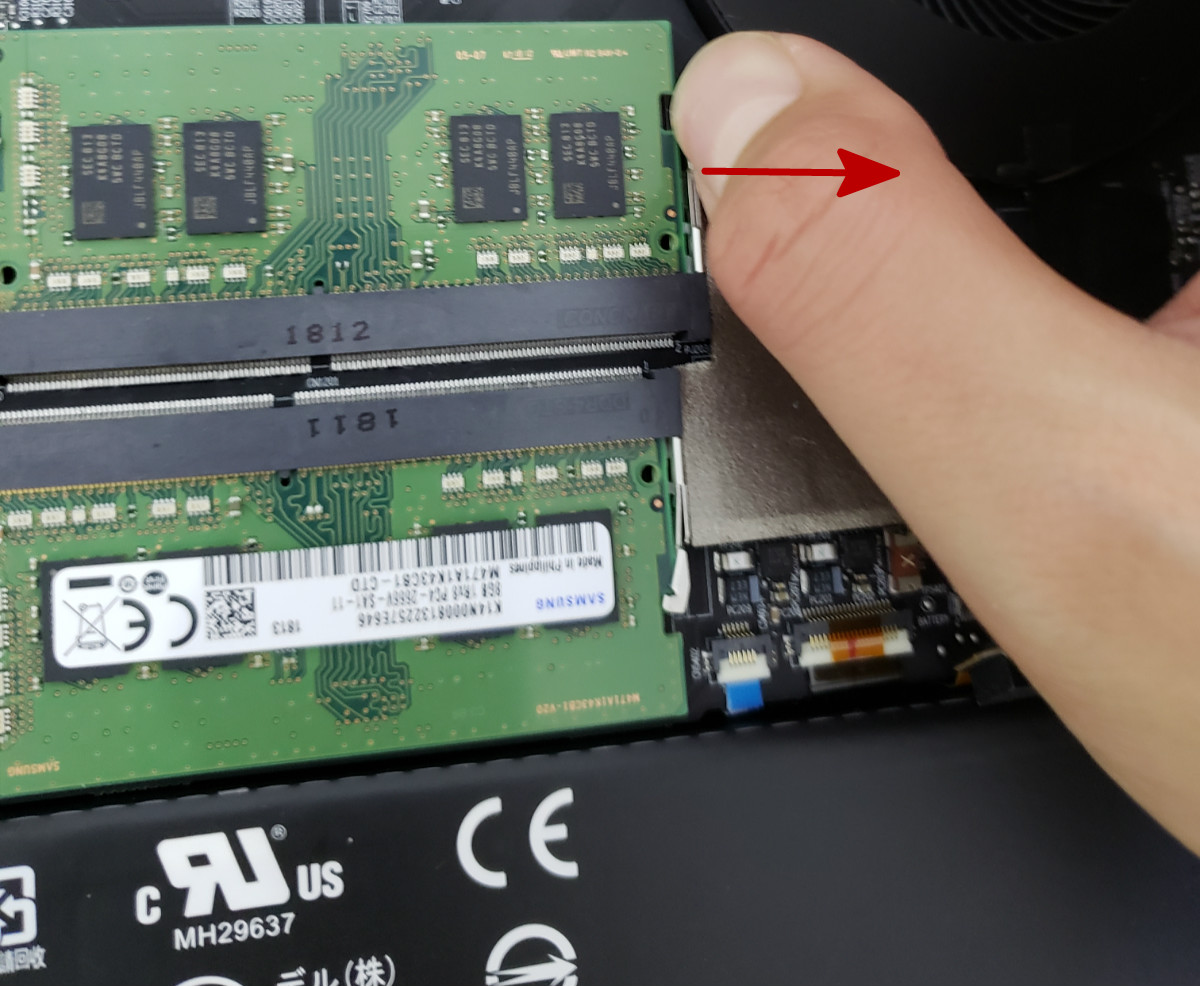
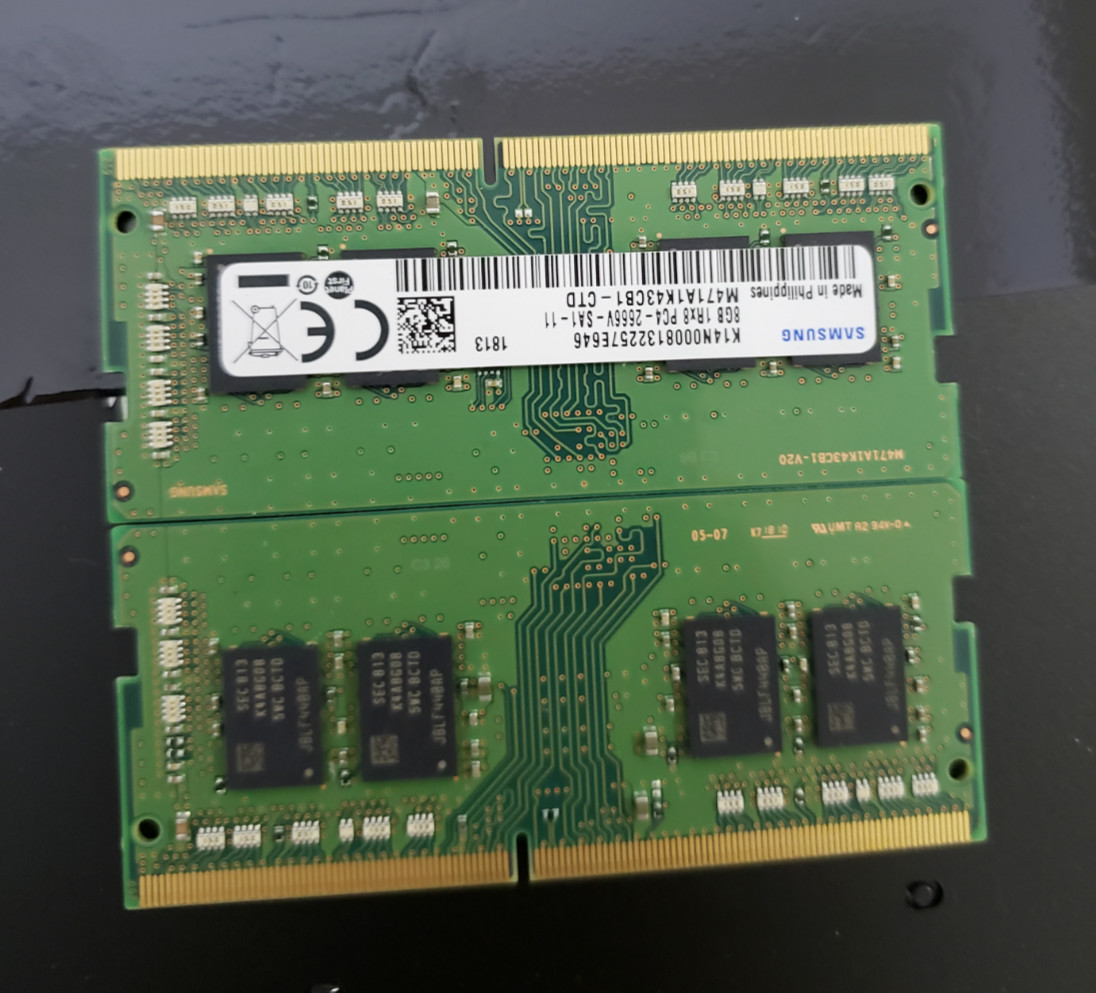
It comes with two Samsung 8GB DDR4 2666 RAM.
Remove all screws that secure the heat sink.
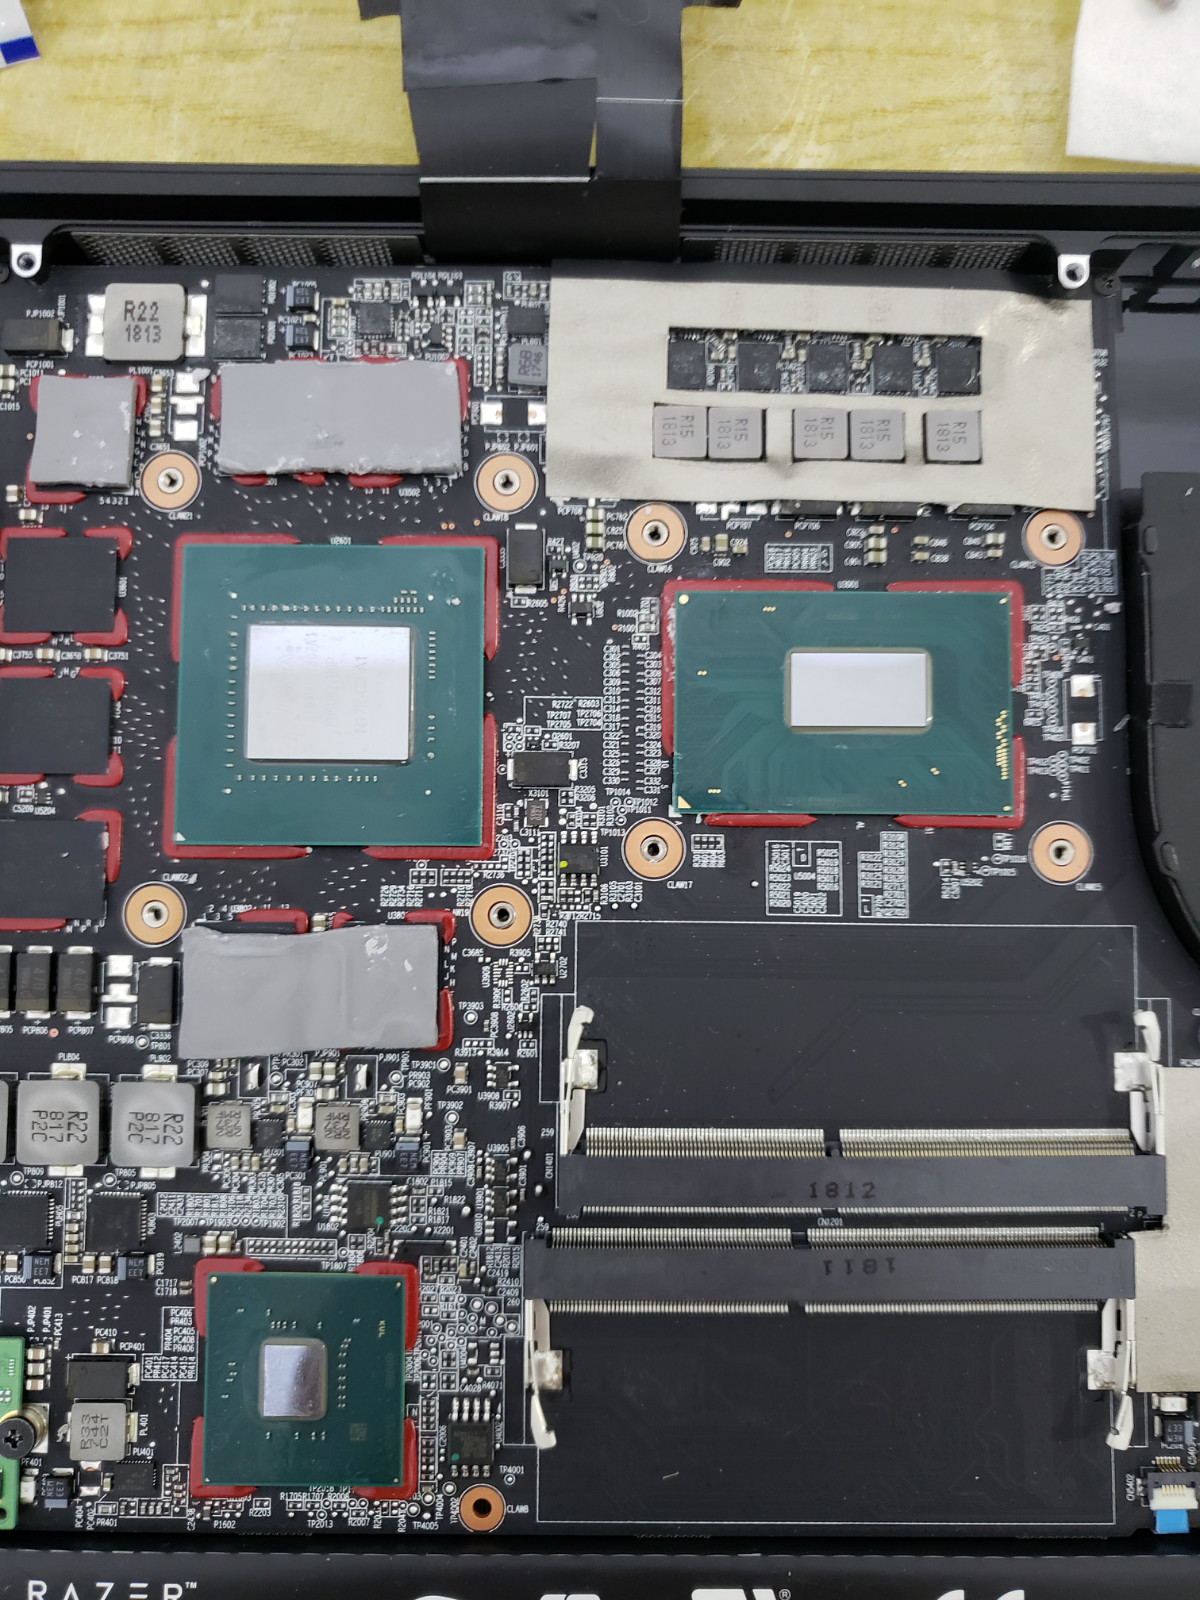
Under the heatsink, you can access the CPU and GPU, as well as the CPU power supply chip and GPU memory chip.
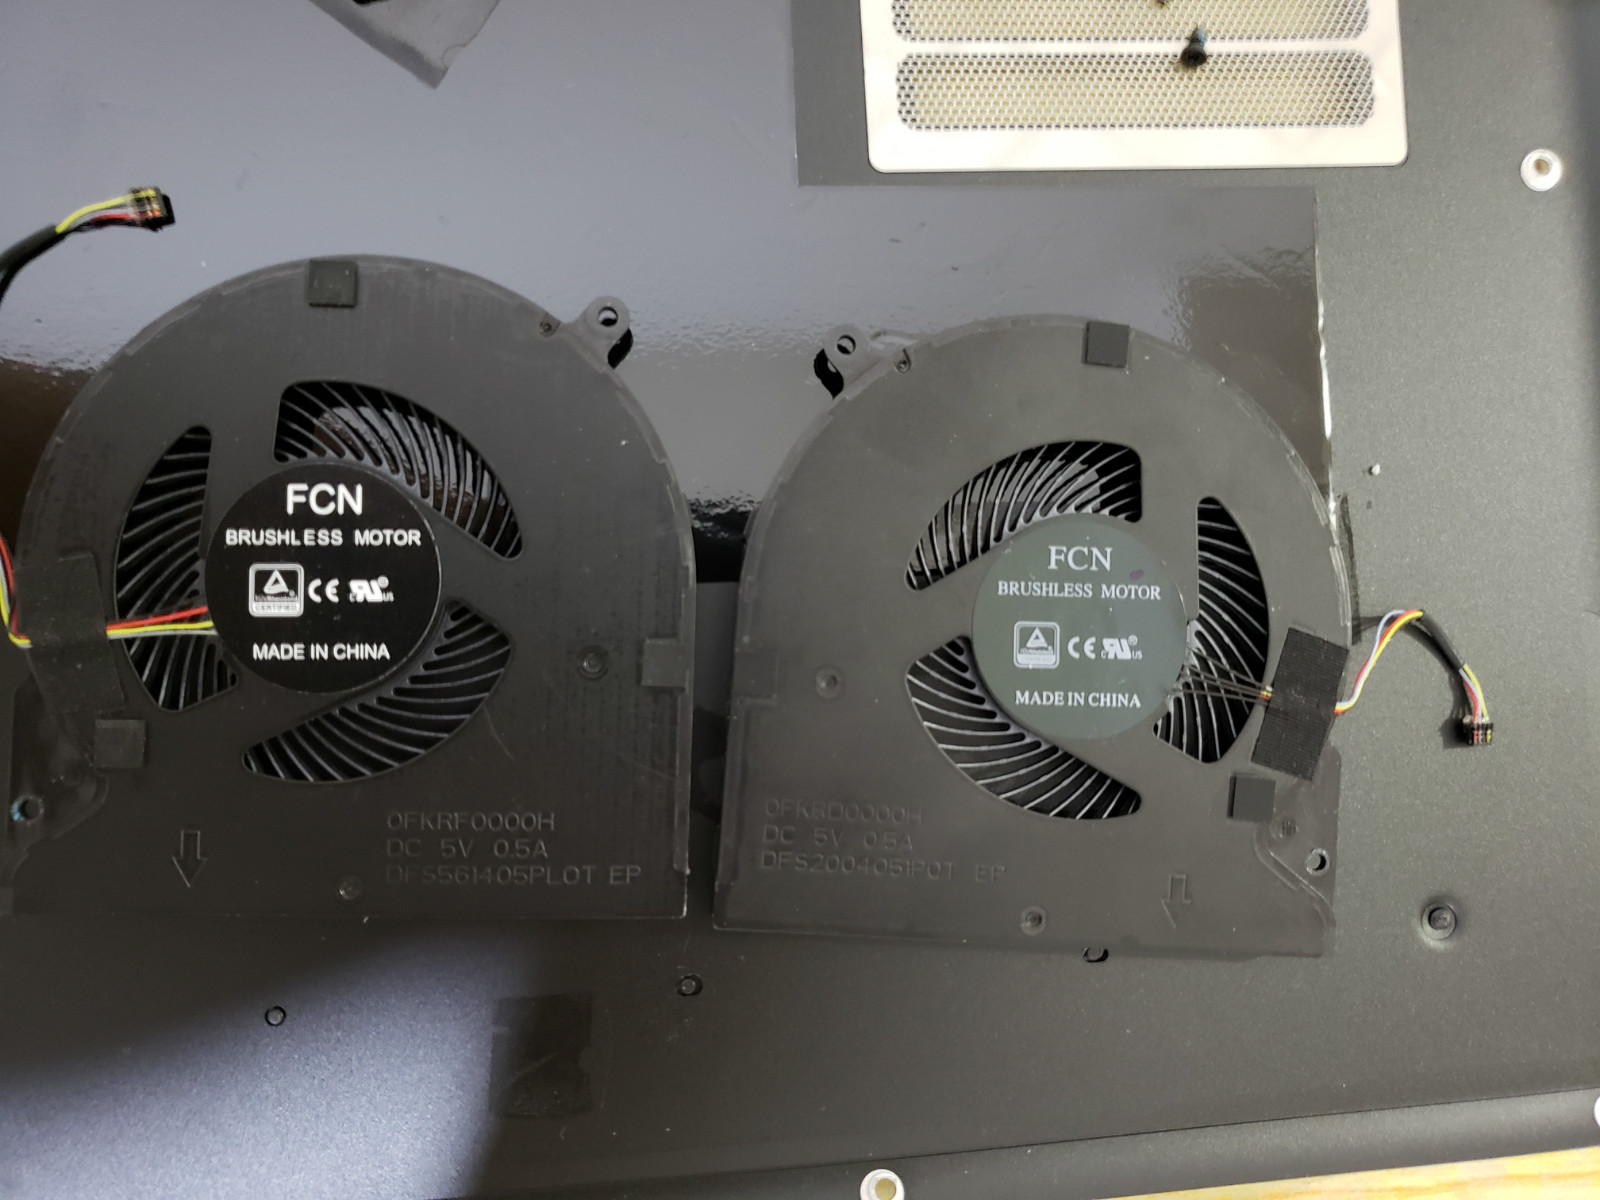
This is the cooling fan for CPU and GPU. It can be seen that they are not the same, all of them from FCN.
Remove the battery by removing the 6 screws that hold the battery.
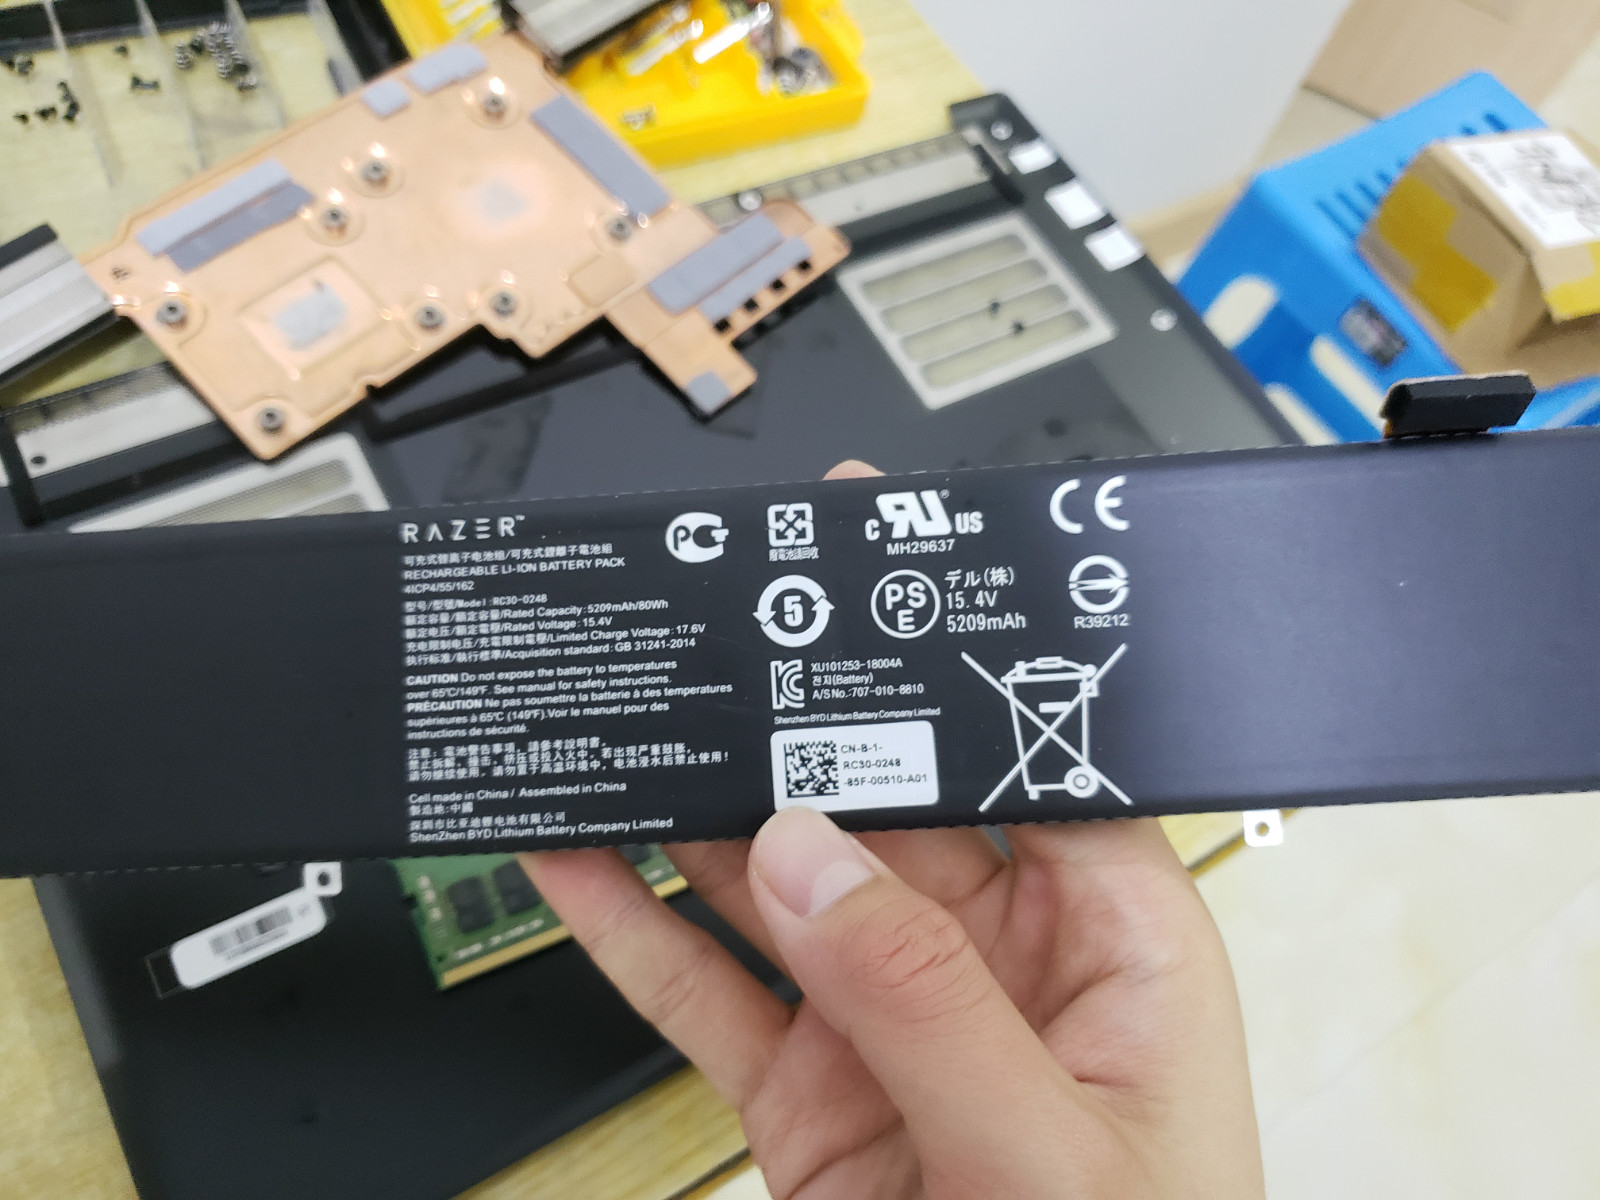
This laptop is equipped with a 15.4V, 5209mAh Li-ion battery, and the battery is manufactured by BYD.


Hi, The razer have a model of the Blaze (128GB + 1TB of HDD), can you please tell me where is the HDD located? Thank you in advance.
Does your laptop is Razer Blaze 15 2017, Razer Blaze 15 2018 or others?
Is 2018. But I bought the 256 instead of the 128, I was in doubt if the 128GB has the M2 interface in both entrances…
The HDD is located beside the battery (left of it if you’re looking from the bottom) They made the battery smaller 60wHr Battery to accommodate room for the HDD.
I have a Razer 15 2018 and I love it but I hate the sharp edges on the body. I came across your article because I was trying to figure out how thick the aluminum body is. So here are my questions if you can help. I want to take a Dremel and route the front edges (where your palm rests) down to a similar angle as the angle in front of the trackpad. (I wish the entire front and side was like this.) This laptop is crazy sharp and I keep scratching my wrists.
1. Does this sound like a good idea? If I do it I will polish it smooth. 2. Is the aluminum body solid black or just surface? 3. If I took a file or the Dremel router to the laptop body, would that magnetize the body and ruin the motherboard and other parts in the process? Or would it be better to try sandpapering the edges?
I tried putting black tape but even at less than 1mm thick, it causes the laptop not to close properly.
Thanks
Hi Guys, How can I replace the battery ? I mean where can I get it because my battery is dead and sending the laptop to Razer will cost too much
Where is the CMOS located on this model?
I’m like 3 years late but the CMOS battery can be seen in the 4th picture. It’s on the left side, with the words “LIXING ML1220 3.0V” on it.