In this guide, I will disassemble an Asus ROG Strix Scar II GL504GS. I will remove the bottom case to access the battery, SSD, Wi-Fi card, RAM, cooling fan, speaker, heatsink, and motherboard.
At the Computex 2018 show, Asus ROG brought the latest members – Scar II, to inject more powerful blood into the high-end gaming laptop market. Today we bring you its disassembly experience.
The Scar II is equipped with Intel’s 8th Core i7-8750H Coffee Lake processor, built-in 32GB DDR4 memory, with a 512GB PCIe SSD and 1TB HDD hard drive, and also armed with NVIDIA GeForce GTX1070 (8GB GDDR5) discrete graphics card.
Unfortunately, the USB Type-C does not support Thunderbolt 3, which means it can’t connect to the external graphics docking station. In the future, it can only rely on built-in GTX1060/GTX1070 to play games. For a game laptop with a price of over $2000, the lack of Thunderbolt 3 is the biggest regret.
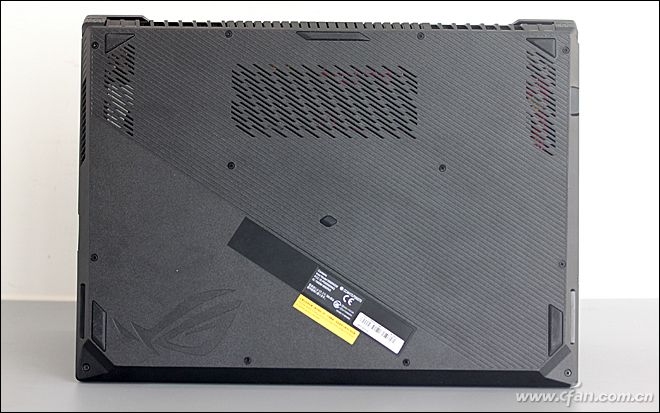
It is not difficult to disassemble the Asus ROG Strix Scar II GL504GS. Unscrew all the screws that secure the bottom case and use the plastic picks to pry it along the edge of the bottom case. However, the screws of this product have different length specifications, so you should remember their corresponding installation position.
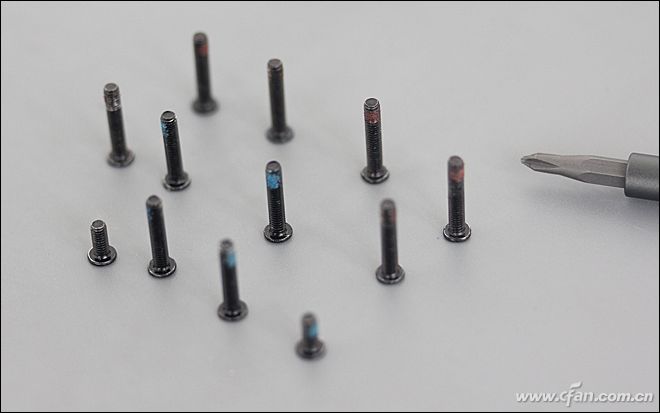
We removed a total of 10 screws, and two screws are relatively short.
Asus ROG Strix GL504GS uses a red PCB motherboard that is rare in notebooks. The motherboard occupies most of the internal space, leaving only a small part of the lower right corner of the 66Wh battery.
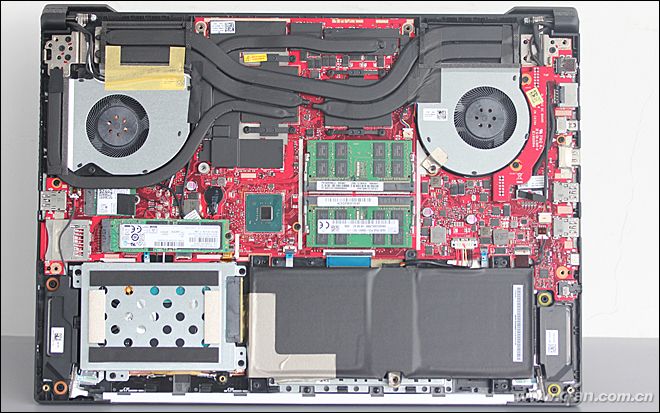
This product comes with two memory slots, and this one has two 16 GB memory, so there’s no need to upgrade anymore.

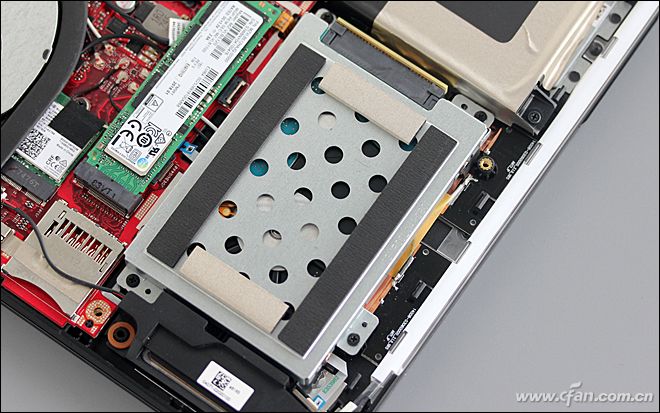
Here is a standard 1TB mechanical hard disk, which is fixed by a bracket, with better protection and earthquake resistance.
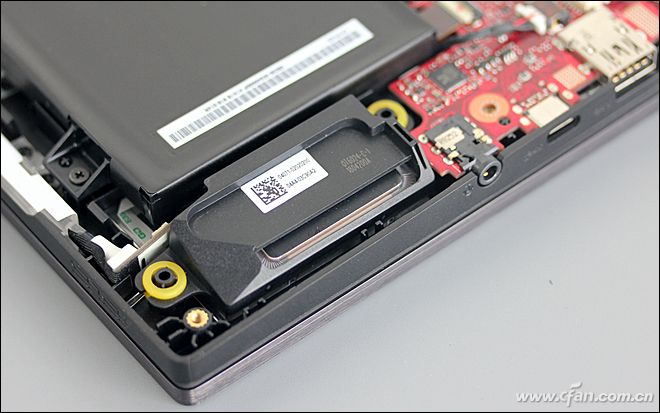
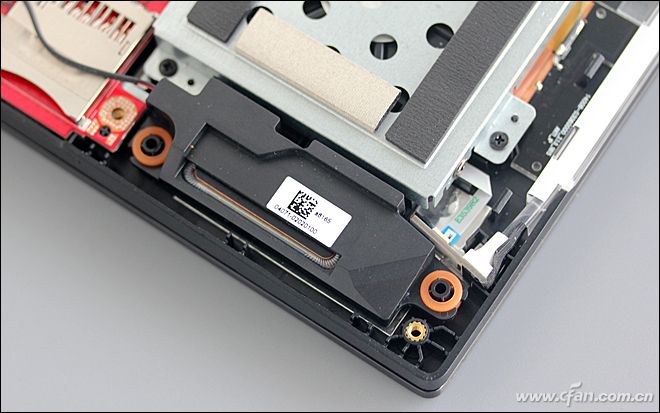
The 3.5W speakers on both sides of the fuselage are large enough to ensure volume and sound quality.
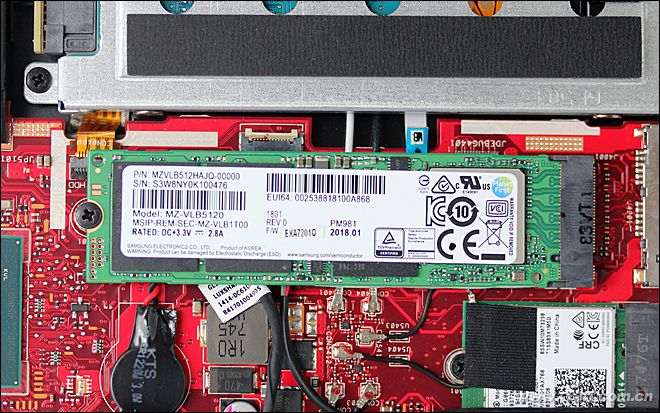
It comes with a Samsung PM981 M.2 SSD that supports the NVMe protocol, and it is one of the top models in the SSD. Below the SSD is the Intel 9560AC wireless network card, it featuring a 4-antenna design and Rangeboost patented technology, support Bluetooth 5.0, 802.11ac WAVE 2 and MU MIMO technology, with a maximum bandwidth of 1733MB/Mbps.
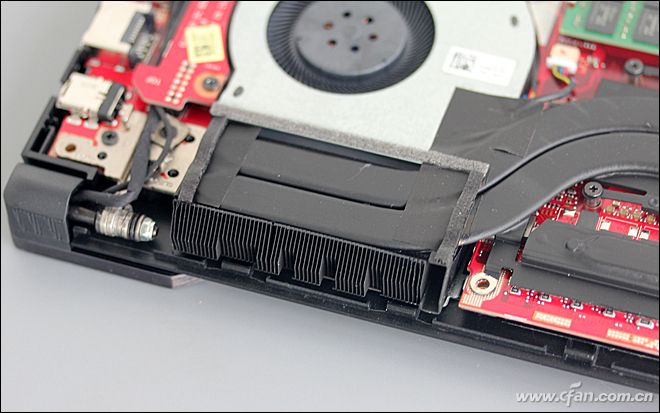
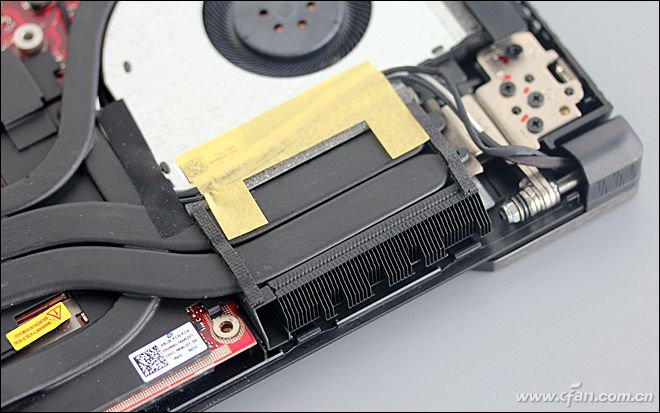
It uses a luxurious two-fan five-copper tube heat dissipation module, while also taking into account the heat dissipation of the video memory and power-related chips.
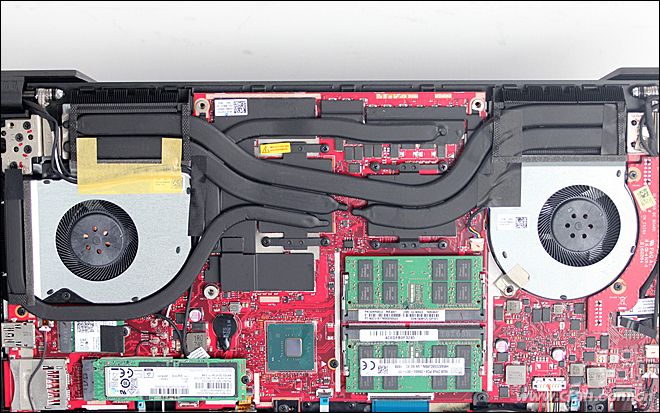
Don’t underestimate the cooling fan of ROG Strix GL504GS, its two sets of fans use 12V voltage and 7271 blades, which has more airflow than many 5V fans used in the game laptop. The special centrifugal fan structure can also blow the dust and dirt in the fan module along the fan blade, and then discharges it to the casing through the dustproof channel to provide the better dustproof effect.

")


Great article thank you – mine only came with the NVMe drive and I want to add a 2.5″ SSD or HDD. Do you want what cable I would require to add it to the HDD bay and connect to the MB?
You need to open the computer to check if it has reserved HDD caddy and SATA cable.
Thanks for your reply Michael, there is definitely the HDD caddy but as far as I can see I cannot see the SATA cable 🙁 I can see where to plug it in on the MB. Does that mean it cannot be done? Why would they have the HDD bay there then?
Hey, I have the same problem. Trying to find a solution as well.
The SATA cable is included inside the box. Is a small ribbon cable to connect the hard drive or SSD on the motherboard.
I have the same problem … if anyone has a solution ?
the cable come in the box you have to check the box for that little cable
Your ROG should come with an external ribbon sata cable adapter (in a small bag with screws) which you connect to the main board
I found a solution. I remembered that i got a little connector with the laptop. It was in the box and i didn’t really took a look at it. You have to connect it to the motherboard and the other side to the sdd. I can upload a picture later if anyone wants.
Hi Jake !
Yes, I want a picture of your adapter if possible. I opened the box completely and I don’t remember to find such an adapter. I will double check.
Thank you
Hi Jake,
I found the adapter in the box! Thank you so much ! However I wonder about where the adapter is connected to the motherboard? Could you send me a picture of your installation?
Thanks !
Hi Nathan,
Can’t send you a picture right now but there is a connection to the motherboard just above the ssd, under the m.2 ssd on the right side. You will even see HDD writen on the motherboard. Connect the adapter and dont forget to lock it in place using a tool\screw.
Hi, what size 2.5″ hard drive can fit in here? I’m looking at a 15mm barracuda, not sure if 9.5mm is max or not
Hi everyone. I found the adapter cable in the small black paper box. The size 2,5″ hard drive should be 7mm thickness type.
With this thickness, you can use one HDD 1TB or SSD 2TB (Samsung Evo).
Is there a specific ram brand and type that can be used to upgrade the capacity? Mine has a single 16gb stick. I was wondering if I had to get the exact same one, or if any 16gb sodimm of 2666 MHz ram will do
Hi! Could I add thermal pads on top of the copper tubes to reduce the temp?