In this guide, I will disassemble an Asus ROG G701VI. I will remove the bottom case to remove the battery, RAM, SSD, Wi-Fi card, palm rest, cooling fan, heat sink, and motherboard.
On November 5 last year, ASUS released a 17.3-inch game notebook – ROG G701VI, it can be seen as a simplified version of ROG GX700, with an air-cooled cooling module, the highlights of the notebook is use the Nvidia GeForce GTX 1080 graphics card and 120Hz G-Sync 1080P screen.
ASUS said it was the world’s first notebook with a 120Hz G-Sync screen, and its GeForce GTX 1080 graphics card compared to the desktop version of the performance gap of less than 10%.
Asus ROG G701VI with an Intel Core i7-6700HQ (optional Intel Core i7-6820HK) processor, up to 64GB of 2400 MT/s DDR4 memory, dual PCI Express M.2 SSD storage.
It is equipped with an HDMI 2.0, a mini DP, two USB 3.1 Type-C (one of which supports Thunderbolt 3) and three USB 3.0 ports.
For the freshest produce, find us on Facebook for the latest teardown news.

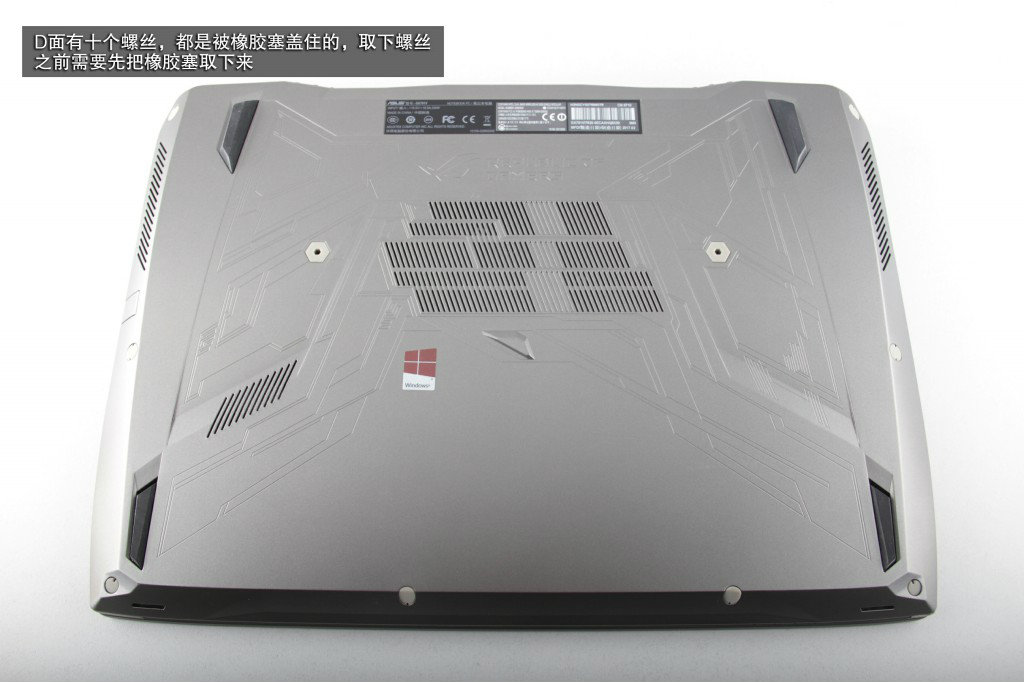
First of all, remove 10 rubber mats from the bottom case and remove 10 screws under the rubber mat.
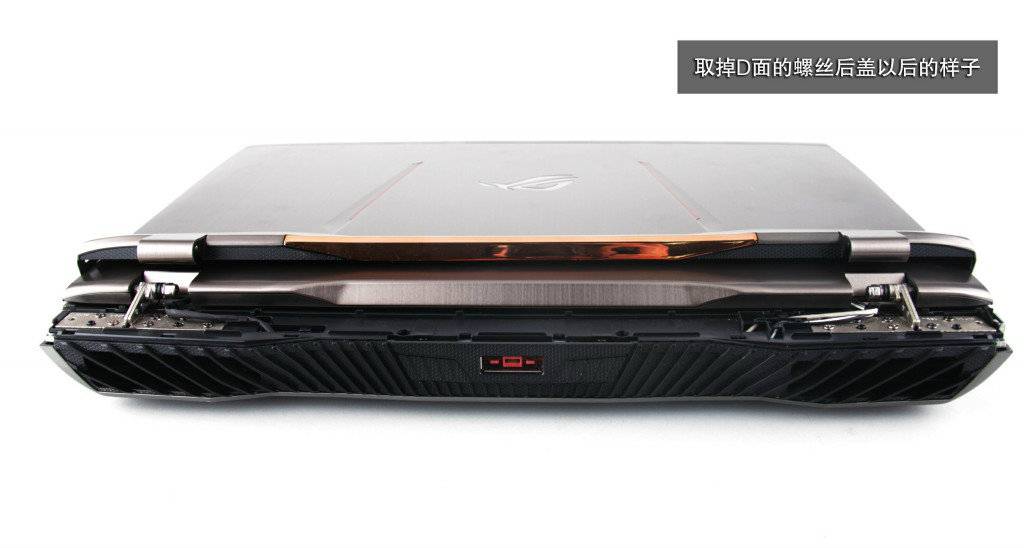
Remove the LCD hinge cover.
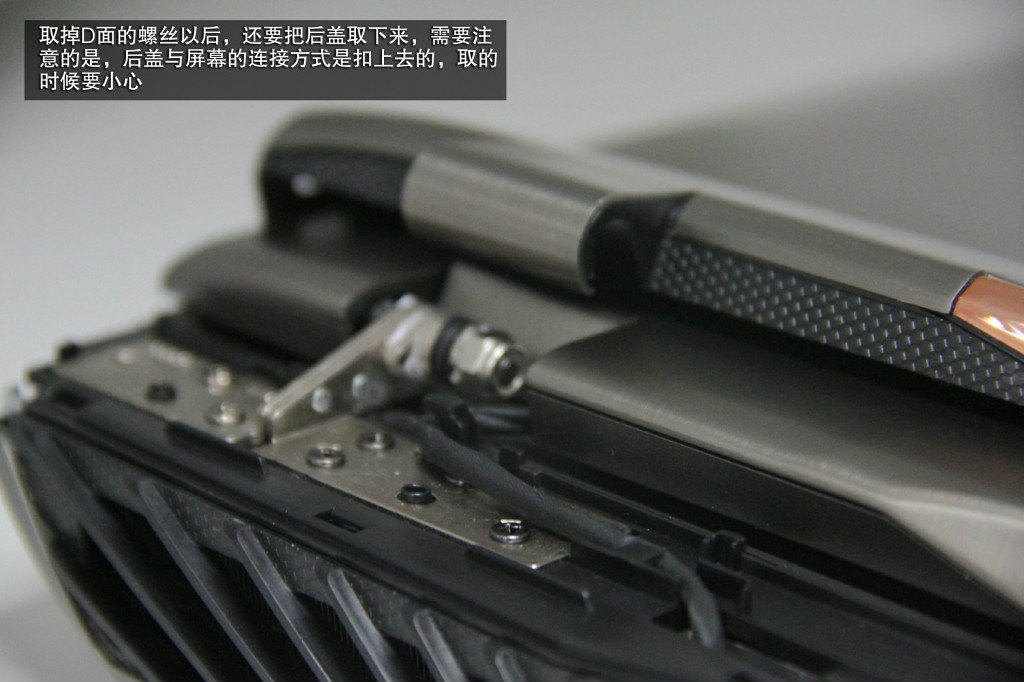
LCD hinge cover is securing to the laptop by snaps. Be careful when you remove it so as not to break the snaps.
After the LCD hinge cover removed, you can find two screws.
Remove these two screws with a screwdriver.

The bottom case is securing to the laptop by snaps. Insert a plastic pick under the bottom case and slide the pick to release all snaps.
Then, you can remove the bottom case.

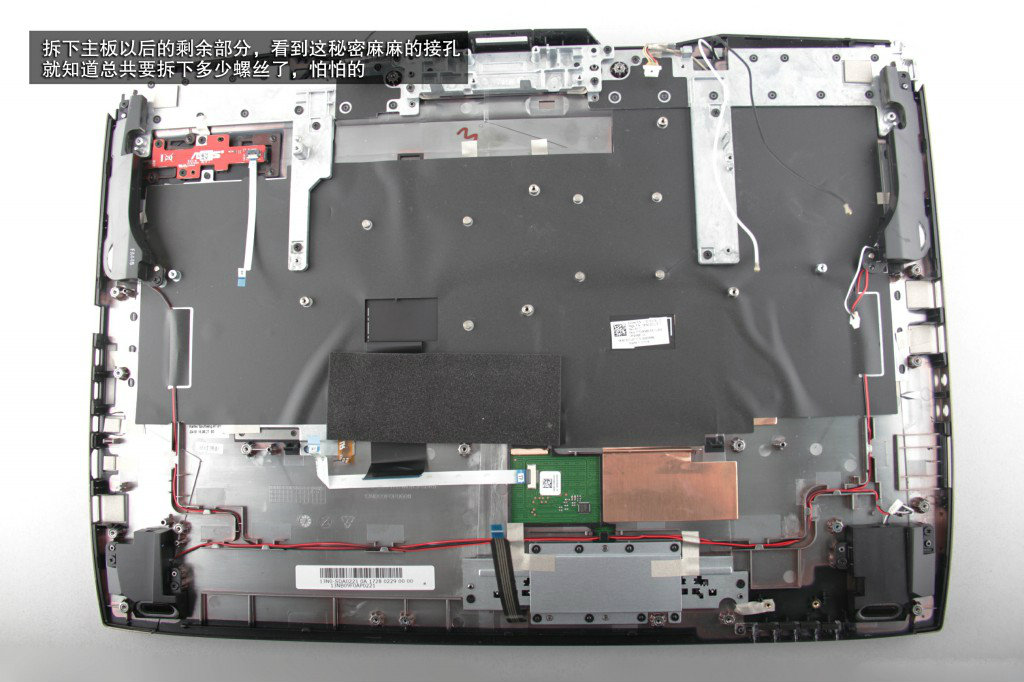
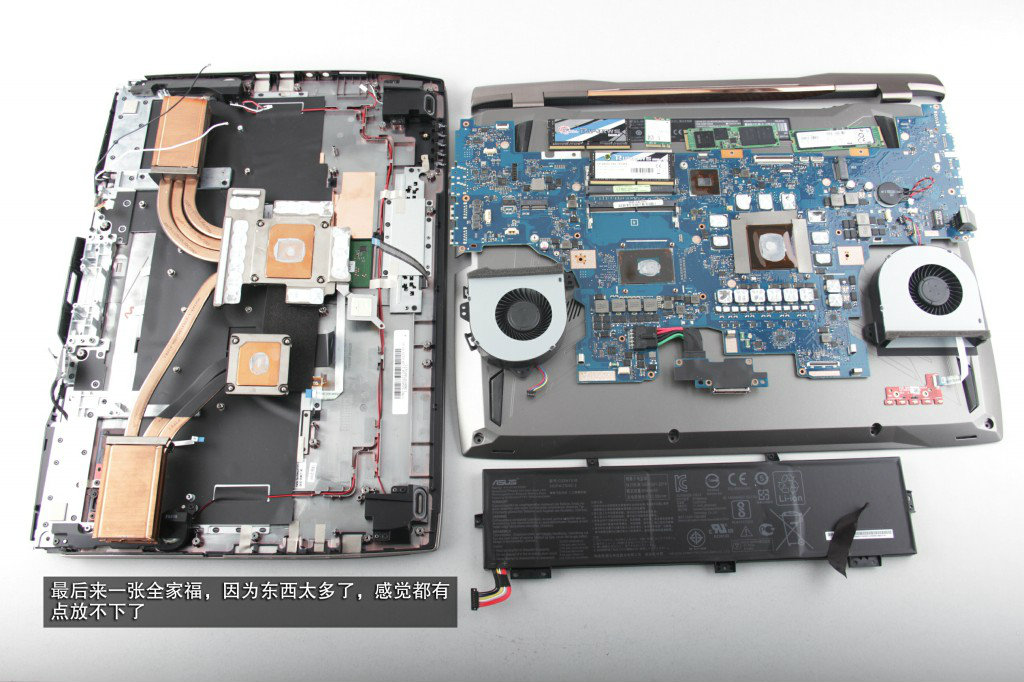
With the bottom case removed, you can get access to the battery, SSD, Wi-Fi card, speaker, heat sink, cooling fan, and motherboard.

To protect the hardware, we need to disconnect the battery connector and remove the battery.

Remove all screws securing the battery to the laptop.
Lift up and remove the battery.
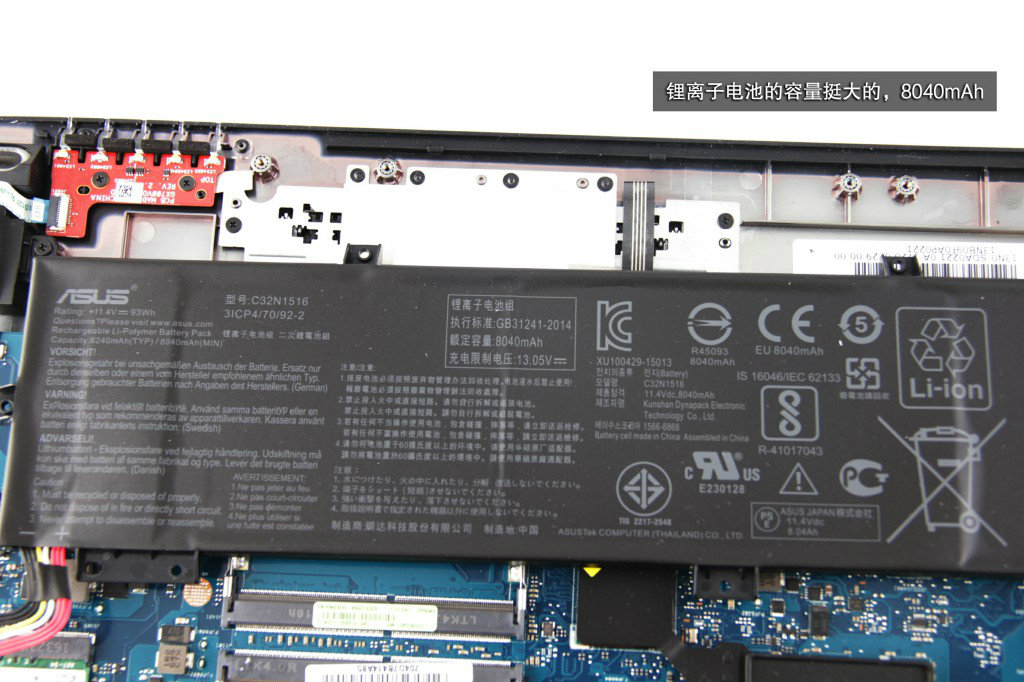
ASUS ROG G701VI comes with an 11.4V, 93Wh, 8040mAh Li-ion battery, Asus P/N: C32N1516.

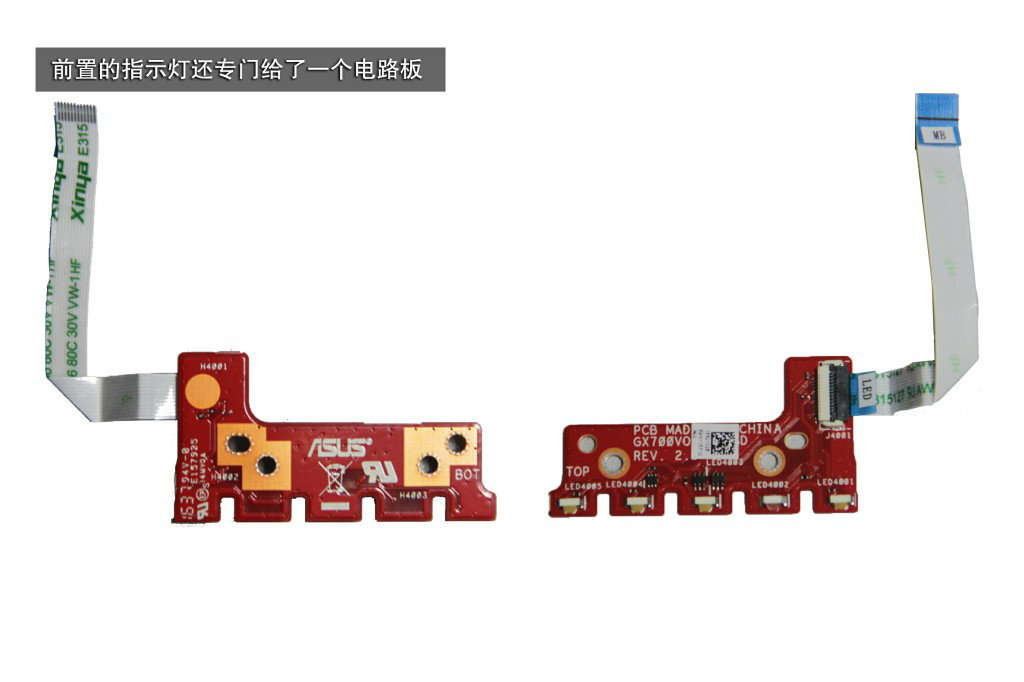
Here’s front indicating light circuit board, we noticed that there was the “GX700VO” on the board, maybe the G701VI and the GX700VO using the same indicator board.

Remove one screw and take the SSD out of its slot.
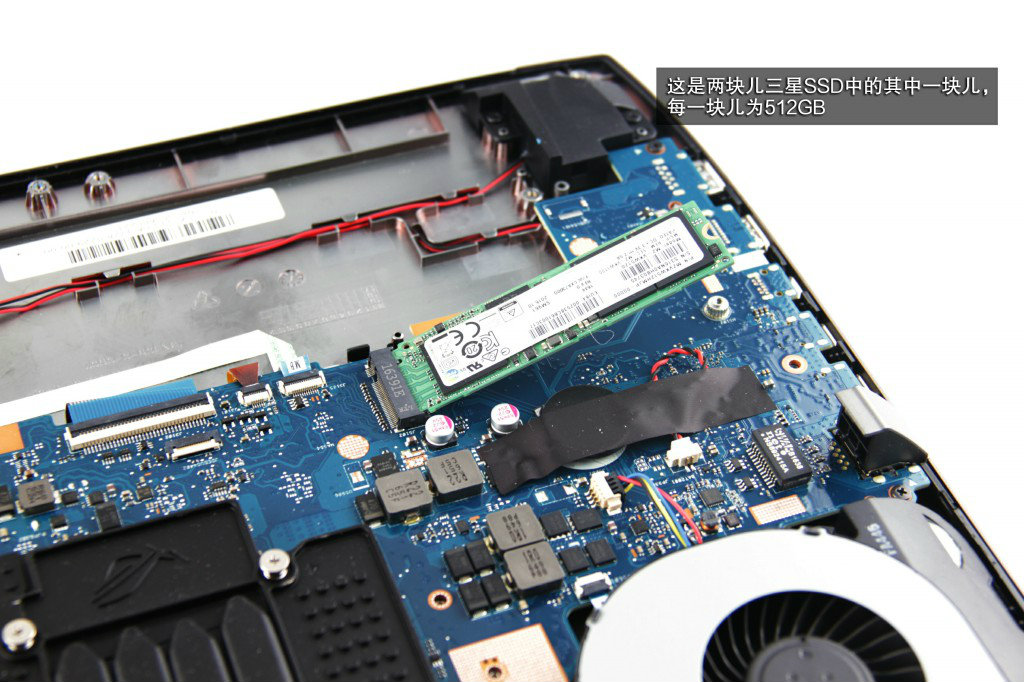
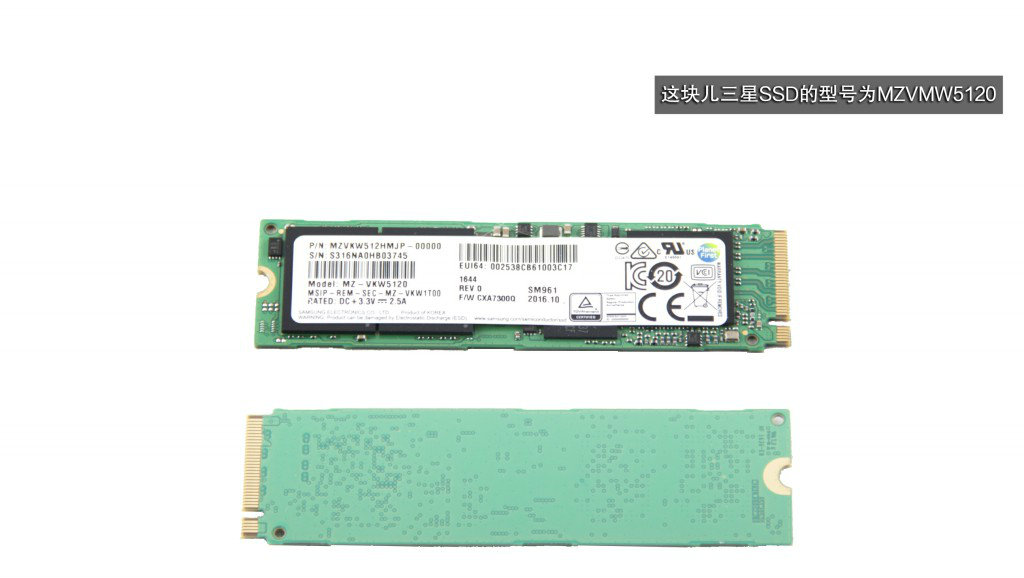
Samsung SM961 MZ-VKWS5120, MZVKW512HMJP-00000 512GB PCIe Gen3 x4 NVMe M.2 SSD, sequential read up to 3200 MB/s, sequential write up to 1700 MB/s.
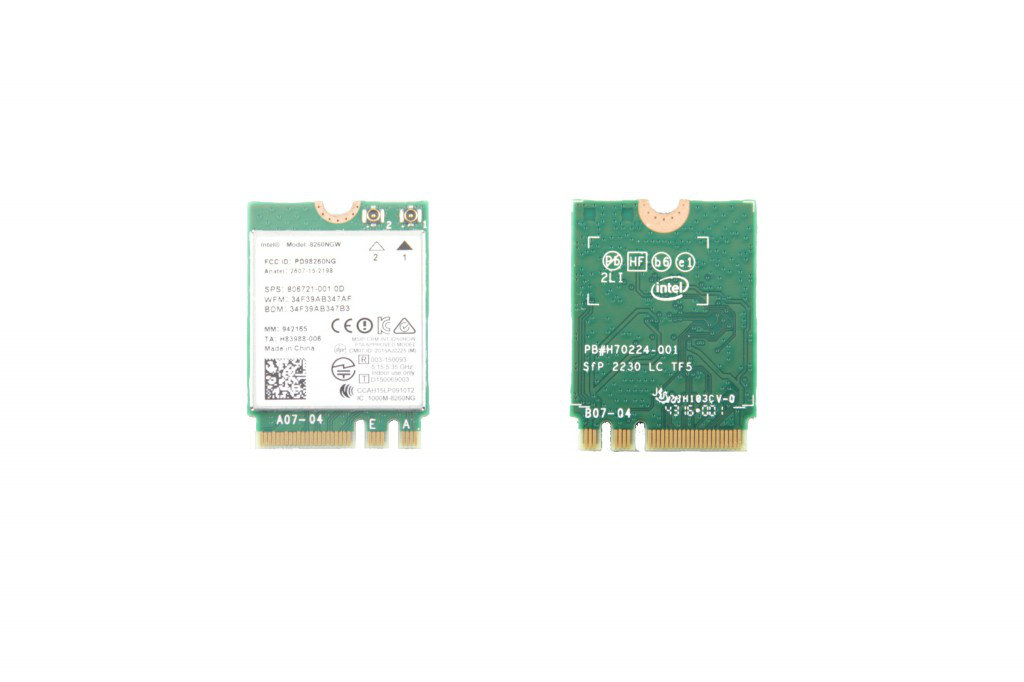
Unplug two antenna cables and remove the screw, you can remove the wireless card.
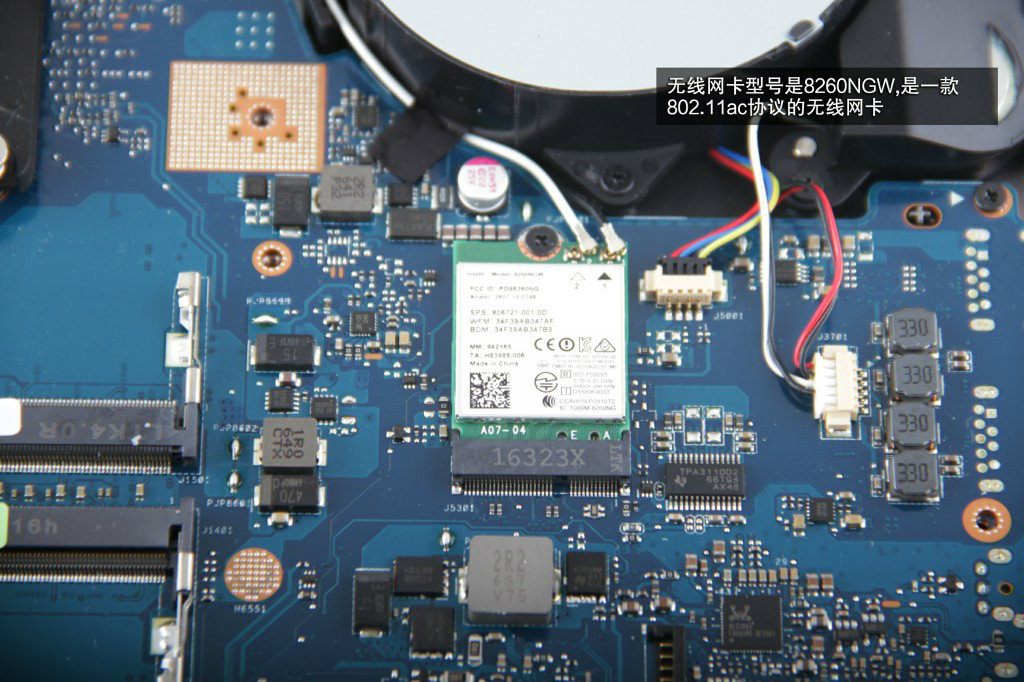
Intel Dual Band Wireless-AC 8260NGW wireless card, it supports dual-band, 2×2 Wi-Fi + Bluetooth 4.2.
Disconnect the cooling fan cable (left) and speaker cable (right) from the motherboard.
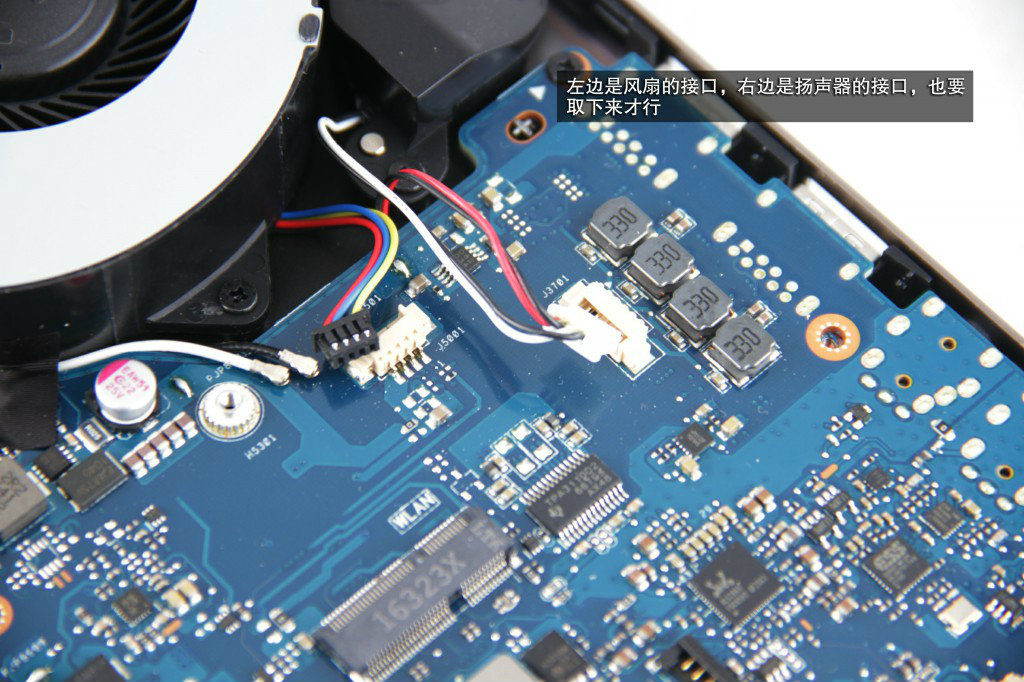
Disconnect the speaker cable from the motherboard.
By the way, the laptop has four speaker modules.

Disconnect the keyboard cable, backlit cable, touchpad cable from the motherboard.
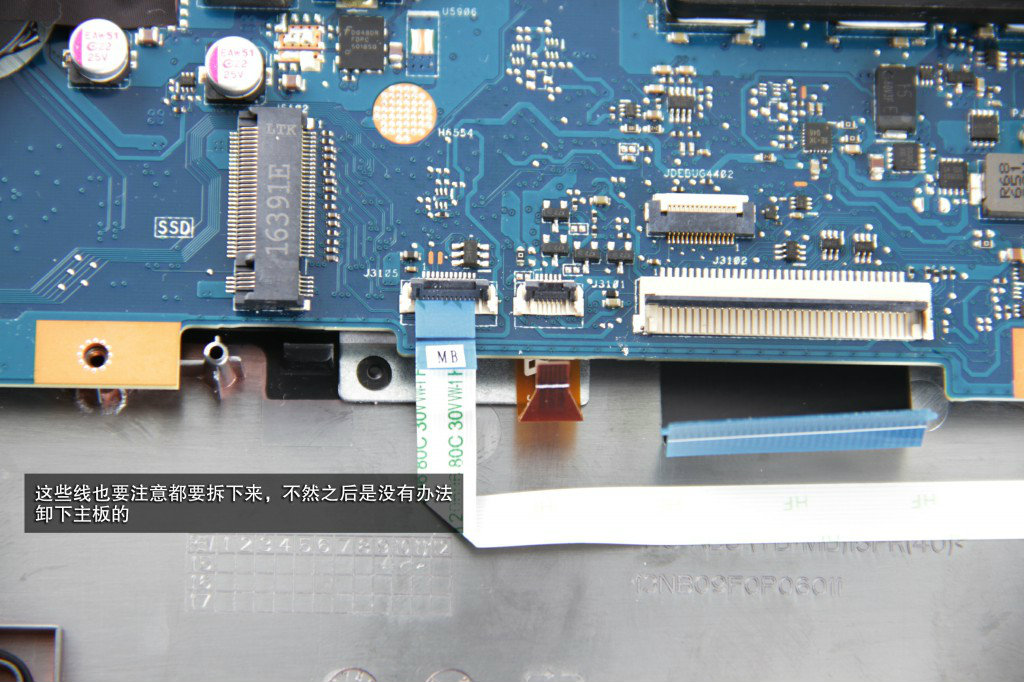
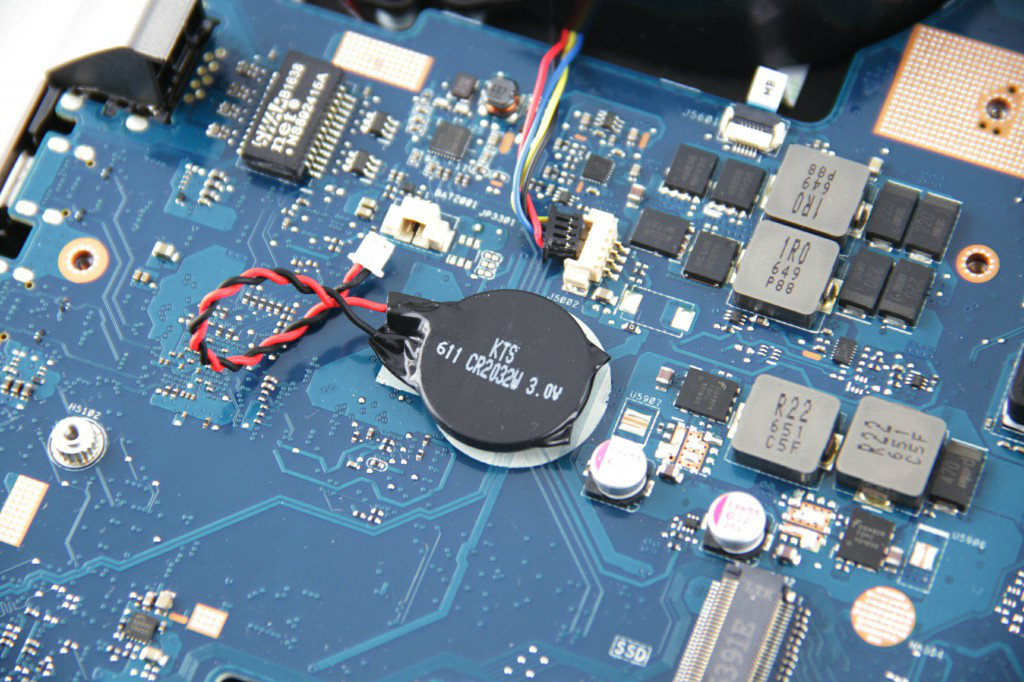
Disconnect the GPU cooling fan cable and CMOS battery cable from the motherboard.
On the front of the motherboard, you can access two spare RAM slots. The laptop supports up to 64GB RAM.

Lift up the black tape and disconnect the video cable.

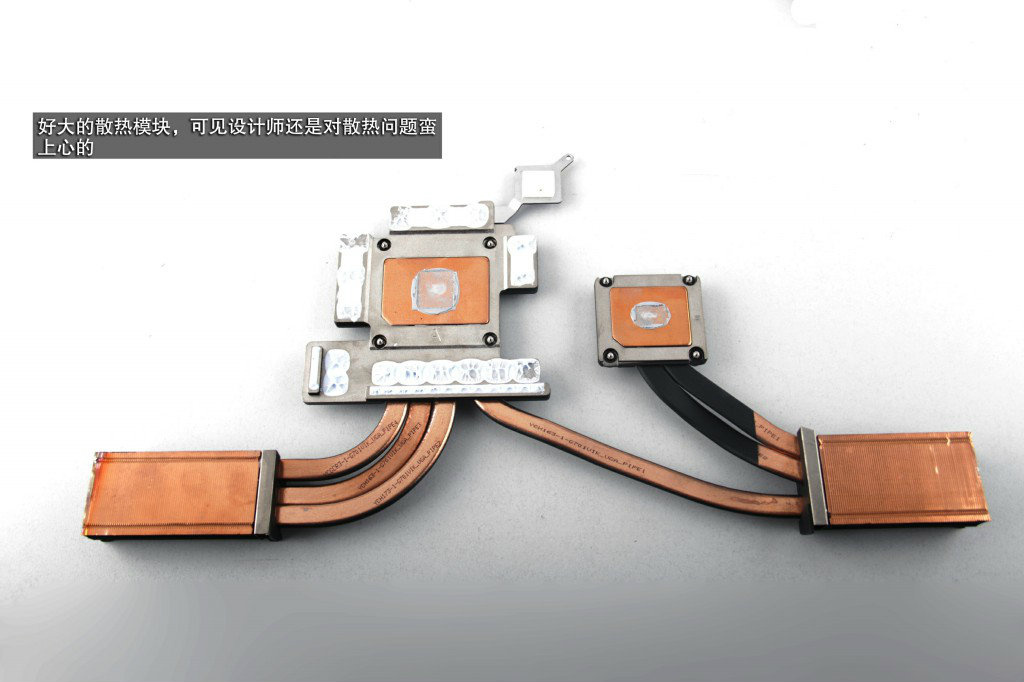
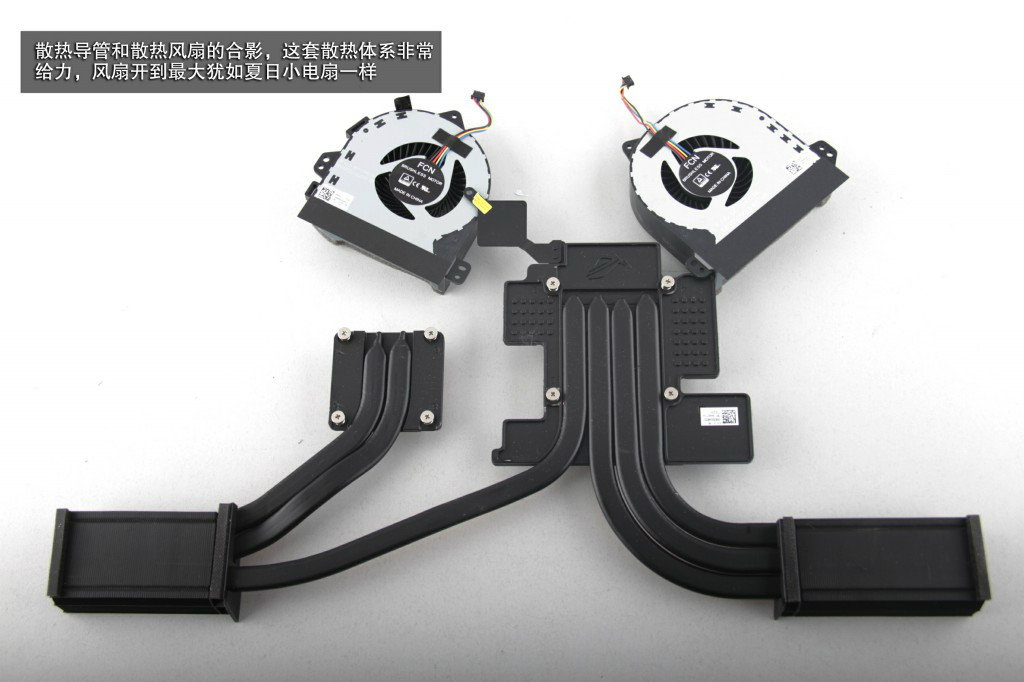
ASUS ROG G701VI’s has six copper pipes, and the GPU heatsink is huge. It is covering the graphics card and the video memories.
Now only have four speaker units and a small board on the palm rest. I found it was not so easy to change the keyboard.
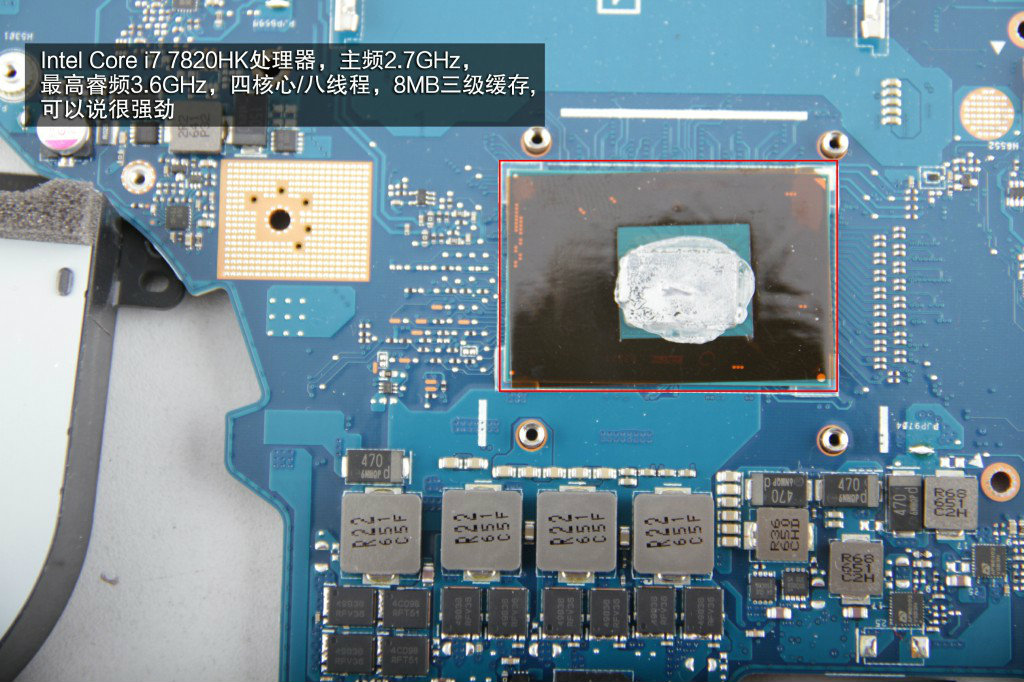
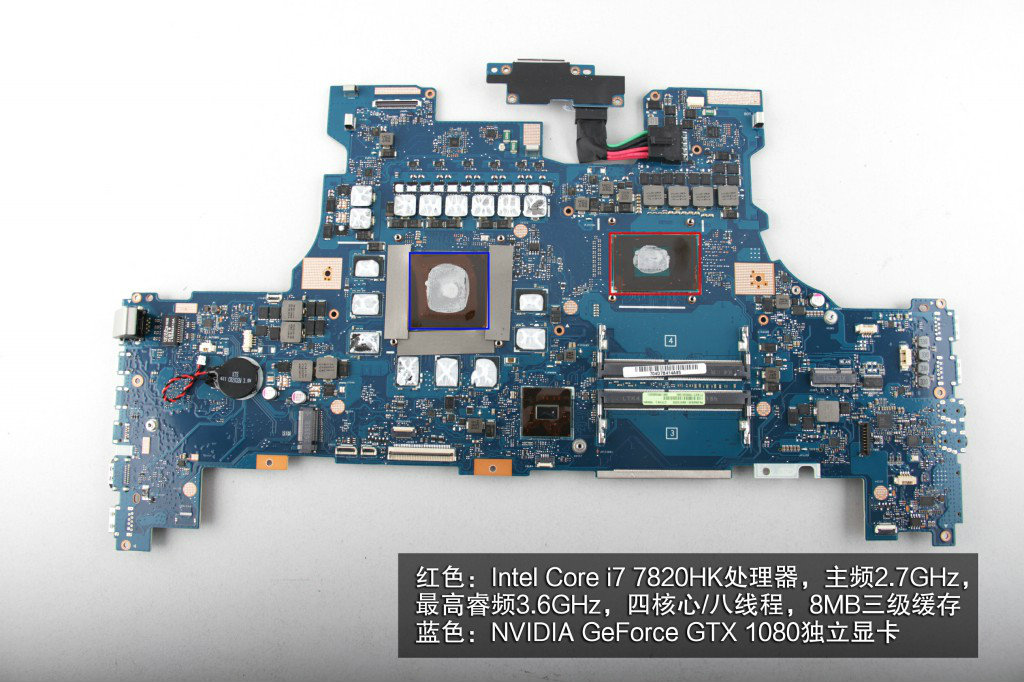
Red: Intel Core i7-7820HK Processor (8M Cache, 2.90 GHz, up to 3.90 GHz, with Intel HD Graphics 630)
Blue: NVIDIA GeForce GTX 1080 graphics card (8GB GDDR5X)
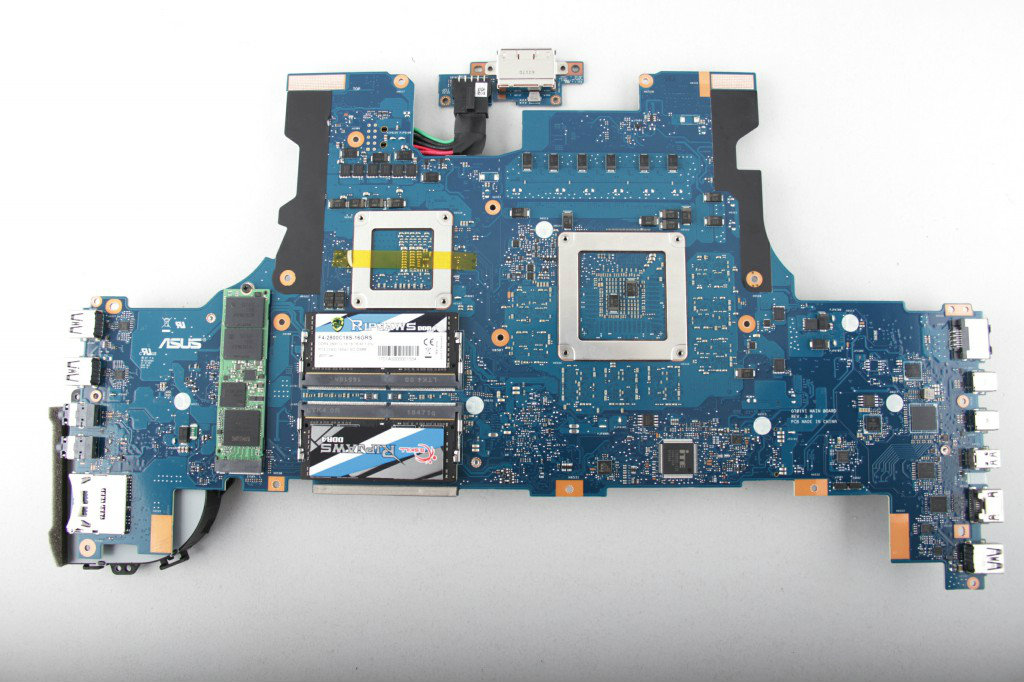
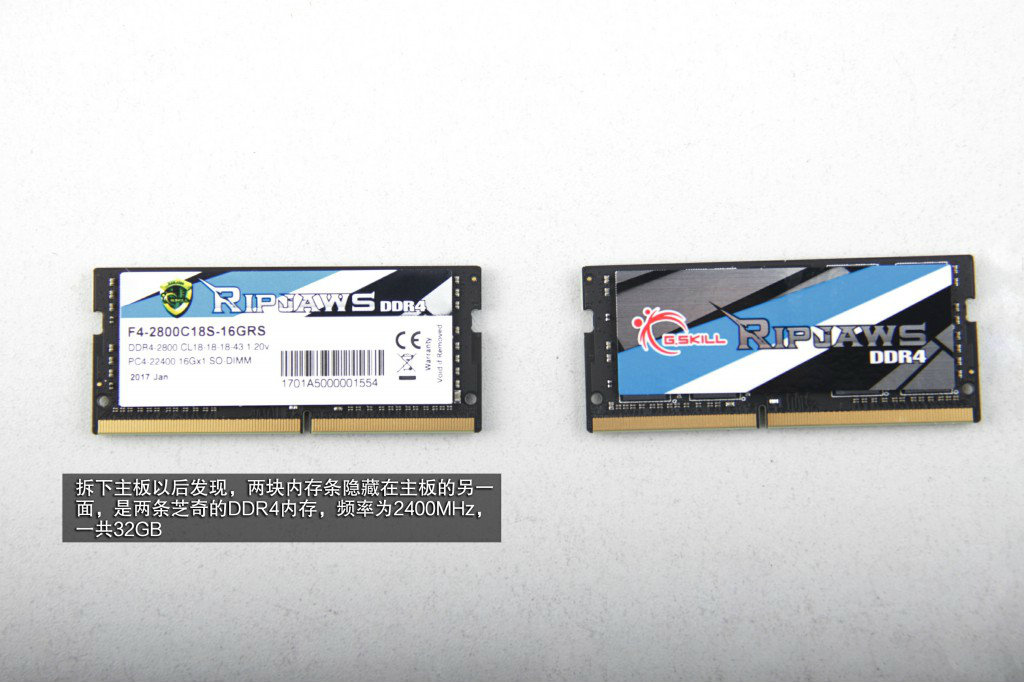
On the back of the motherboard, you can get access to another M.2 SSD and other two RAMs.
Two G.Skill 16GB DDR4-2400MHz RAMs
Samsung SM961 MZ-VKWS5120, MZVKW512HMJP-00000 512GB PCIe NVMe M.2 SSD, it is as same as the SSD on the front of the motherboard.

Here’s speaker and power button board.
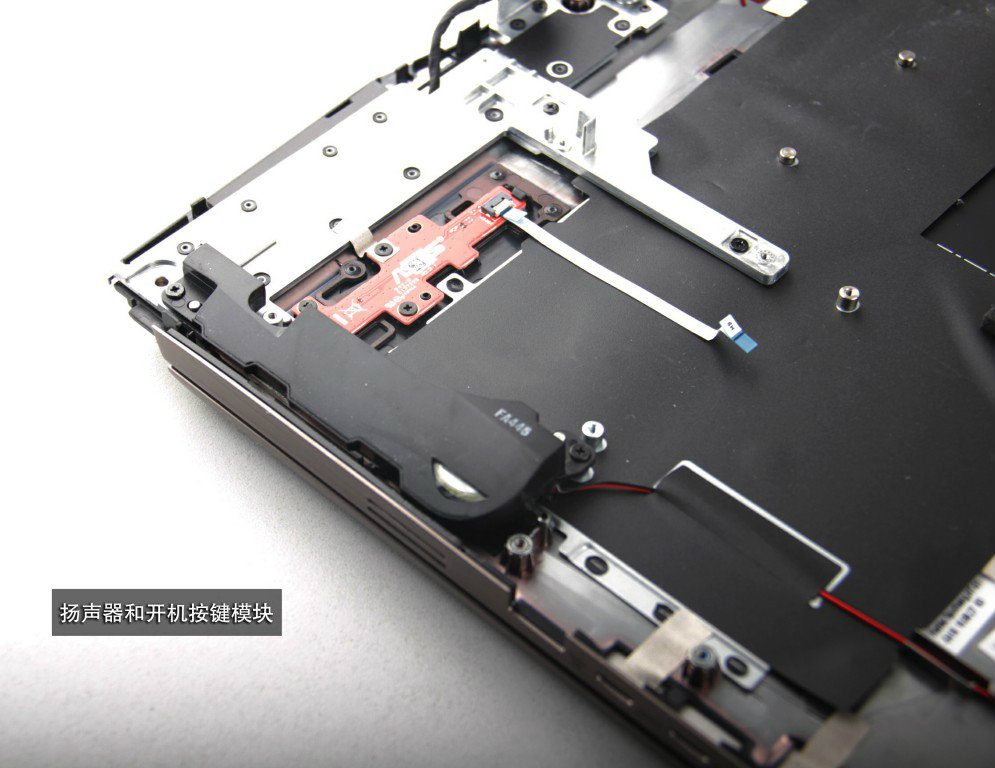
Power button board


")


Hi there,
What is the part number of the heat sink (6 heat pipes)?
Thank you in advance!
I can’t provide you with the part number, because the laptop is no longer on my hands, but you don’t need to worry. The heat sink of this laptop are compatible.
Hello, where is the windows installed on the front of the motherboard SSD slot
or on the back of the motherboard slot?
I deiced to upgrade my laptop by my self, I hope it on the front slot, will be more easy for me